Ping federate
Discover step-by-step instructions on configuring a connection with Ping federate. Learn how to integrate your application with Ping federate for secure and streamlined SSO authentication.
How to start
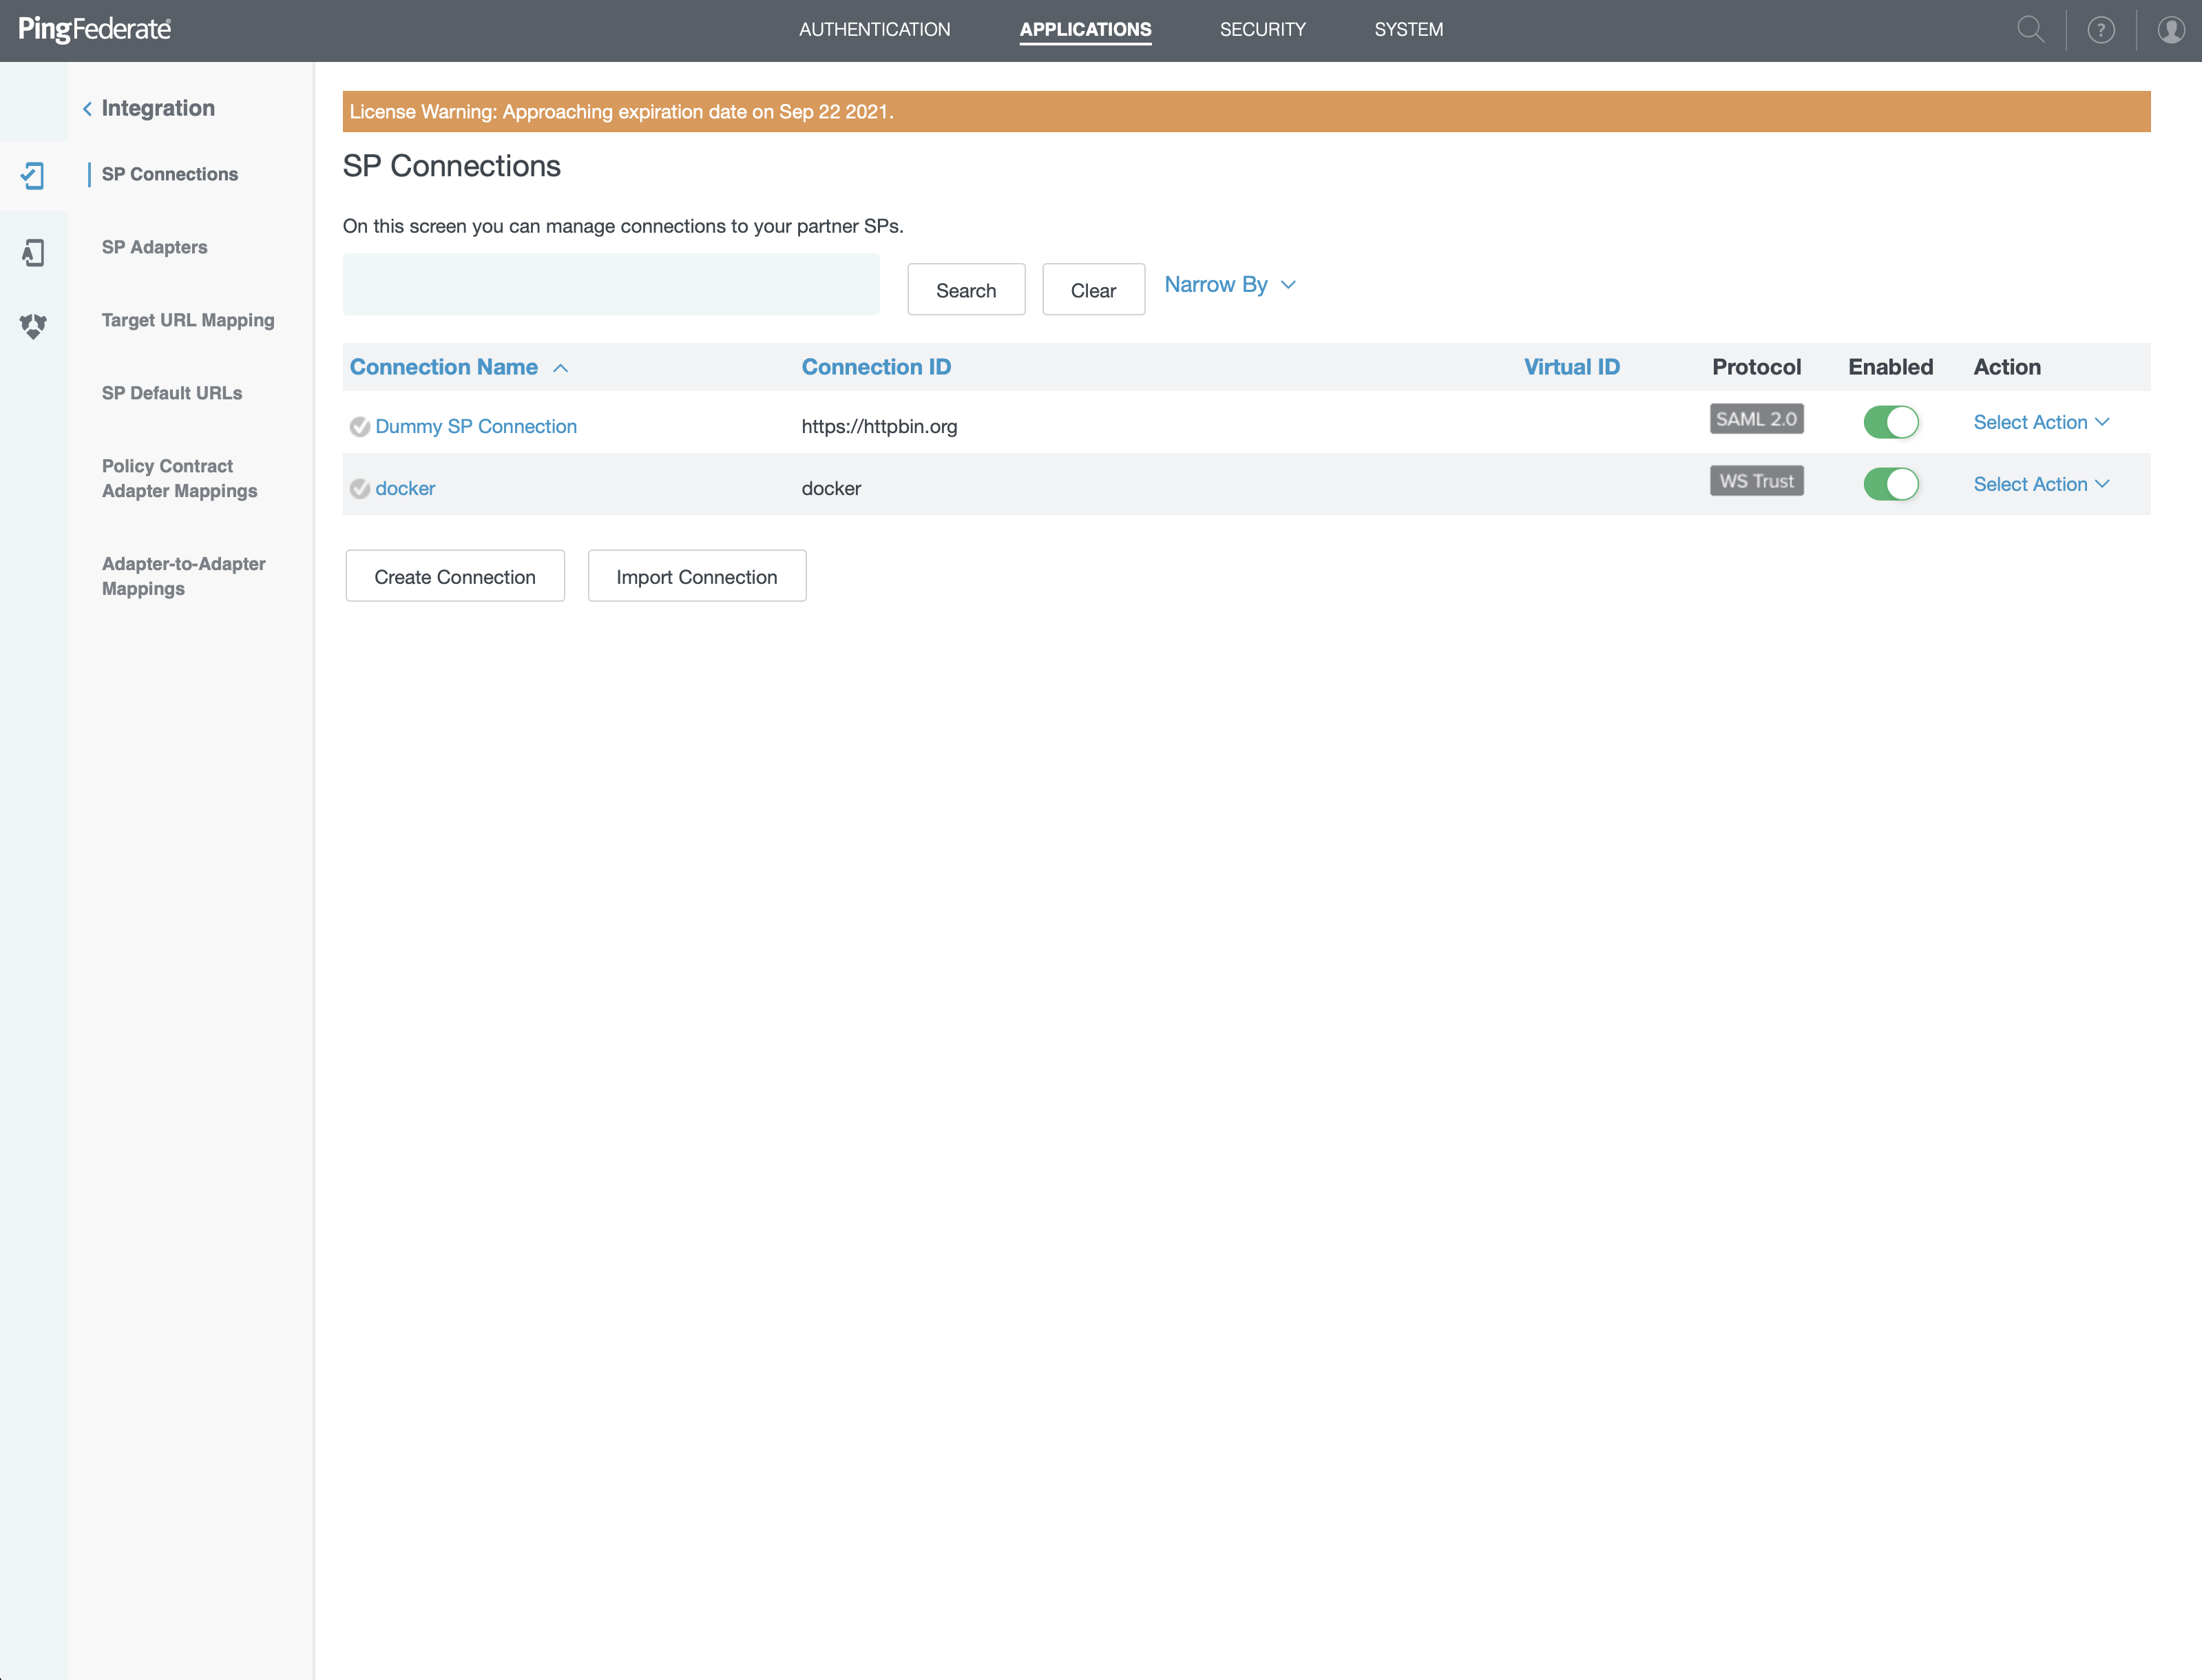
- Log into your PingFederate admin tool
- Open "SP Connections"
- Click on "Create Connection"
Declare an application
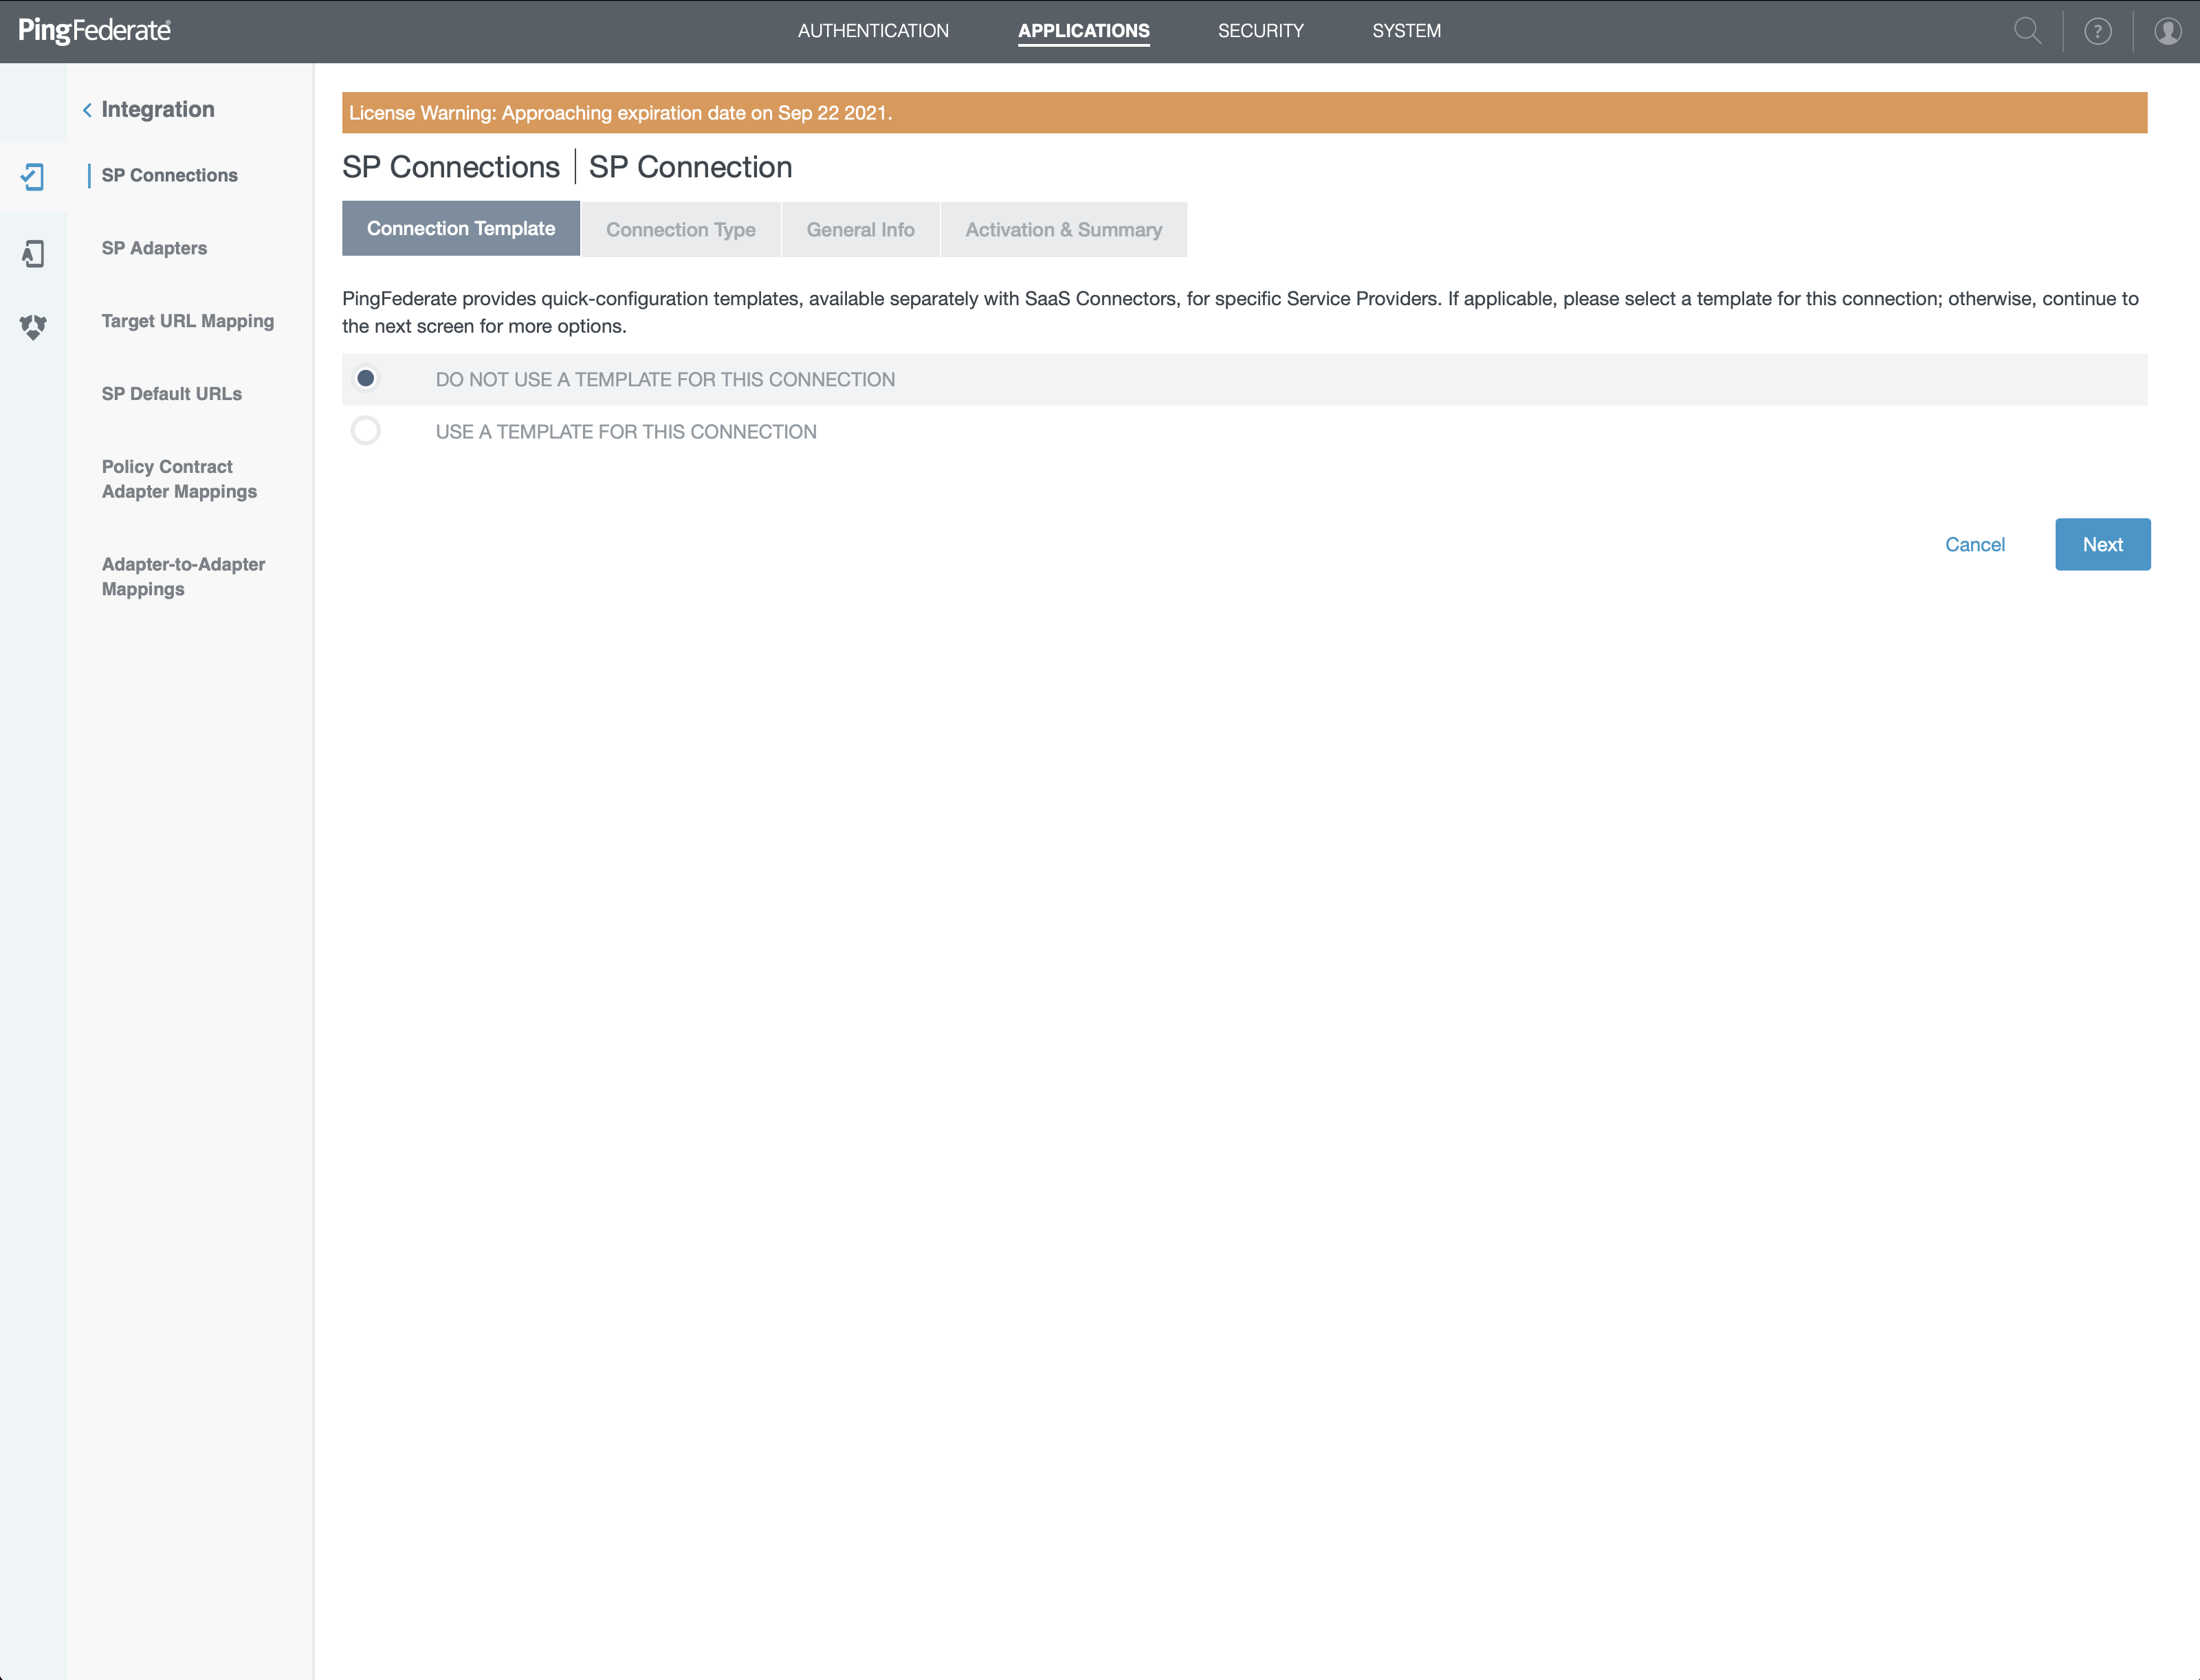
- Select "DO NOT USE A TEMPLATE FOR THIS CONNECTION" on screen and click "Next"
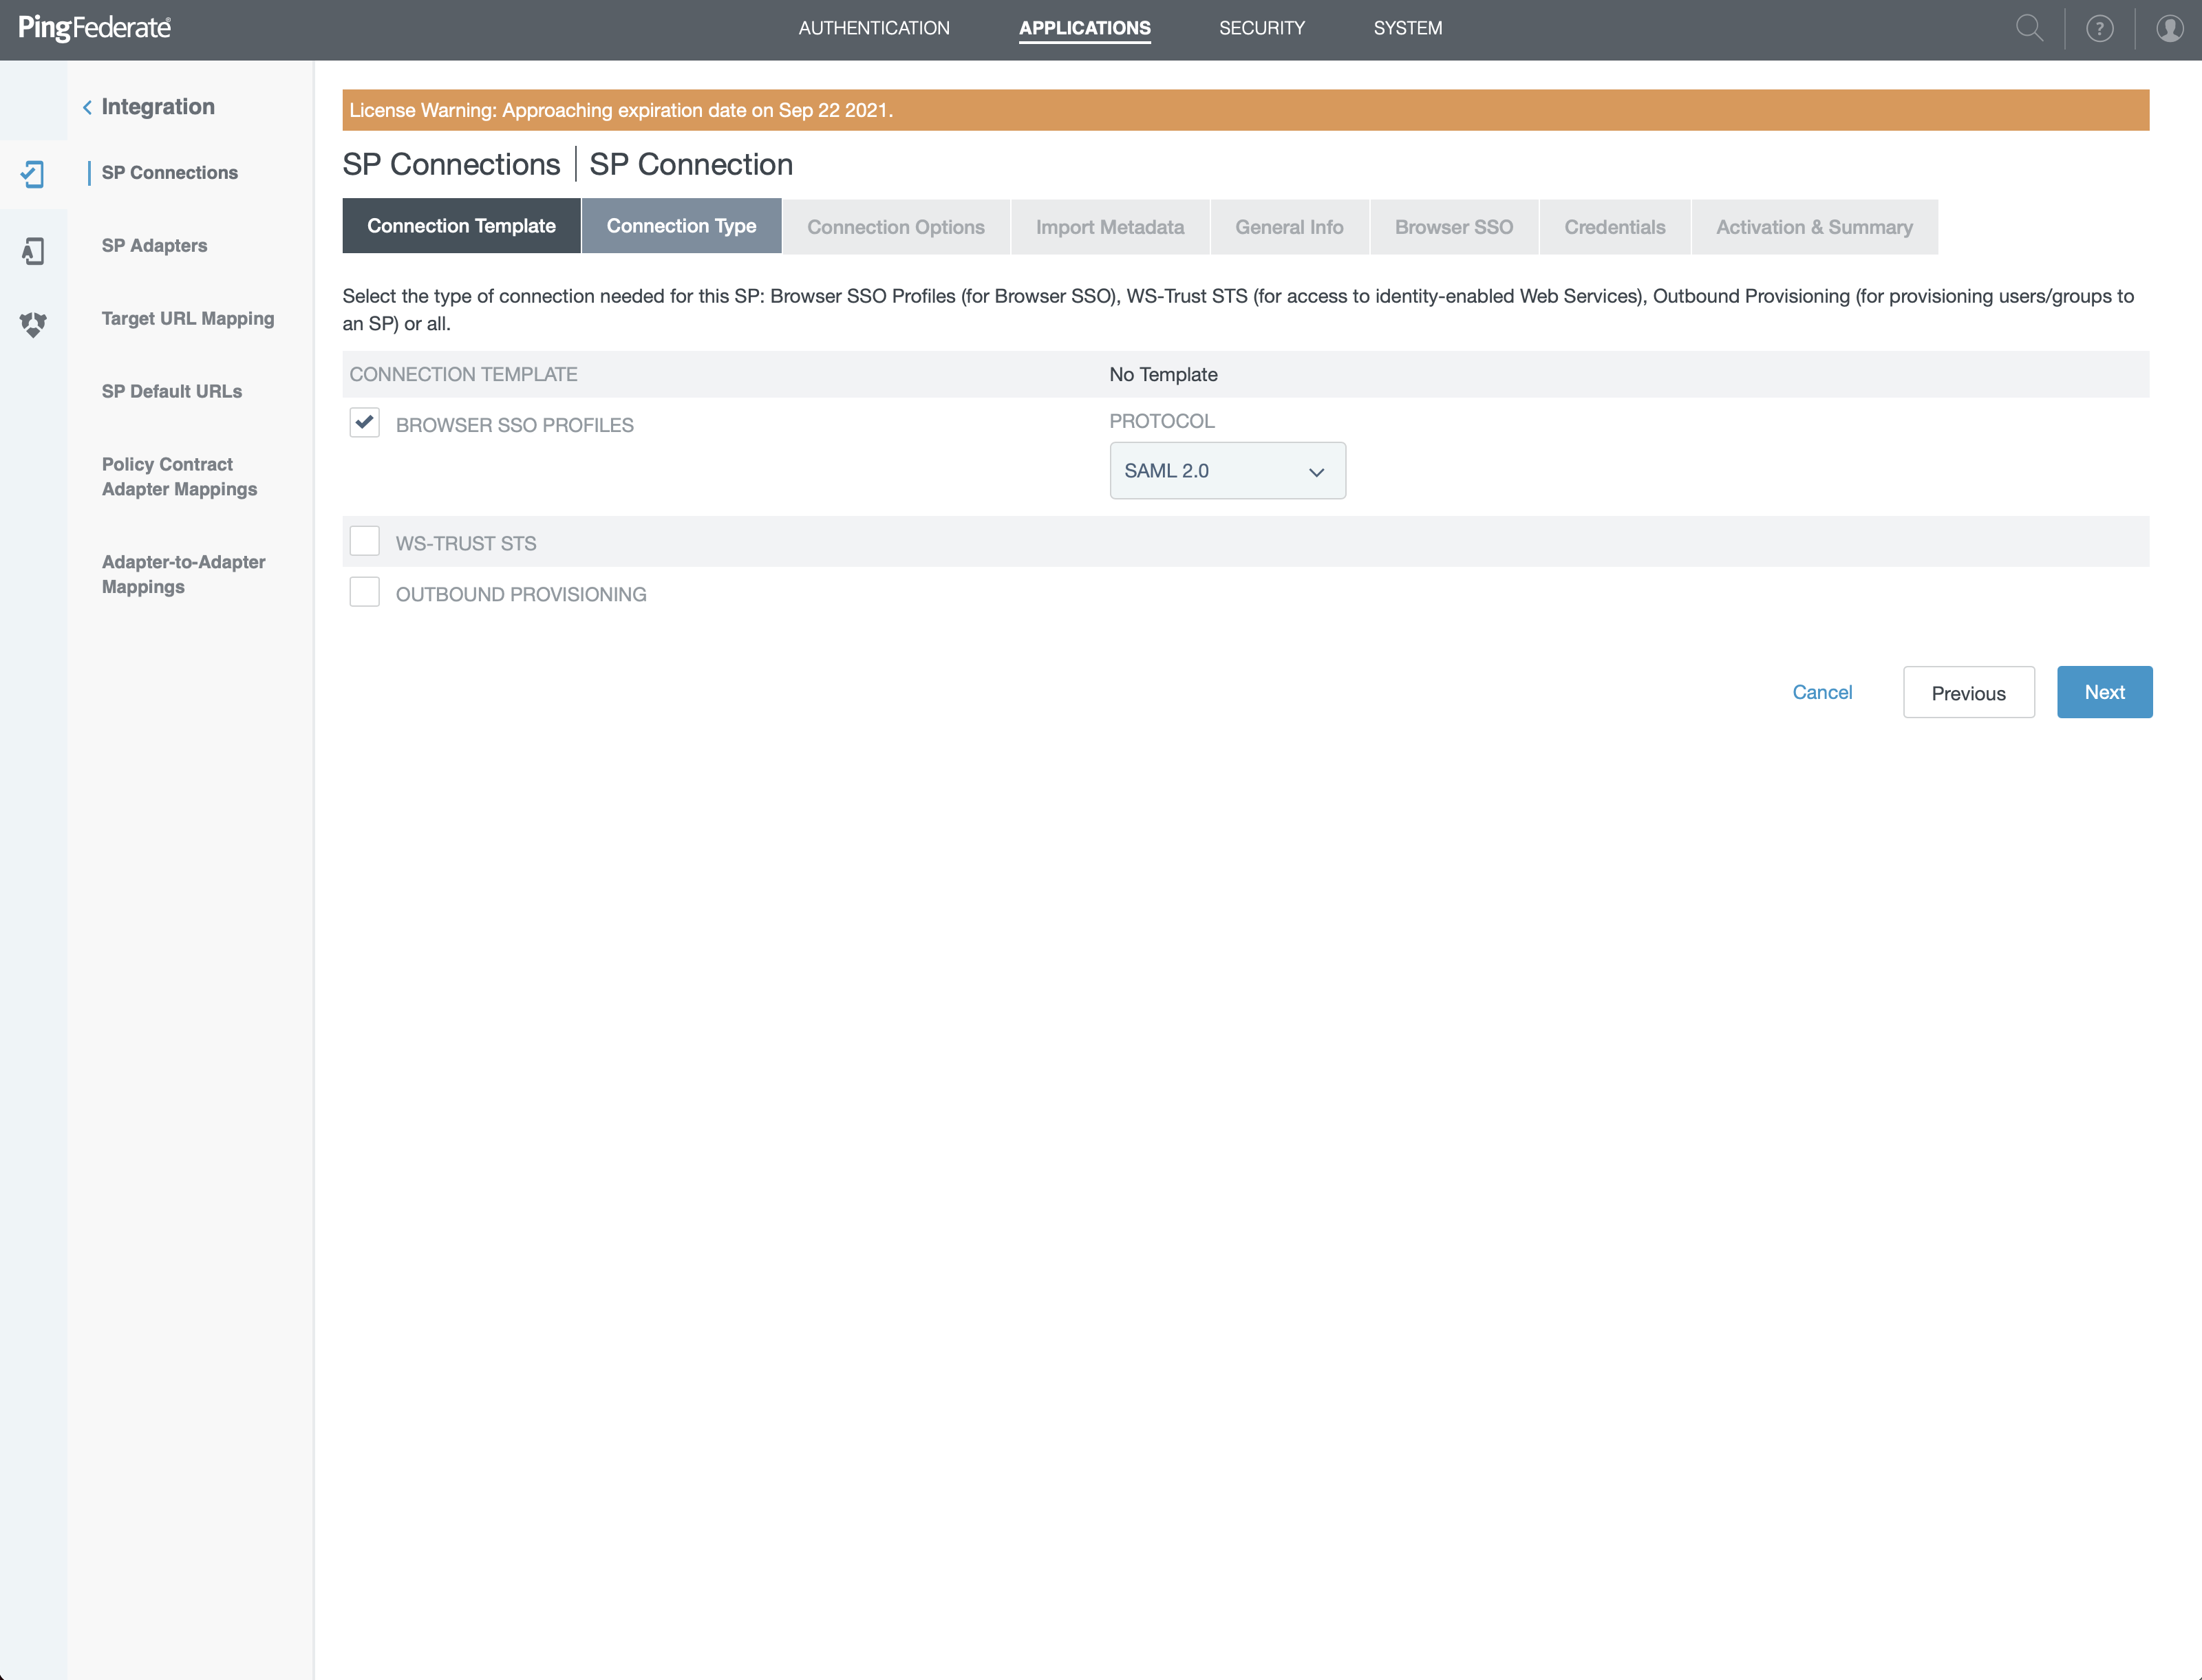
- Select "BROWSER SSO PROFILES"
- Choose "SAML 2.0" and click "Next"
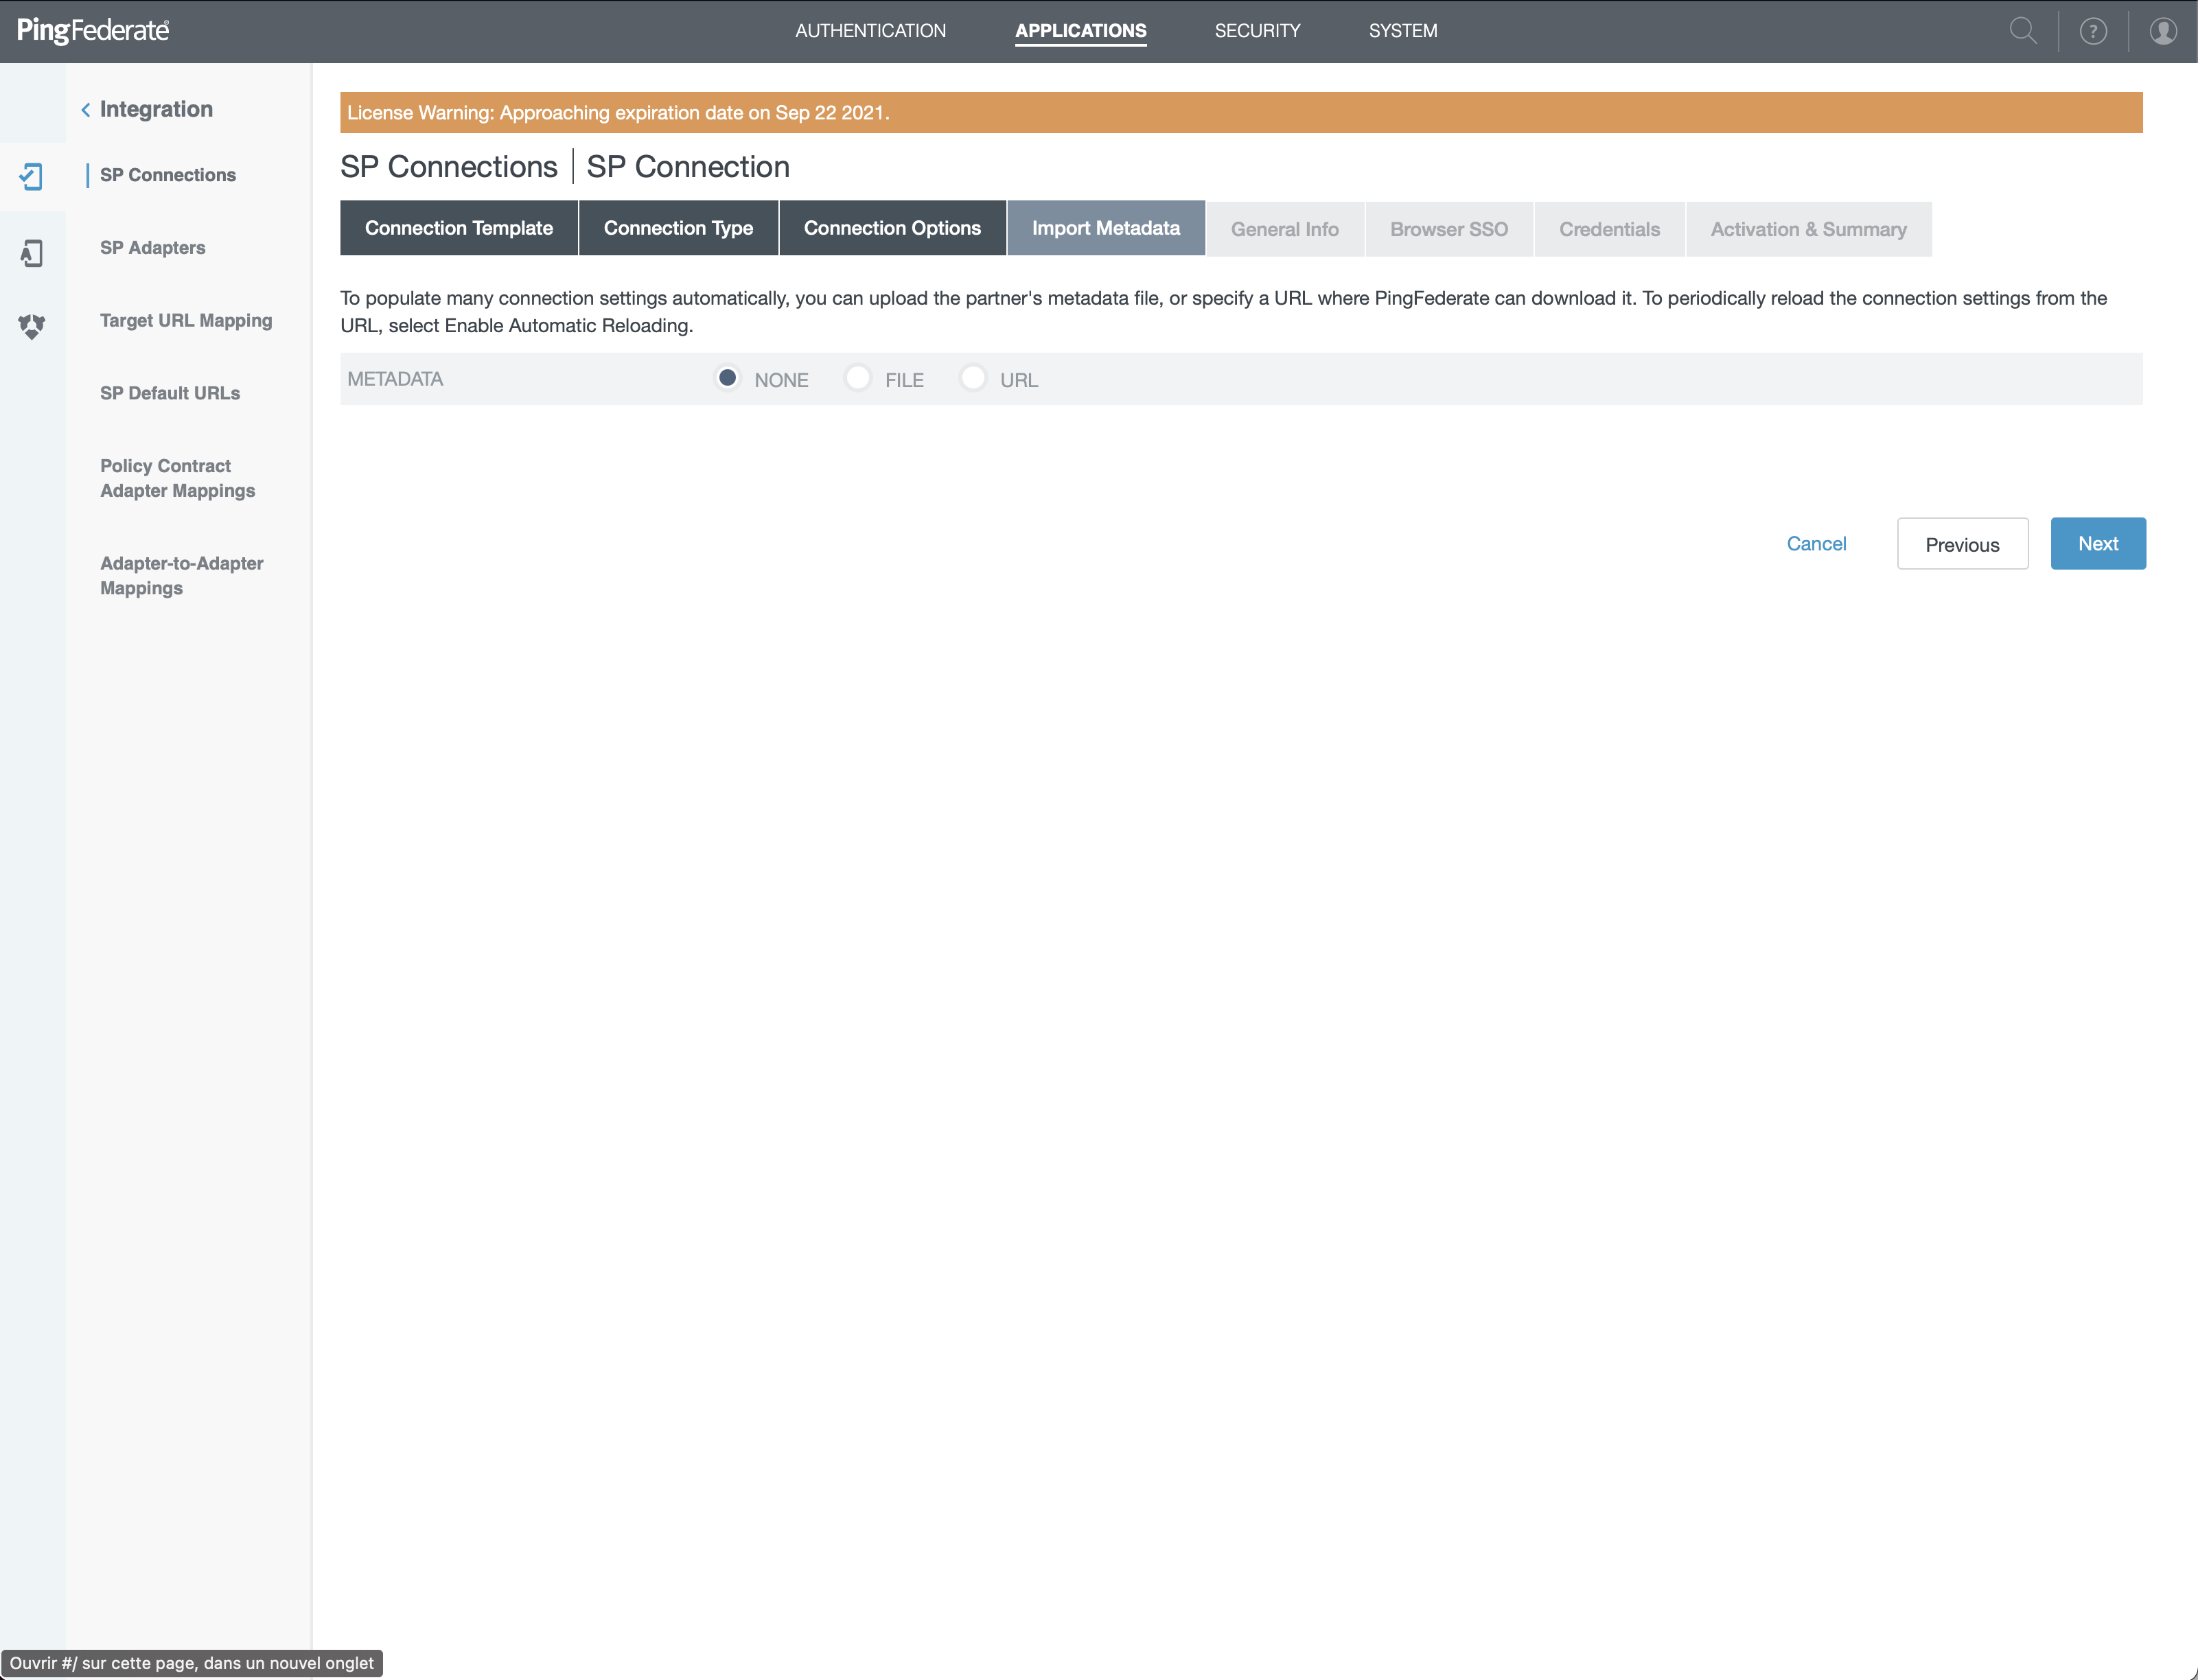
- Choose "NONE" and click "Next"
SAML configuration
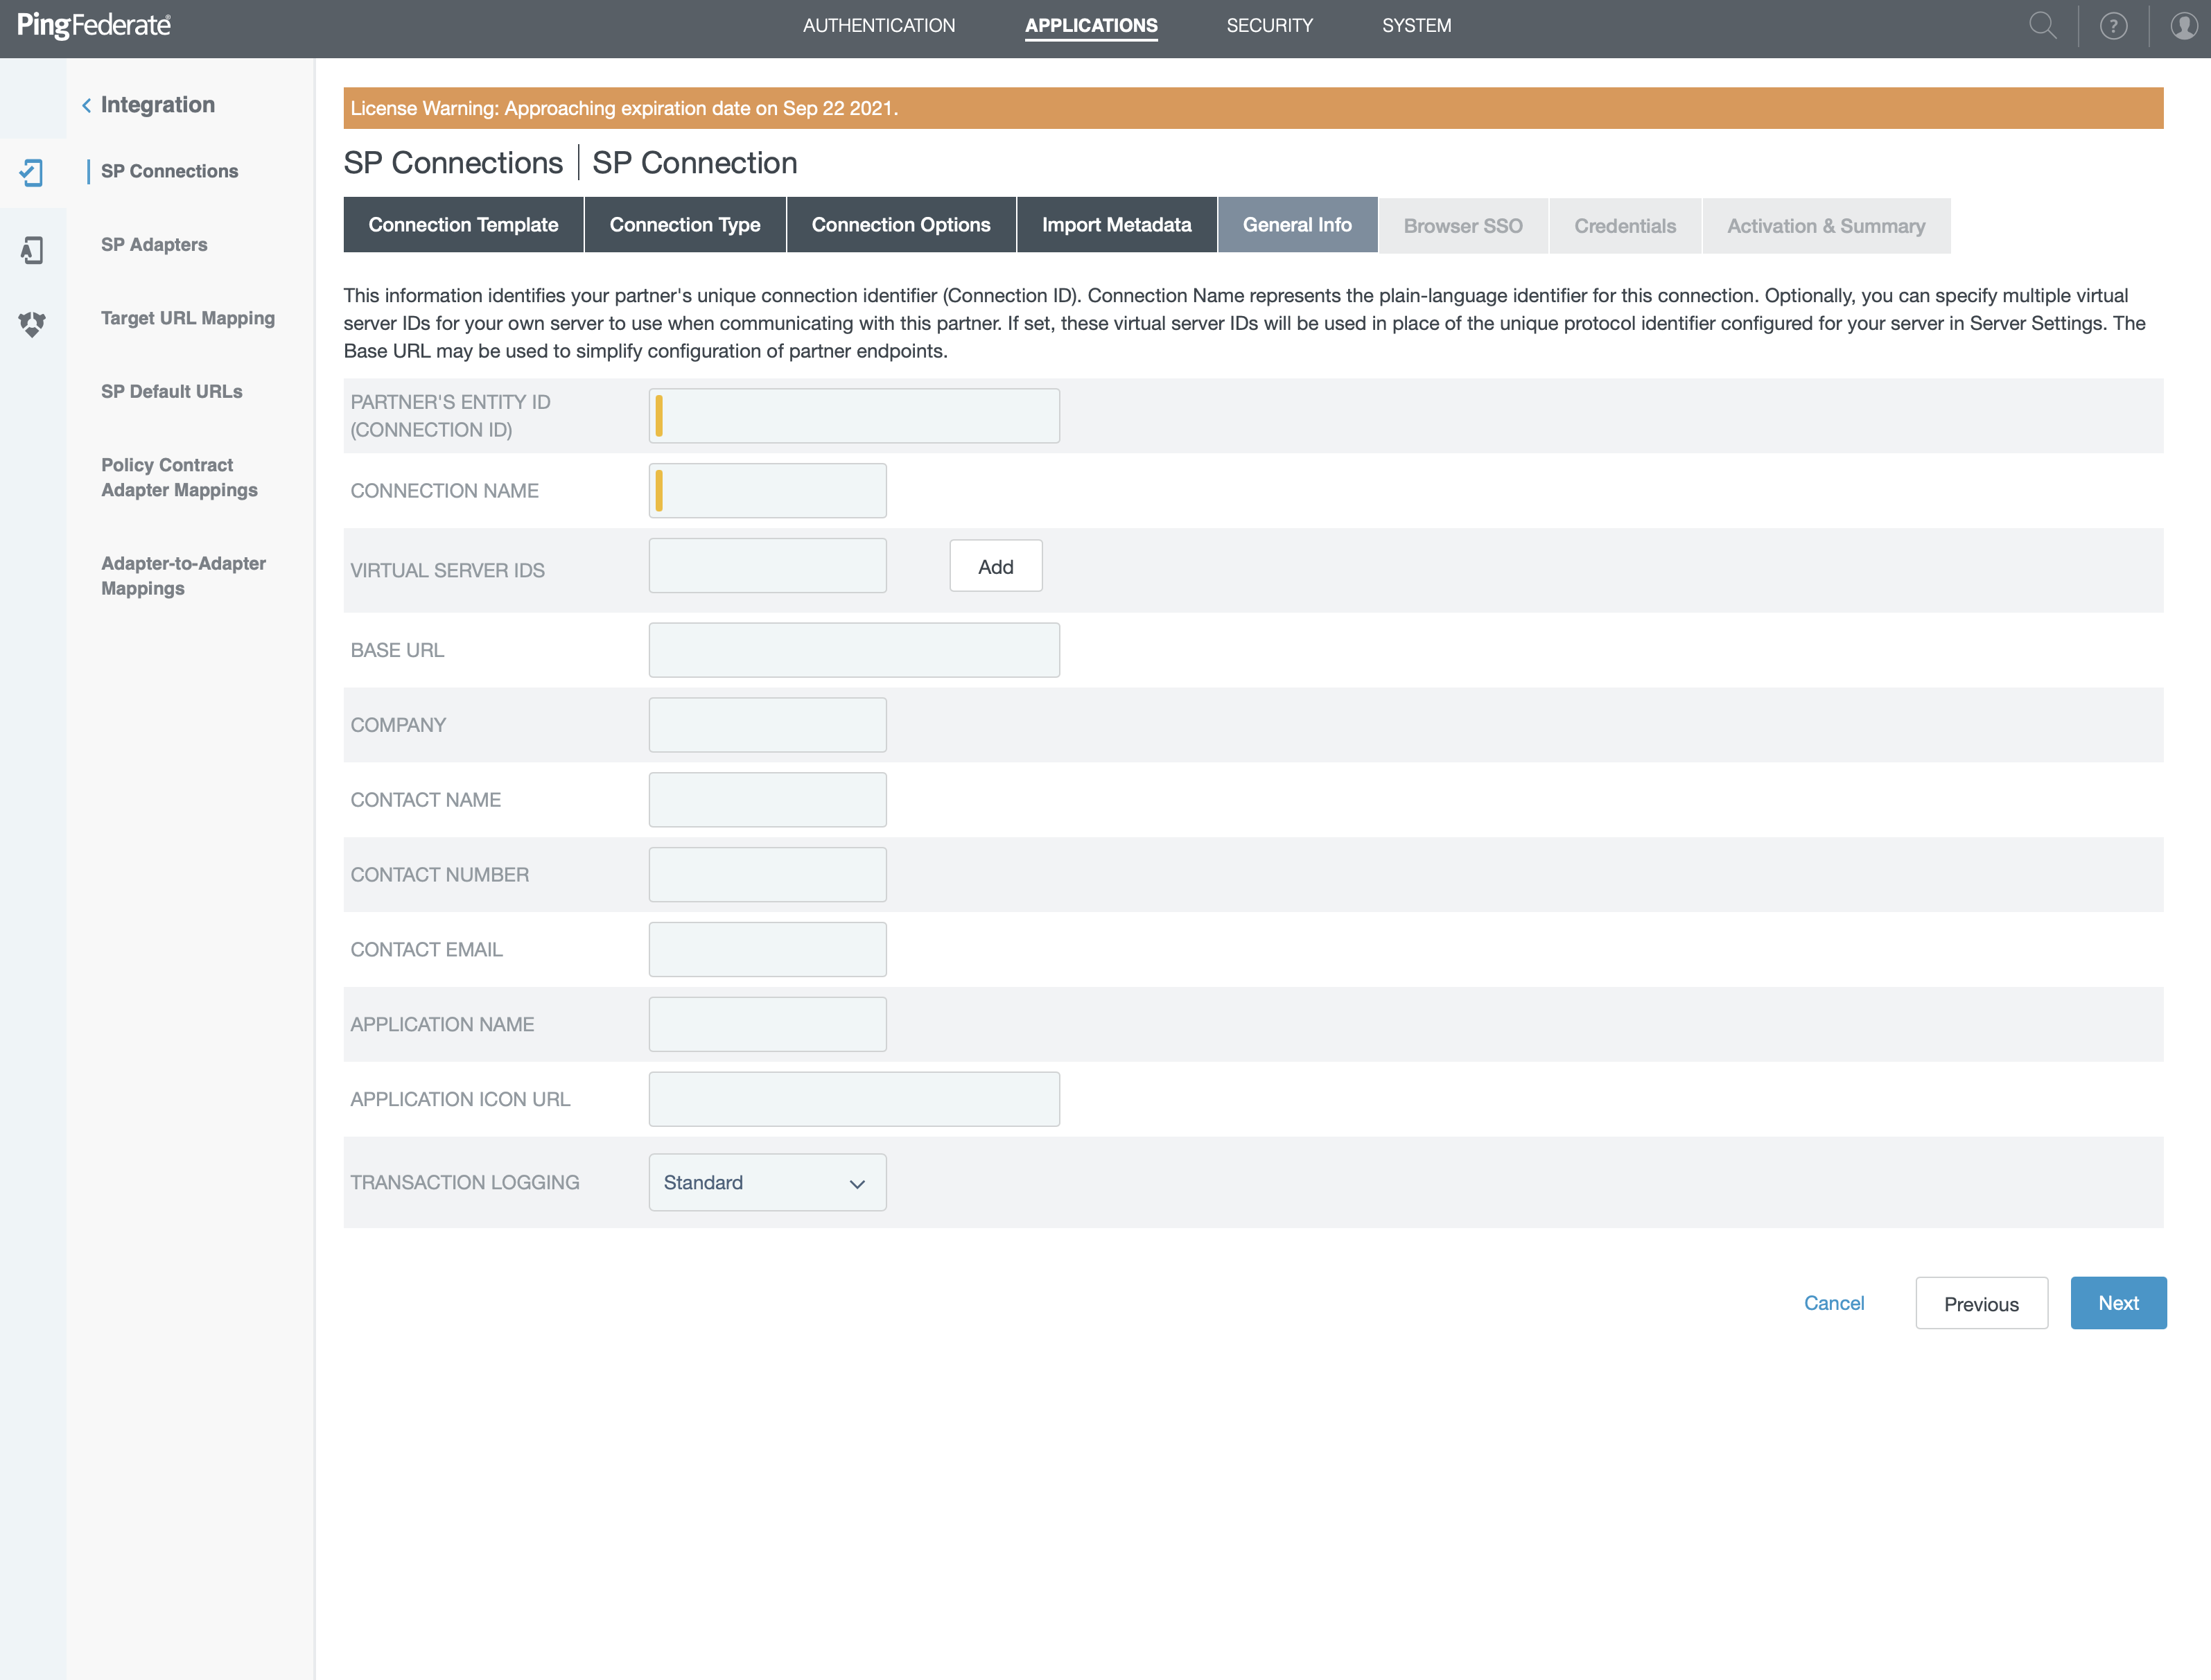
- In "Partner Entity ID" type the Entity ID you got from Cryptr
- In "Connection name" type the Connection name put also "Entity ID"
- Click "Next" and in the screen that appears click on "Configure Browser"
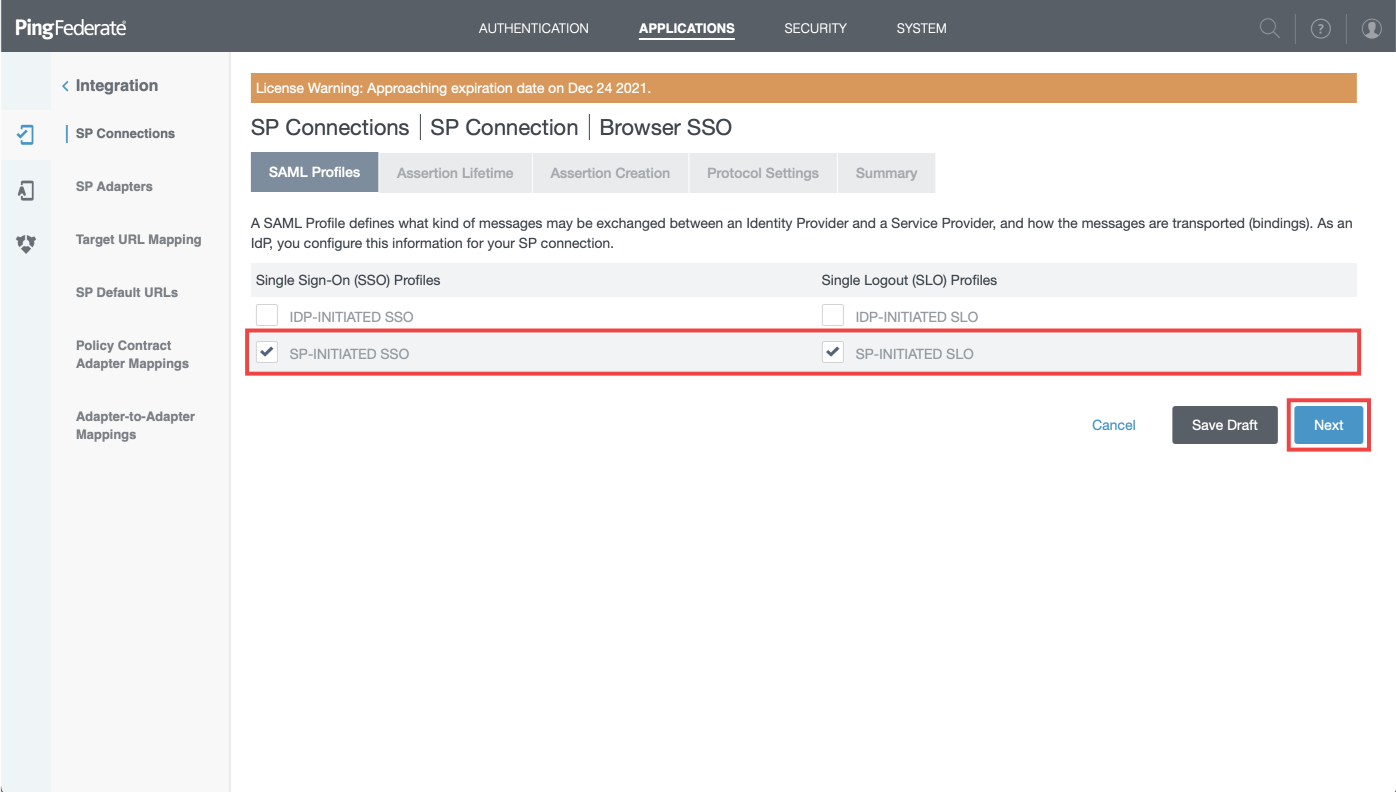
- Check ONLY "SP-INITIATED SSO" and "SP-INITIATED SLO" then click "Next"
- 💡 Keep "Assertion Lifetime" form values as default.
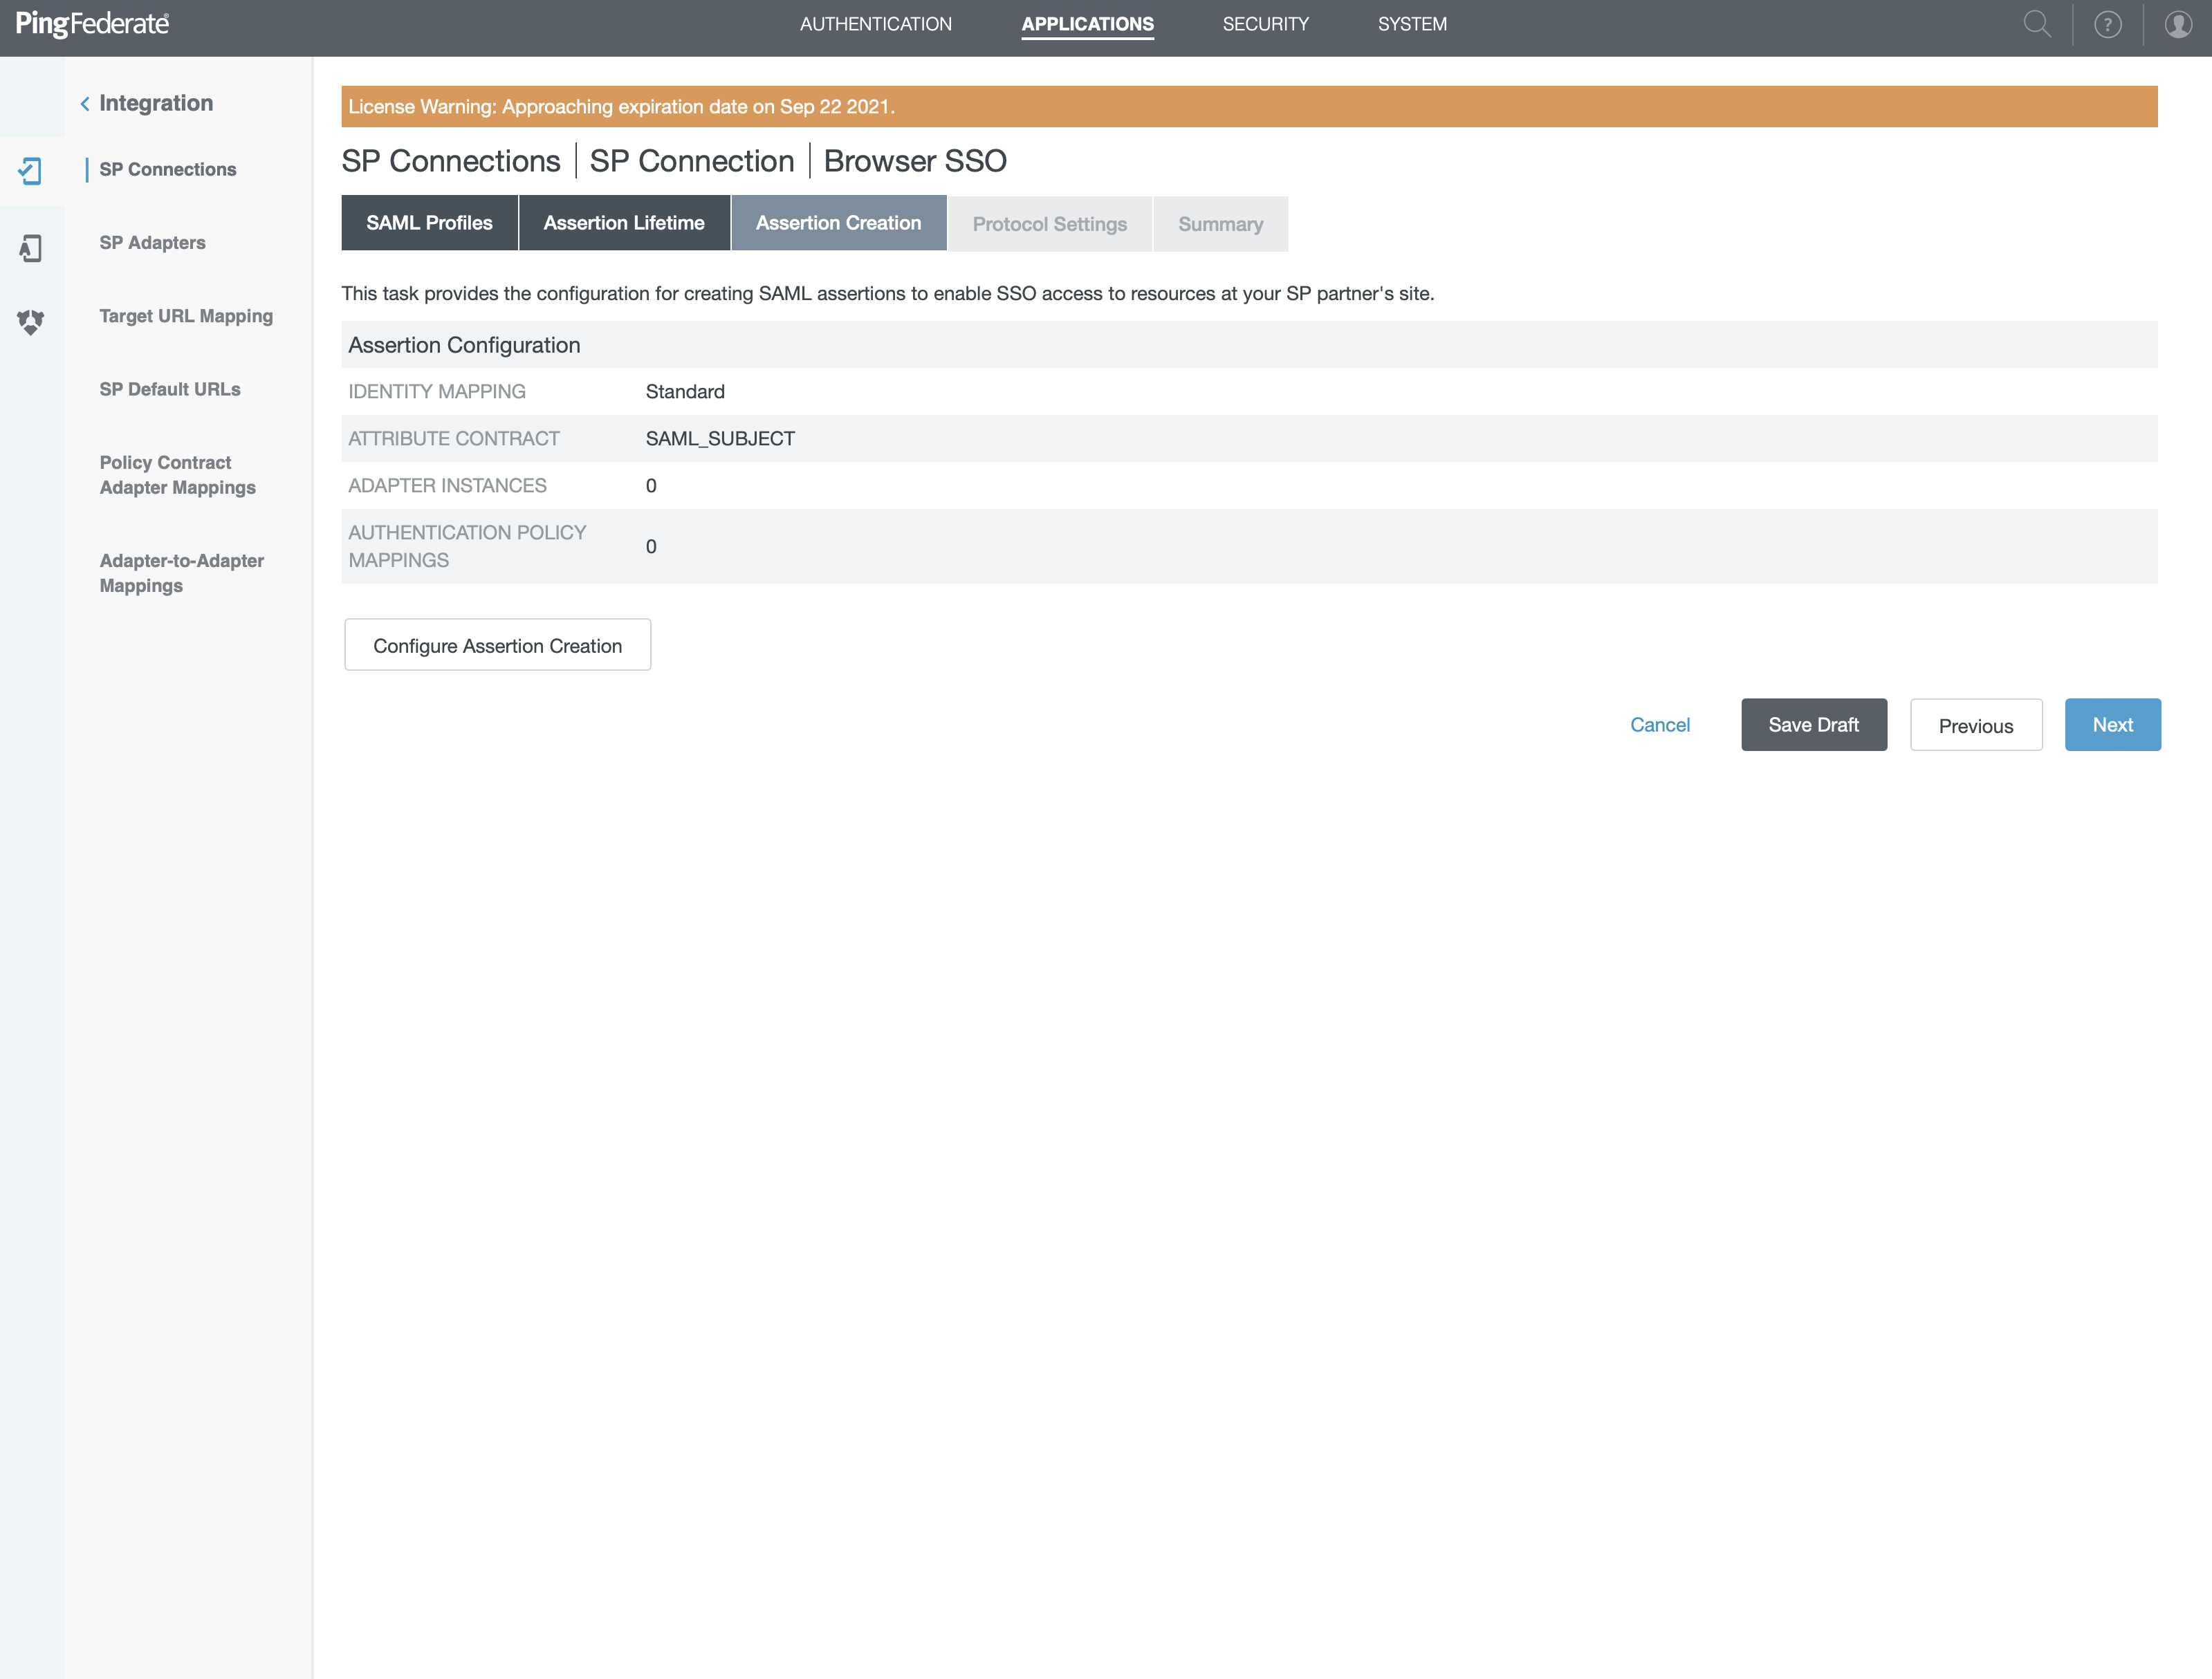
- Click on "Configure Assertion Creation"
- Select "STANDARD" on the new screen and click "Next"
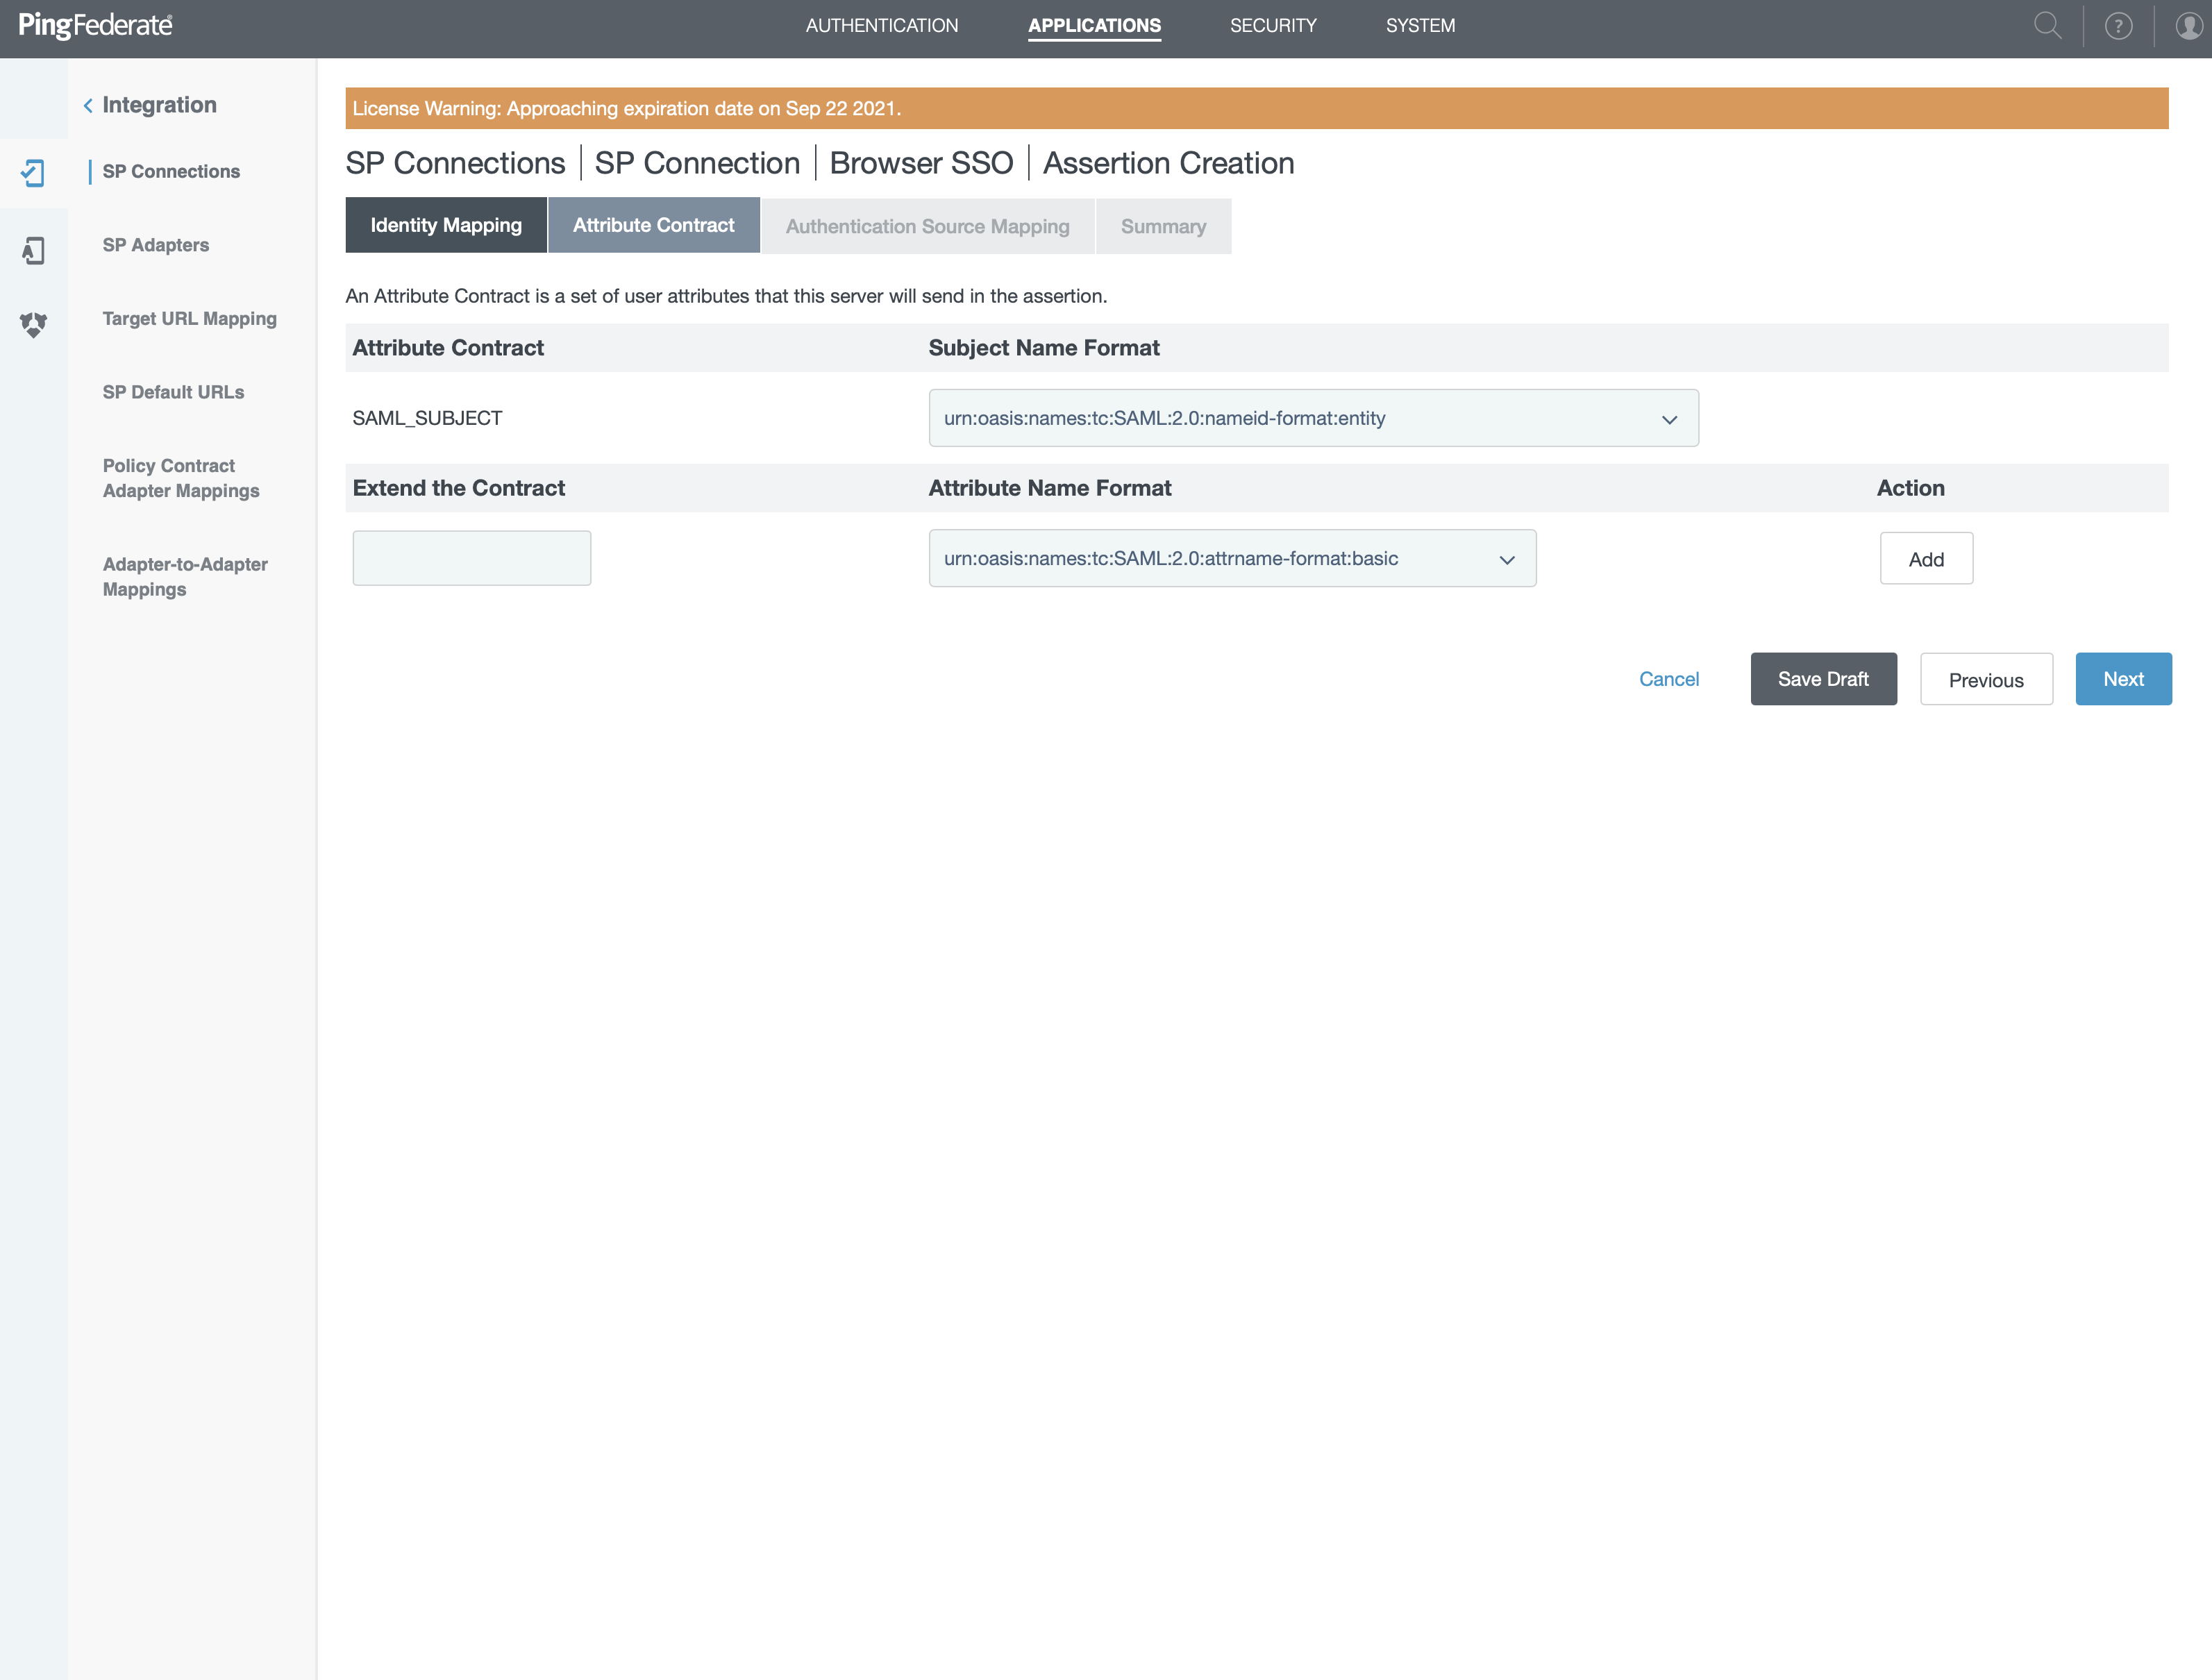
- Select "urn:oasis:names:tc:SAML:2-0:nameid-format:entity" for SAML_SUBJECT
- Extend the contract

- "idp_user_id" with format "urn:oasis:names:tc:SAML:2.0:attrname-format:basic"
- "email" with format "urn:oasis:names:tc:SAML:2.0:attrname-format:basic"
- "given_name" with format "urn:oasis:names:tc:SAML:2.0:attrname-format:basic"
- "family_name" with format "urn:oasis:names:tc:SAML:2.0:attrname-format:basic"
- Click "Next"
Attributes Mapping
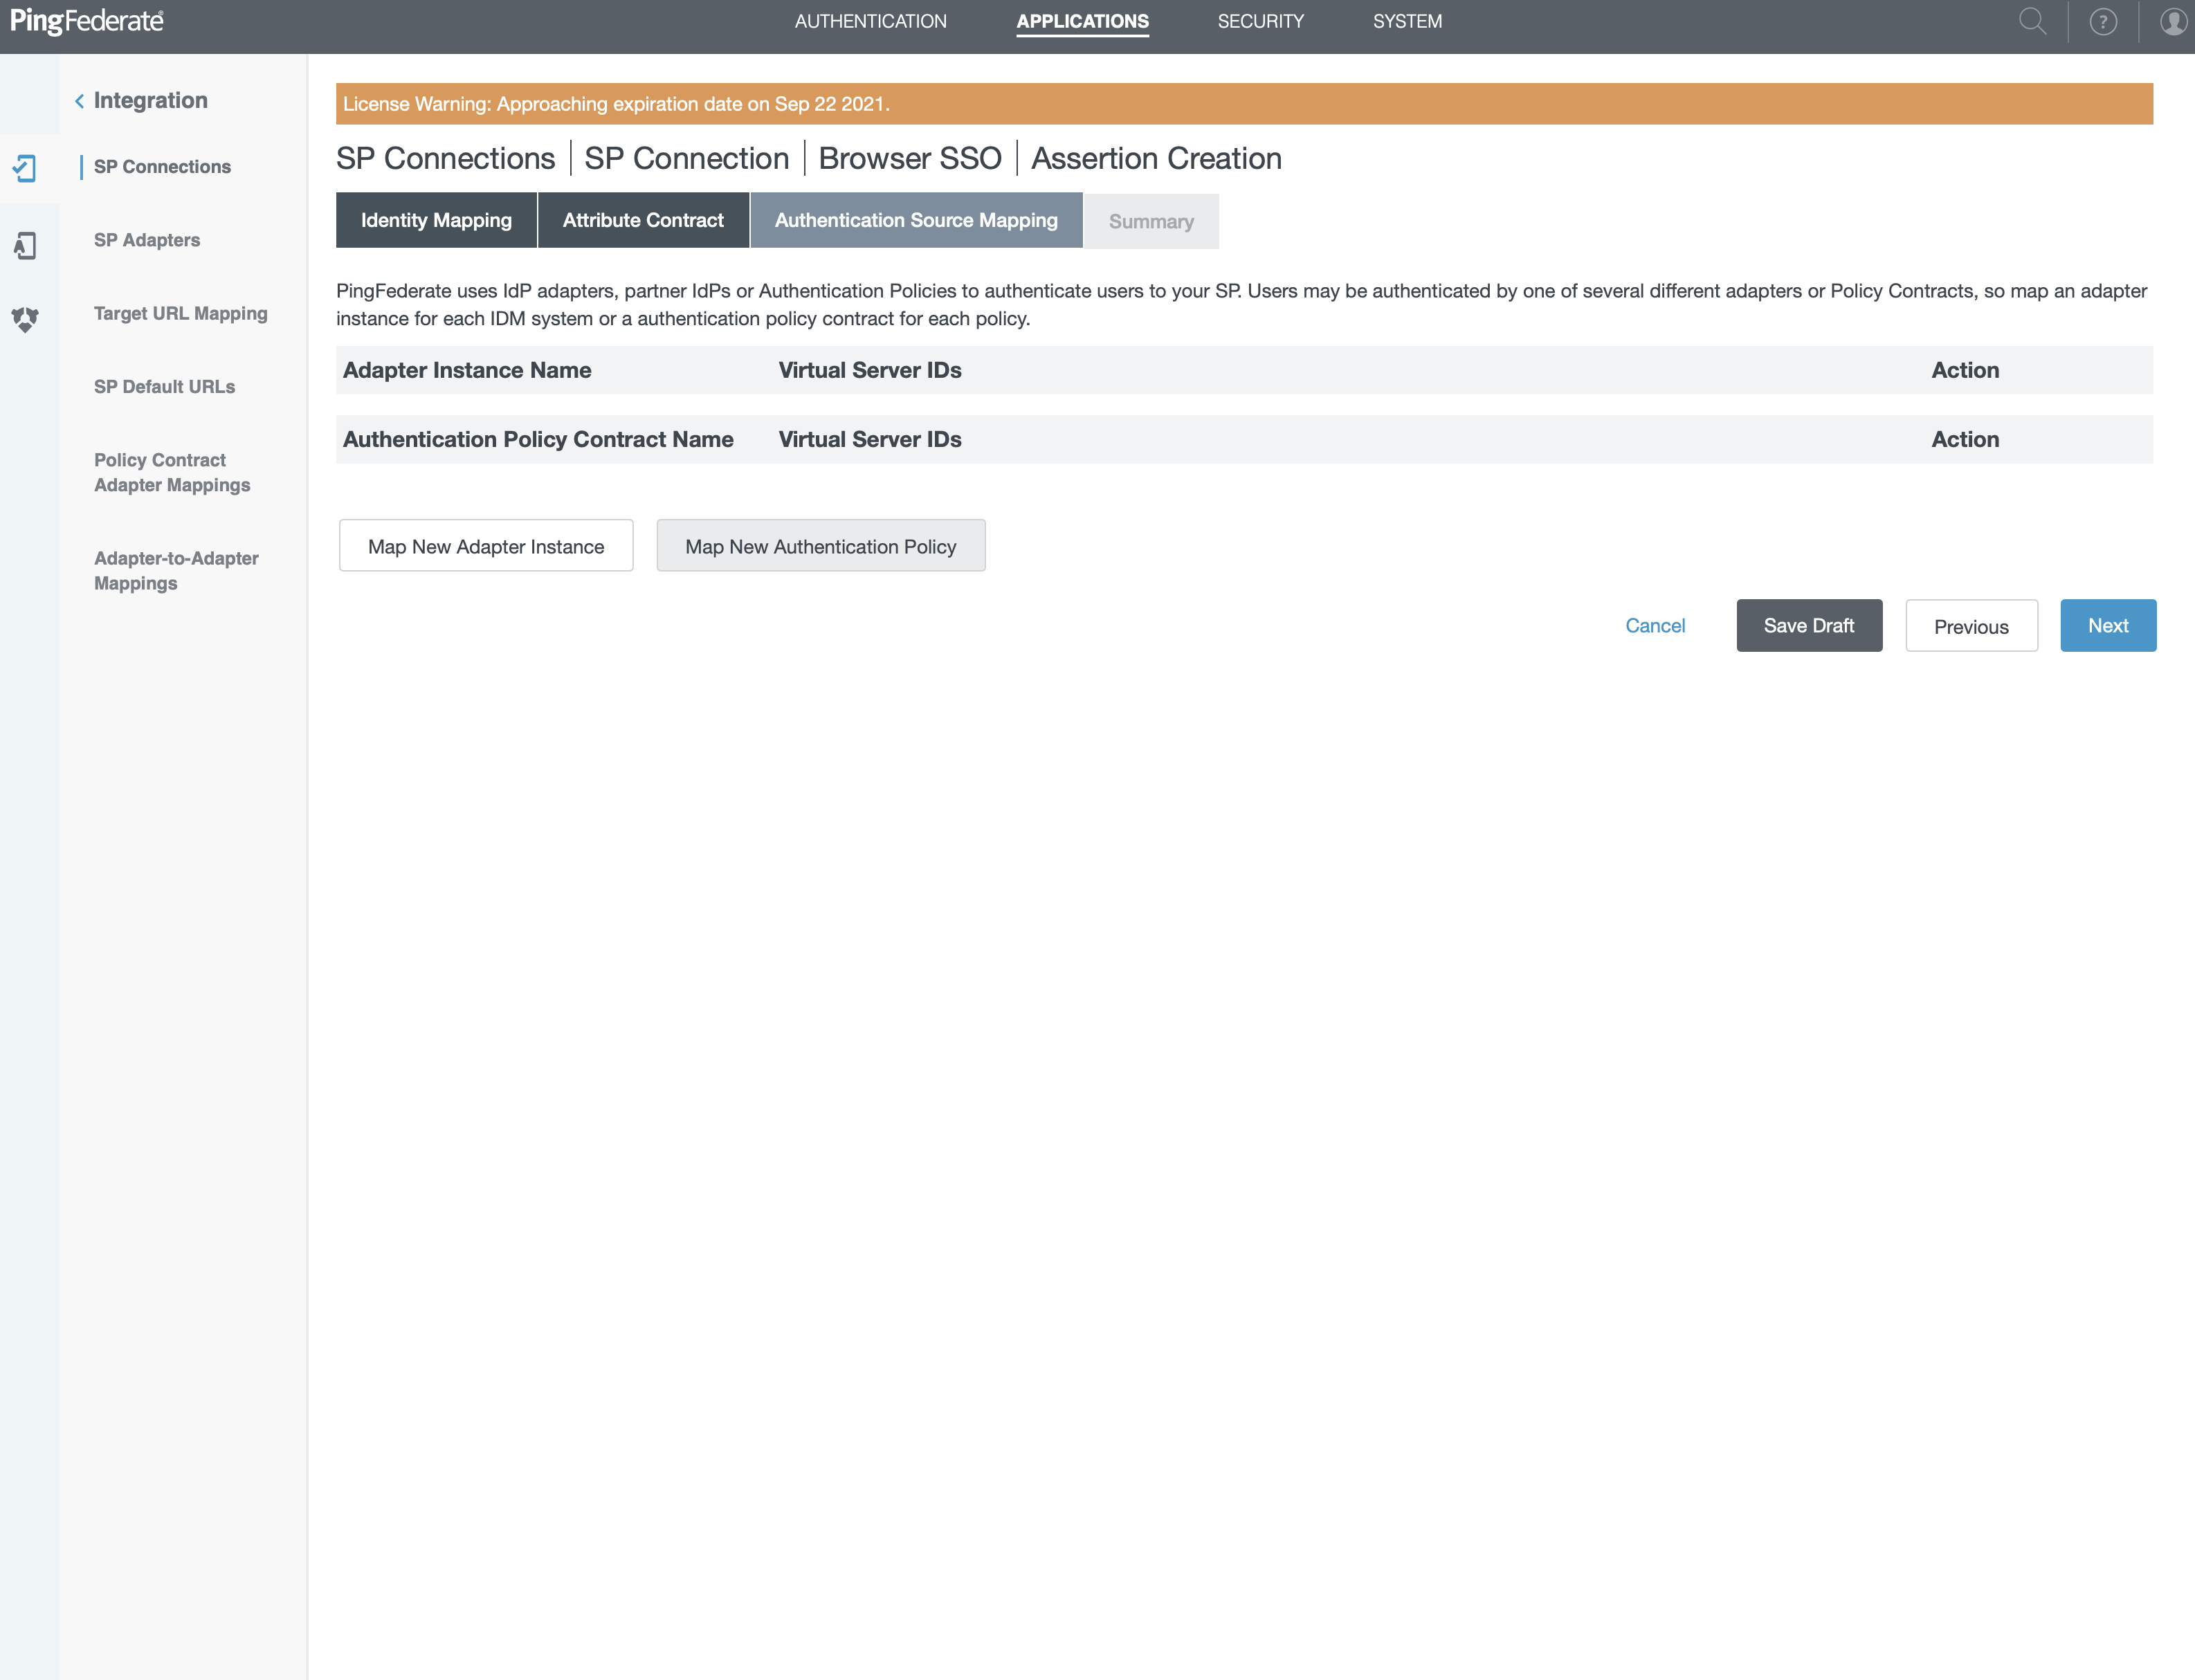
- Click on "Map new Authentication Policy"
- Click "Next"
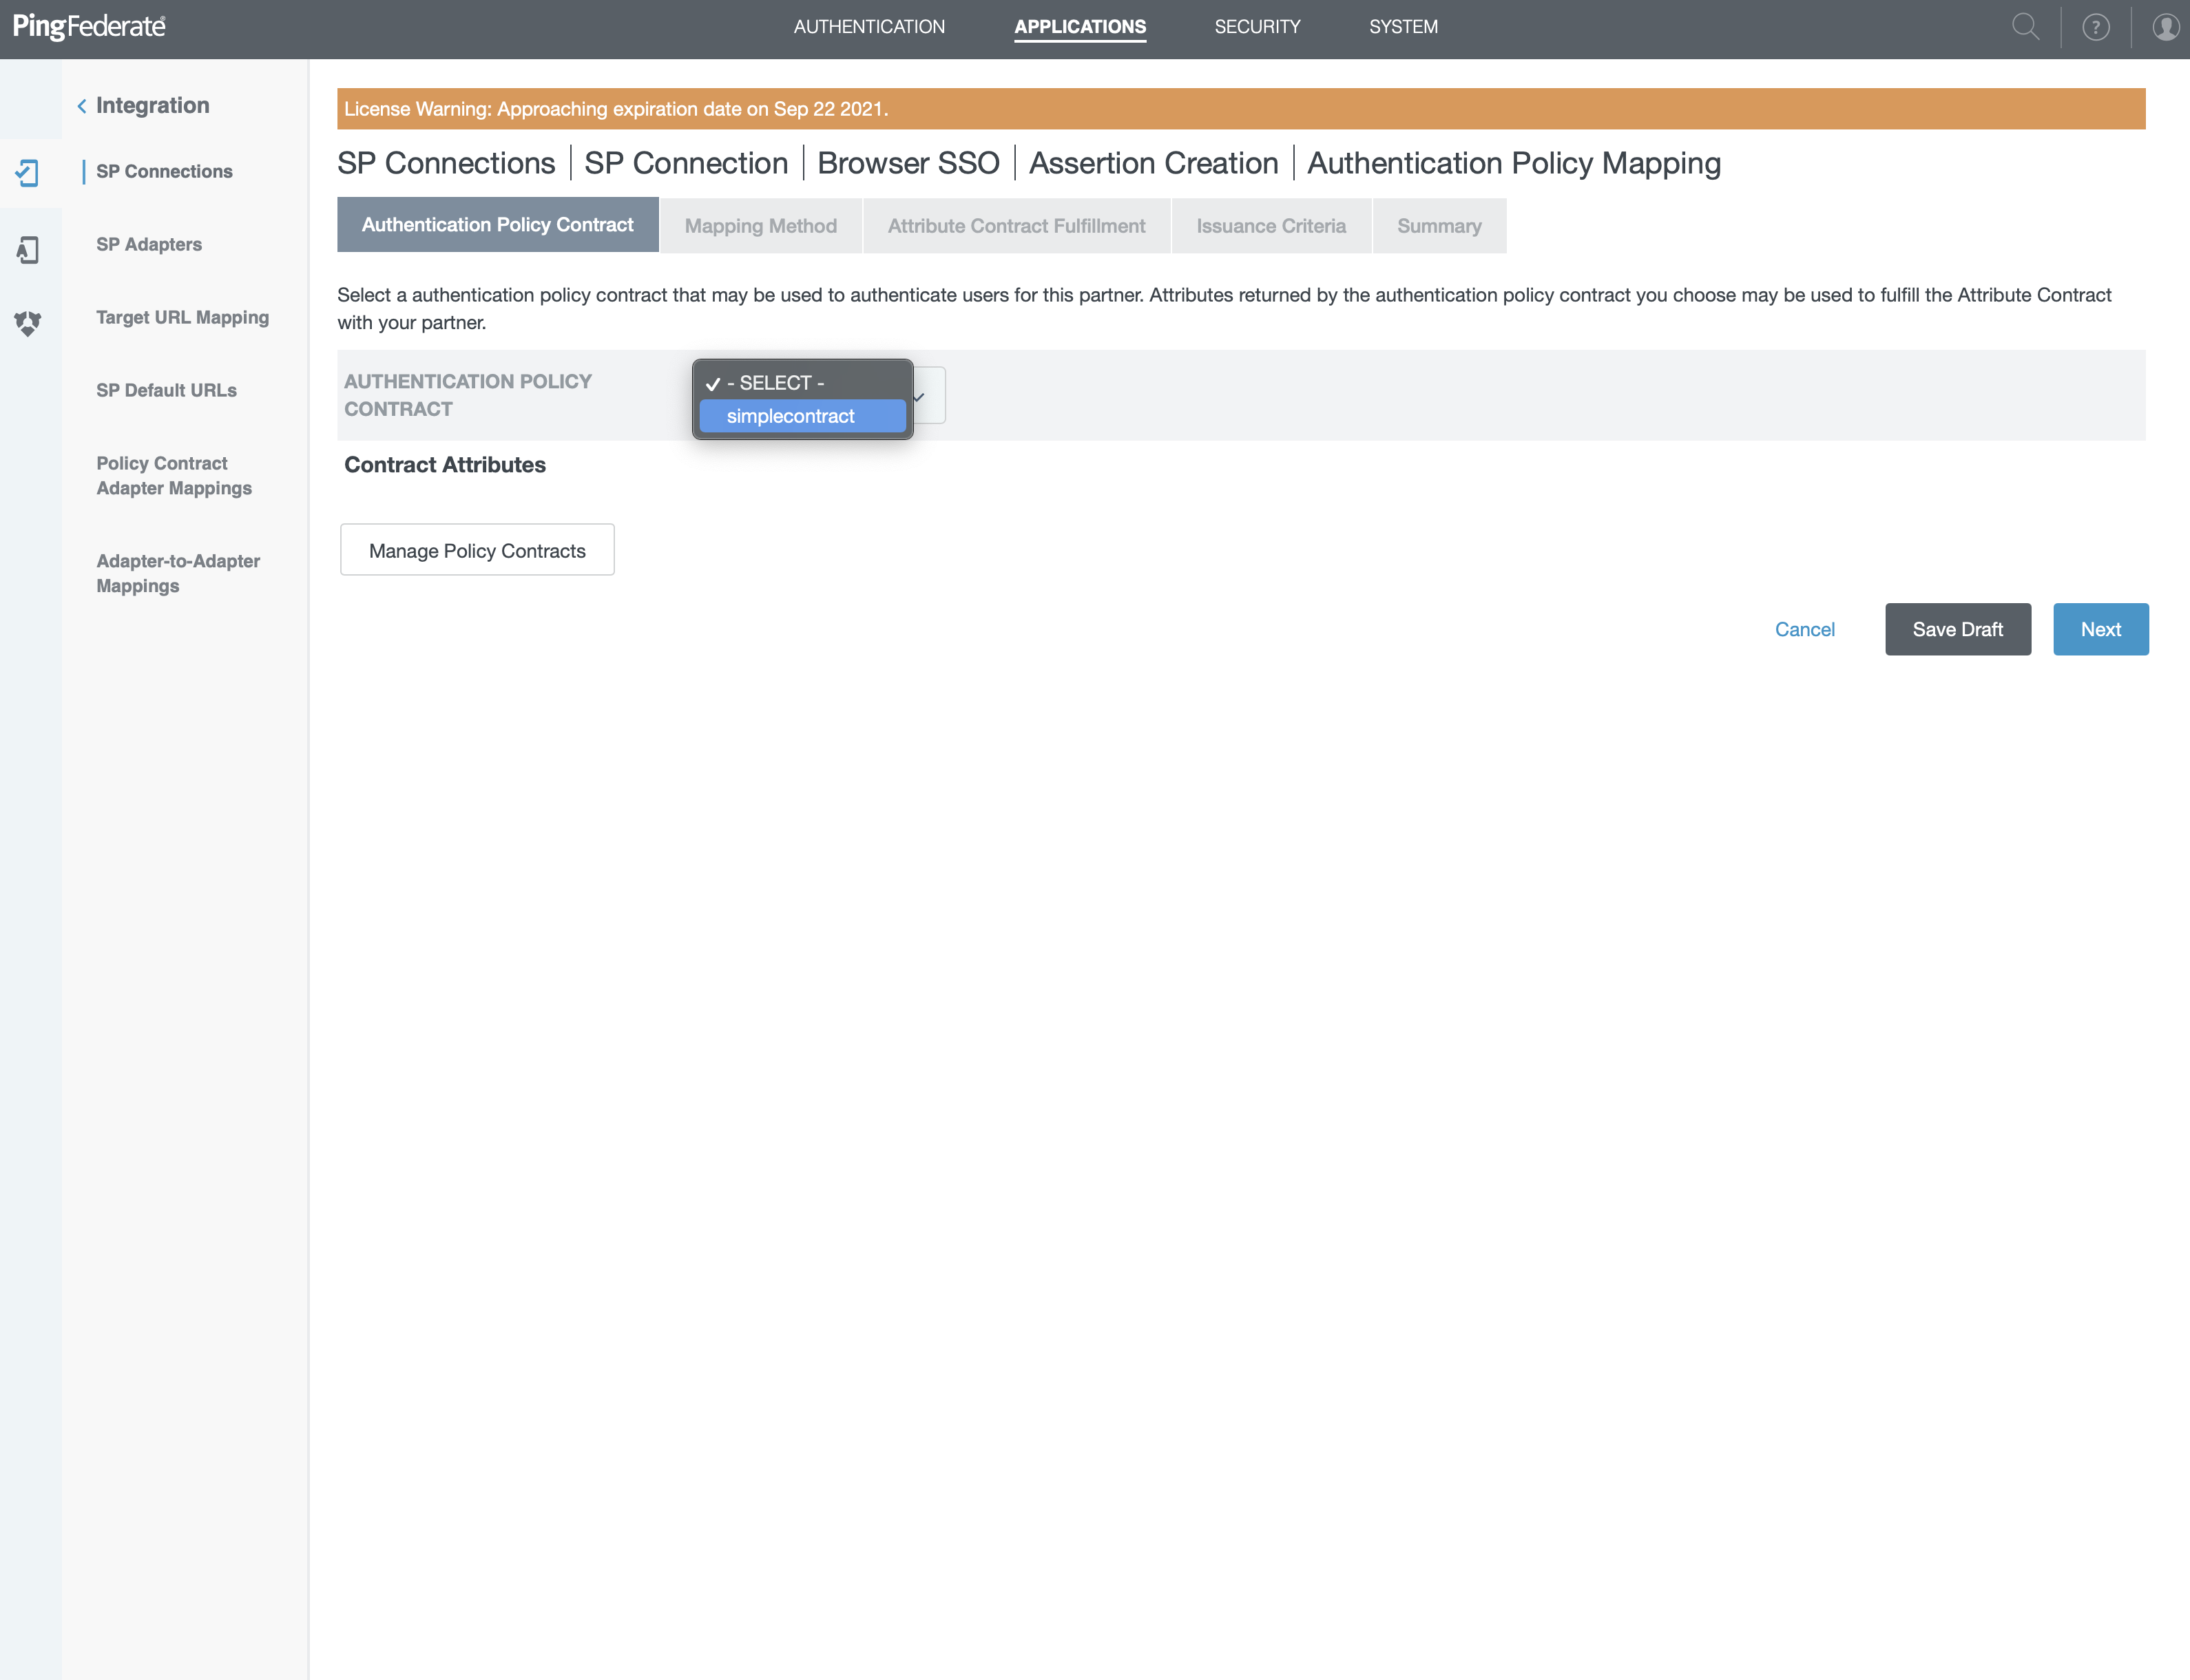
- Select "simplecontract" on the screen
- Click "Next"
- Select "USE ONLY THE AUTHENTICATION POLICY CONTRACT VALUES IN THE SAML ASSERTION" on the new screen
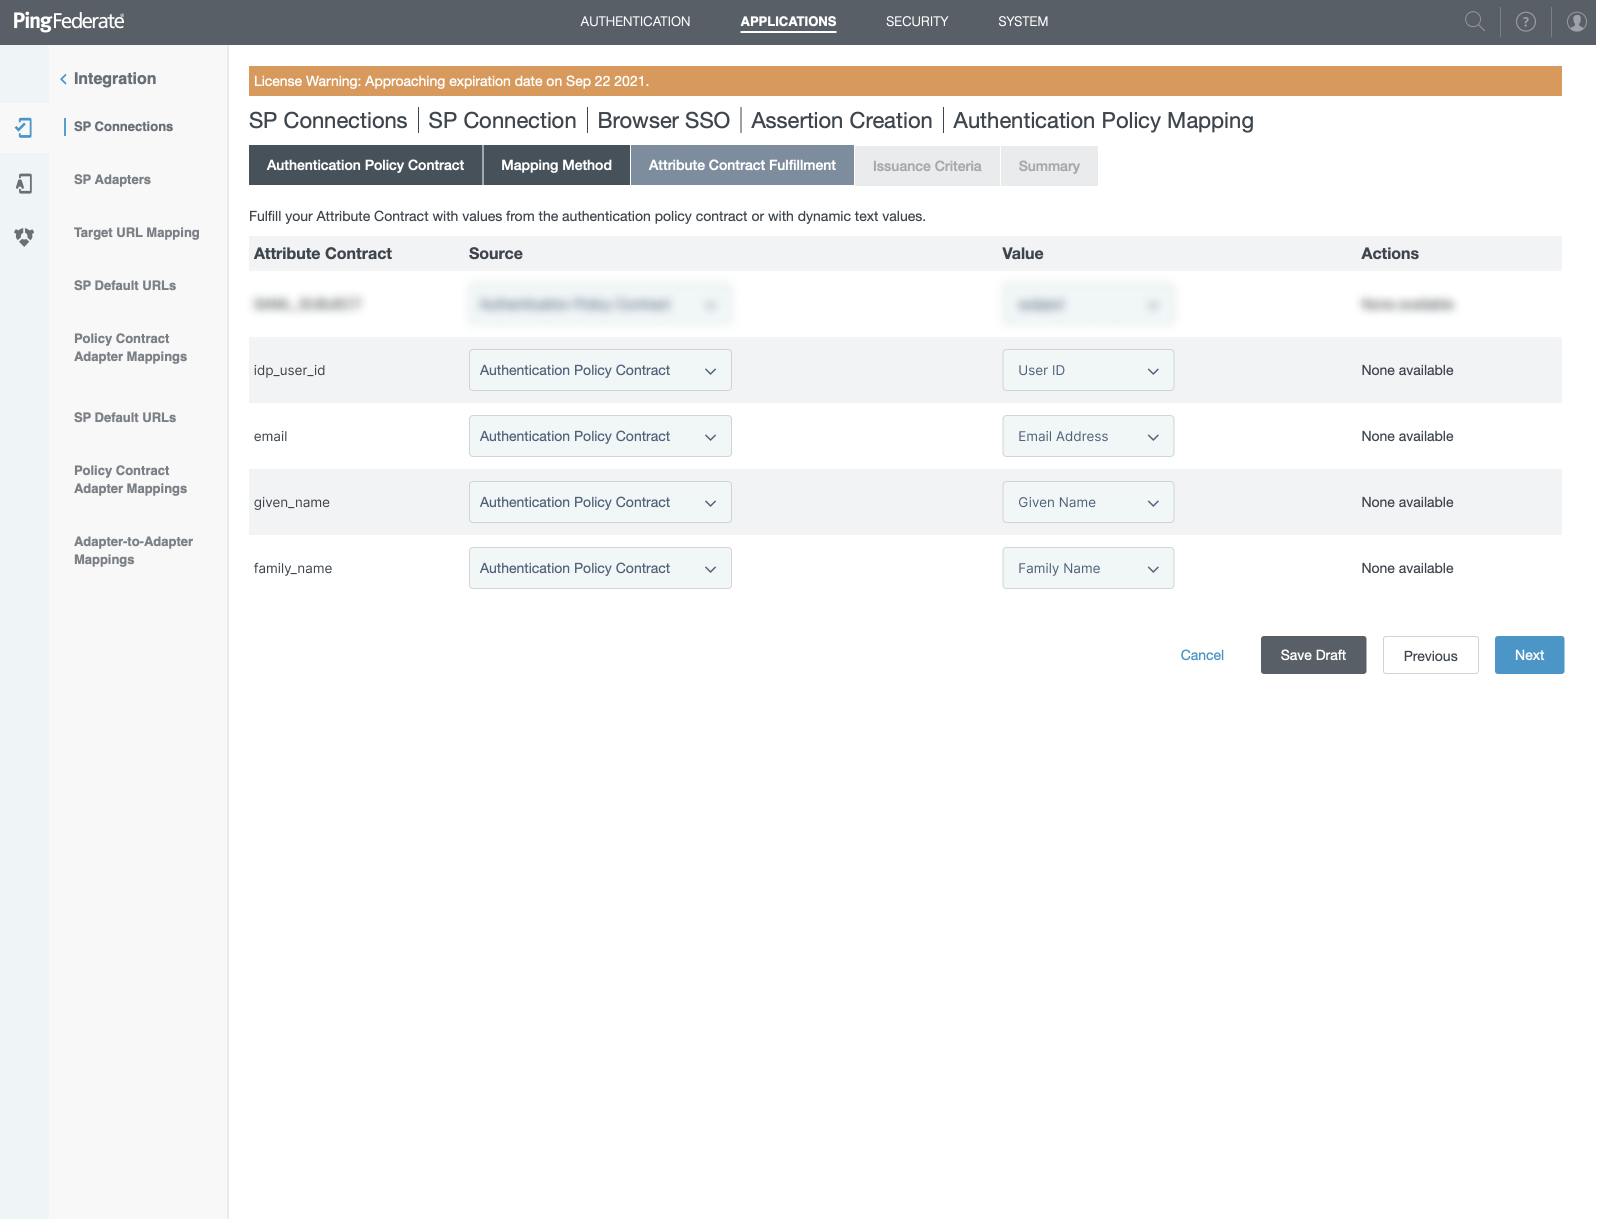
Attributes Contract Fulfillment
For "idp_user_id" Choose "Authentication Policy Contract" as "Source" and "User ID" for "Value"
- For "email" Choose "Authentication Policy Contract" as "Source" and "Email Address" for "Value"
- For "given_name" Choose "Authentication Policy Contract" as "Source" and "Given Name" for "Value"
- For "family_name" Choose "Authentication Policy Contract" as "Source" and "Family Name" for "Value"
- Click "Next"
- Click "Next" on "Issuance Criteria" screen
- You'll have a Summary, on this screen click on "Done" and click "Next" or "Done" until you arrive on "Protocol Settings" screen
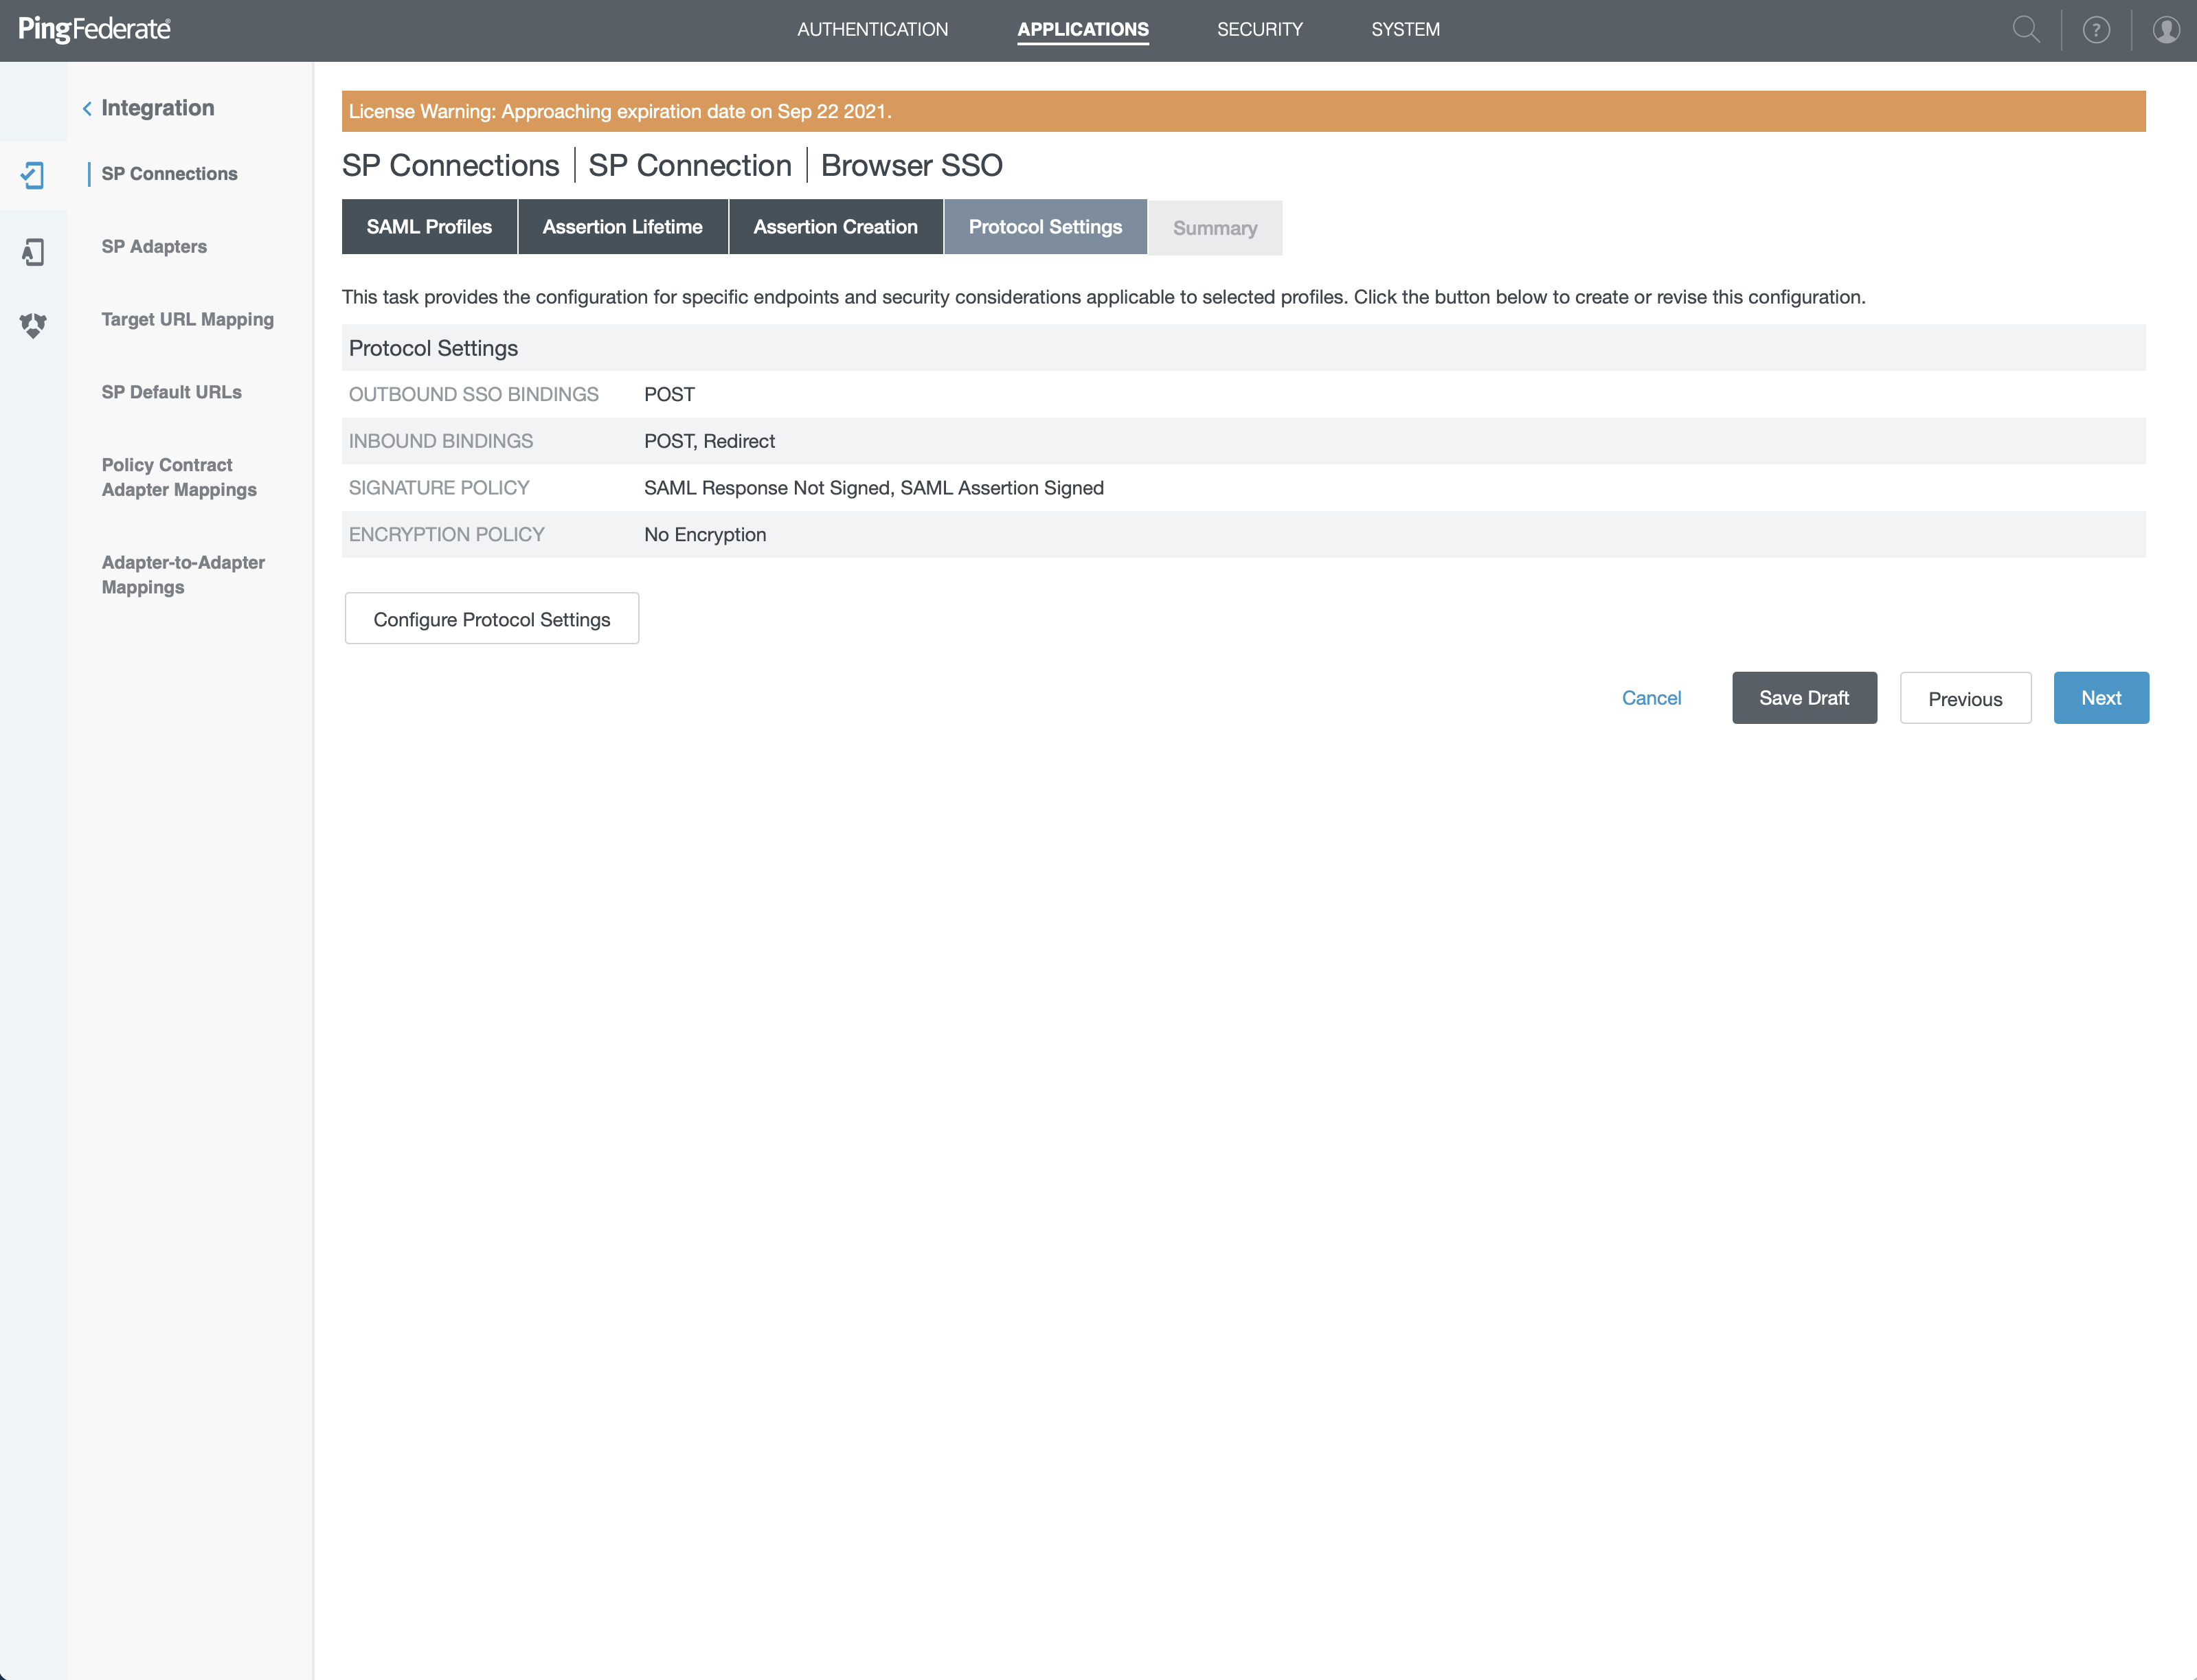
Activation & summary
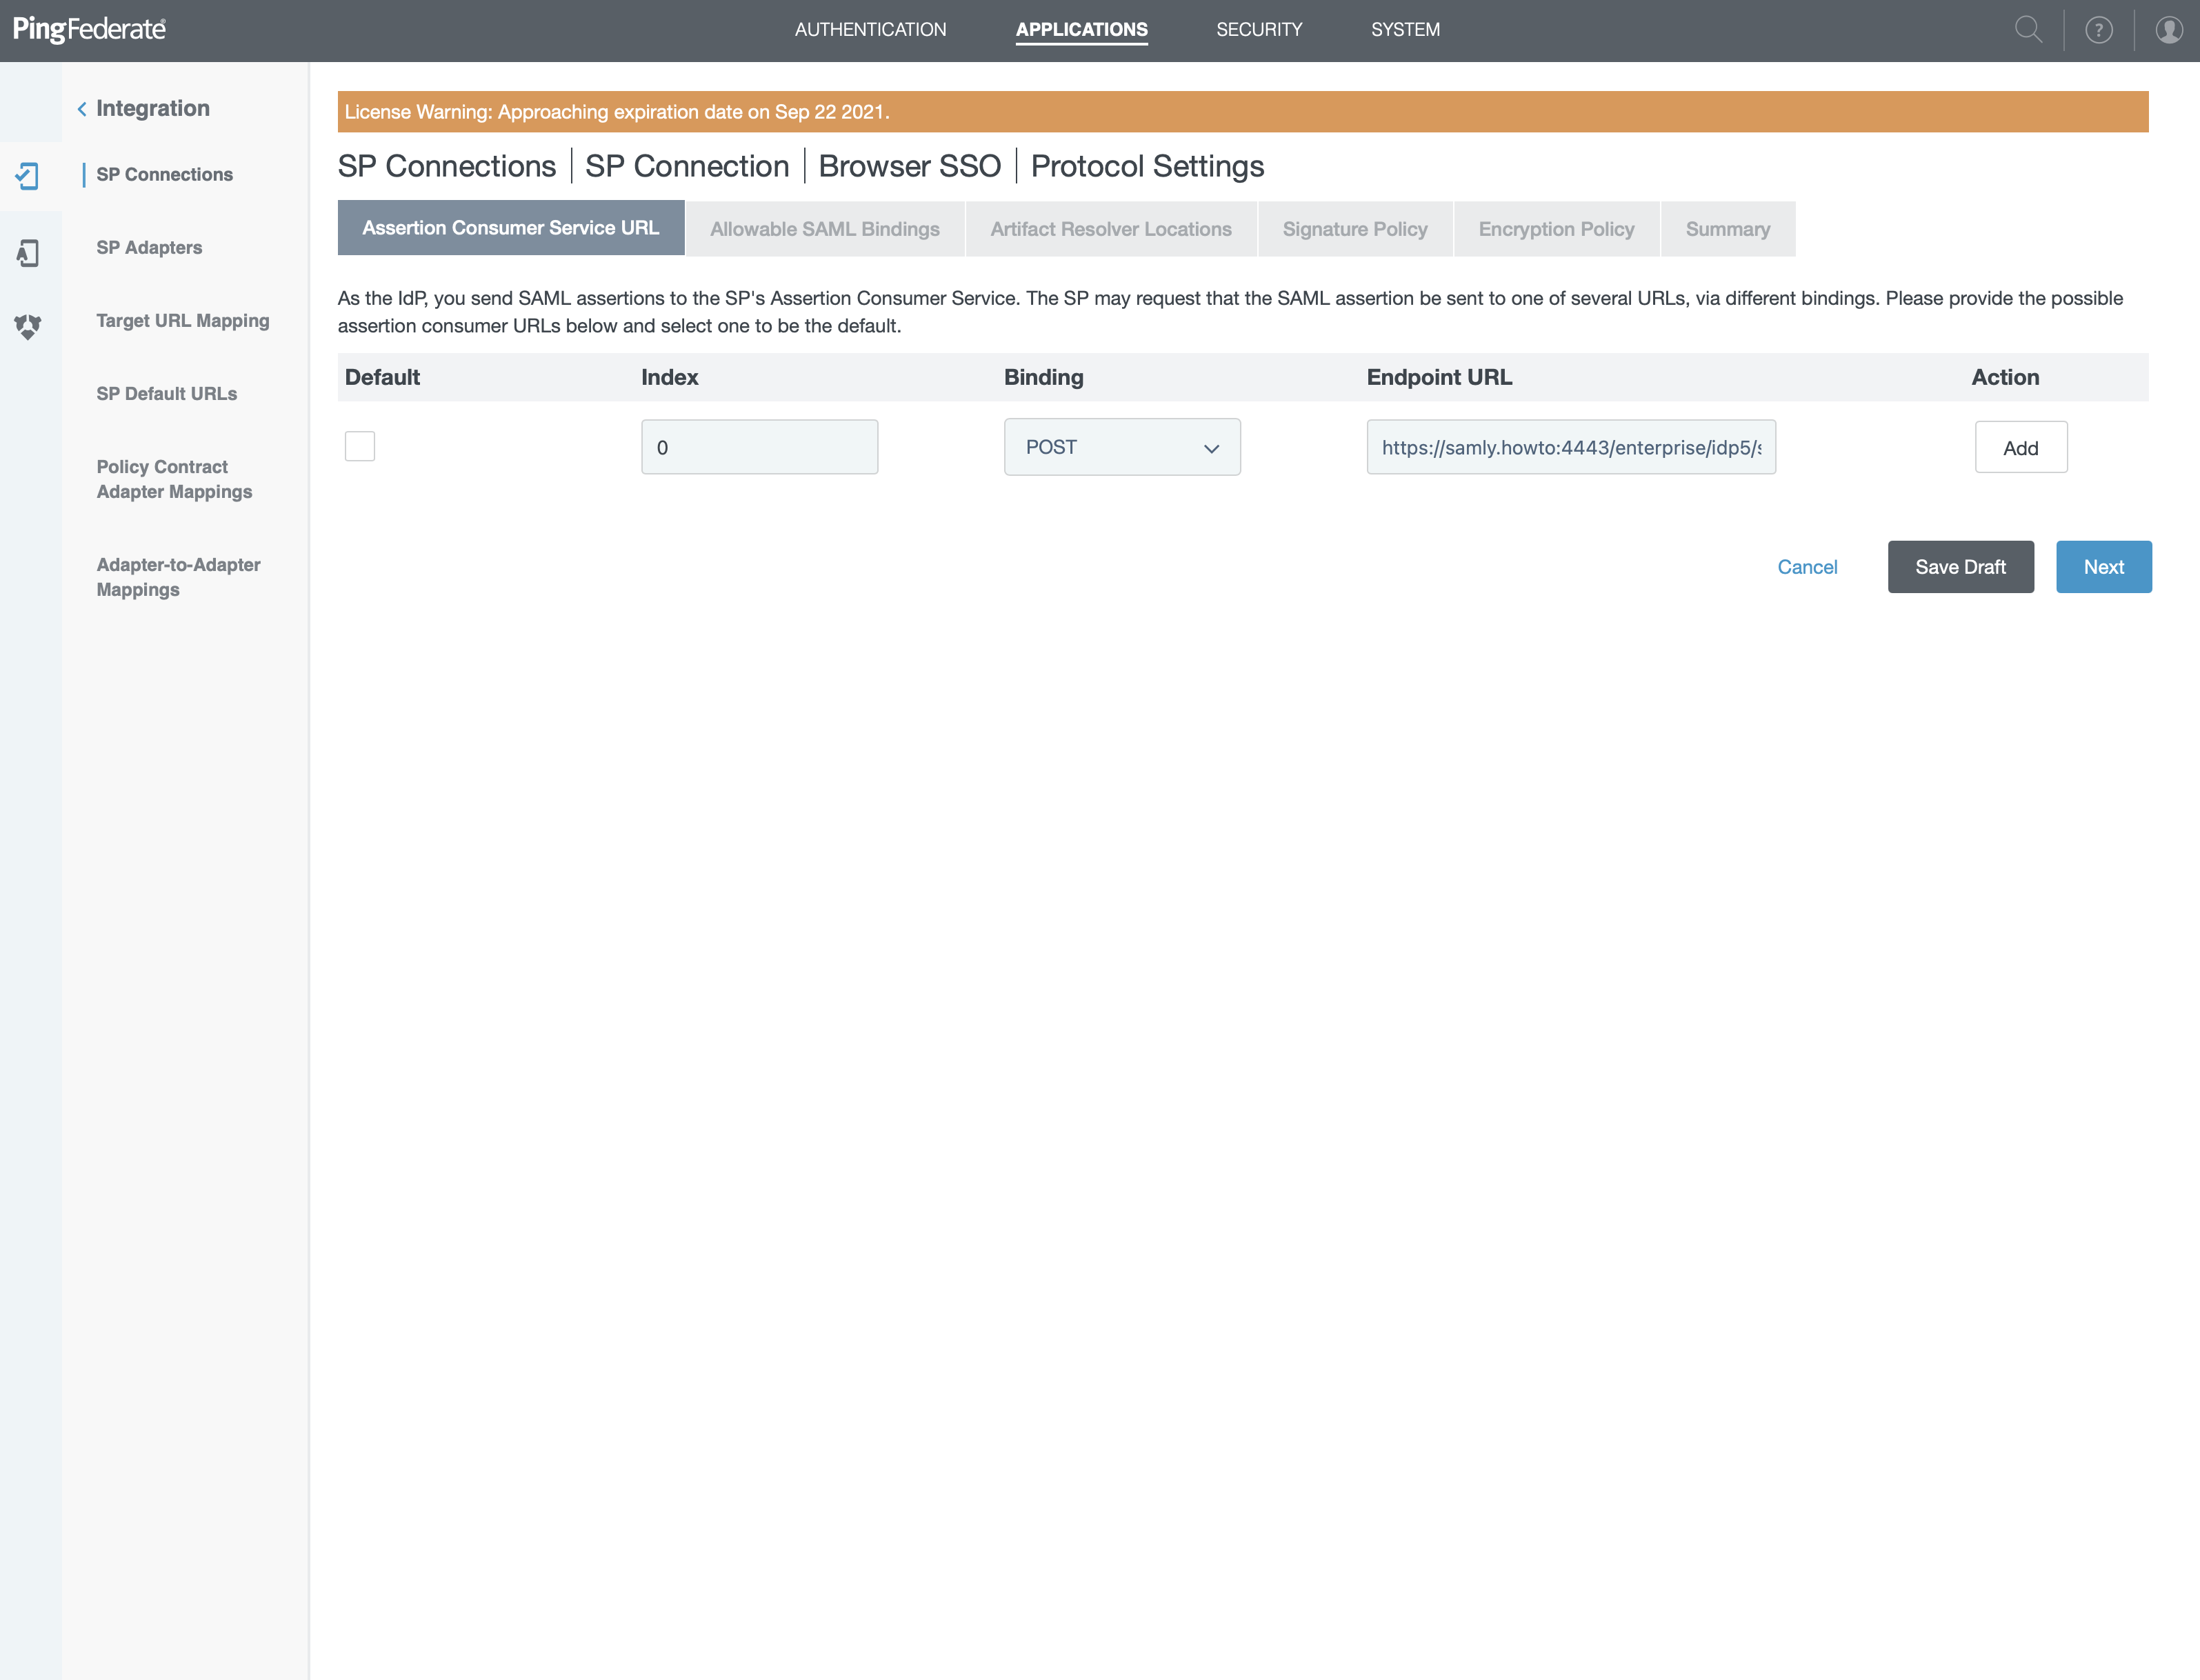
- On this screen, click "Configure Protocol Settings"
- Check "Default"
- Set "0" for index
- "POST" for Binding
- Paste value of "ACS URL" you'll find in right sidebar into "Endpoint URL" field
- Click "Add" then on Next
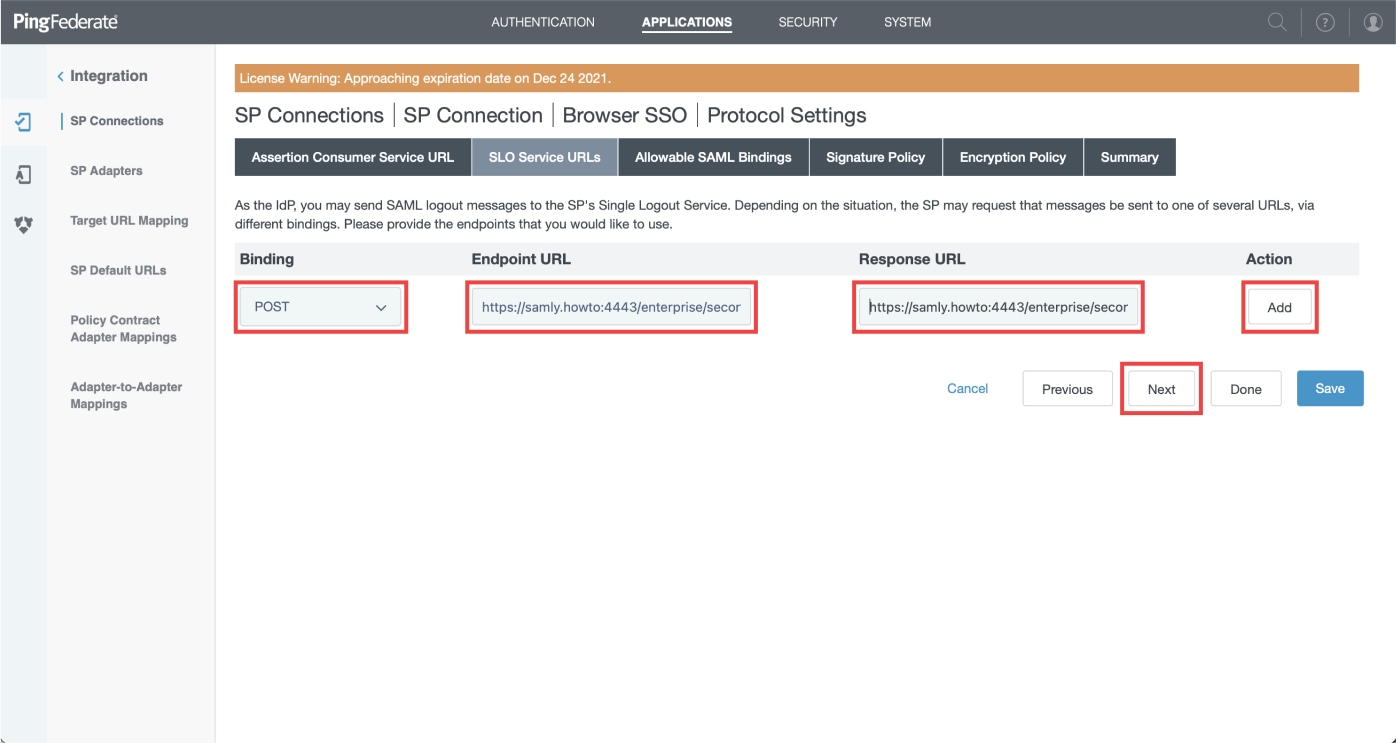
- "Redirect" as Binding
- Paste value of "SLO URL" you'll find in right sidebar into "Endpoint URL" field
- Paste value of "SLO Response URL" you'll find in right sidebar into "Response URL" field
- Click "Add" then on "Next"
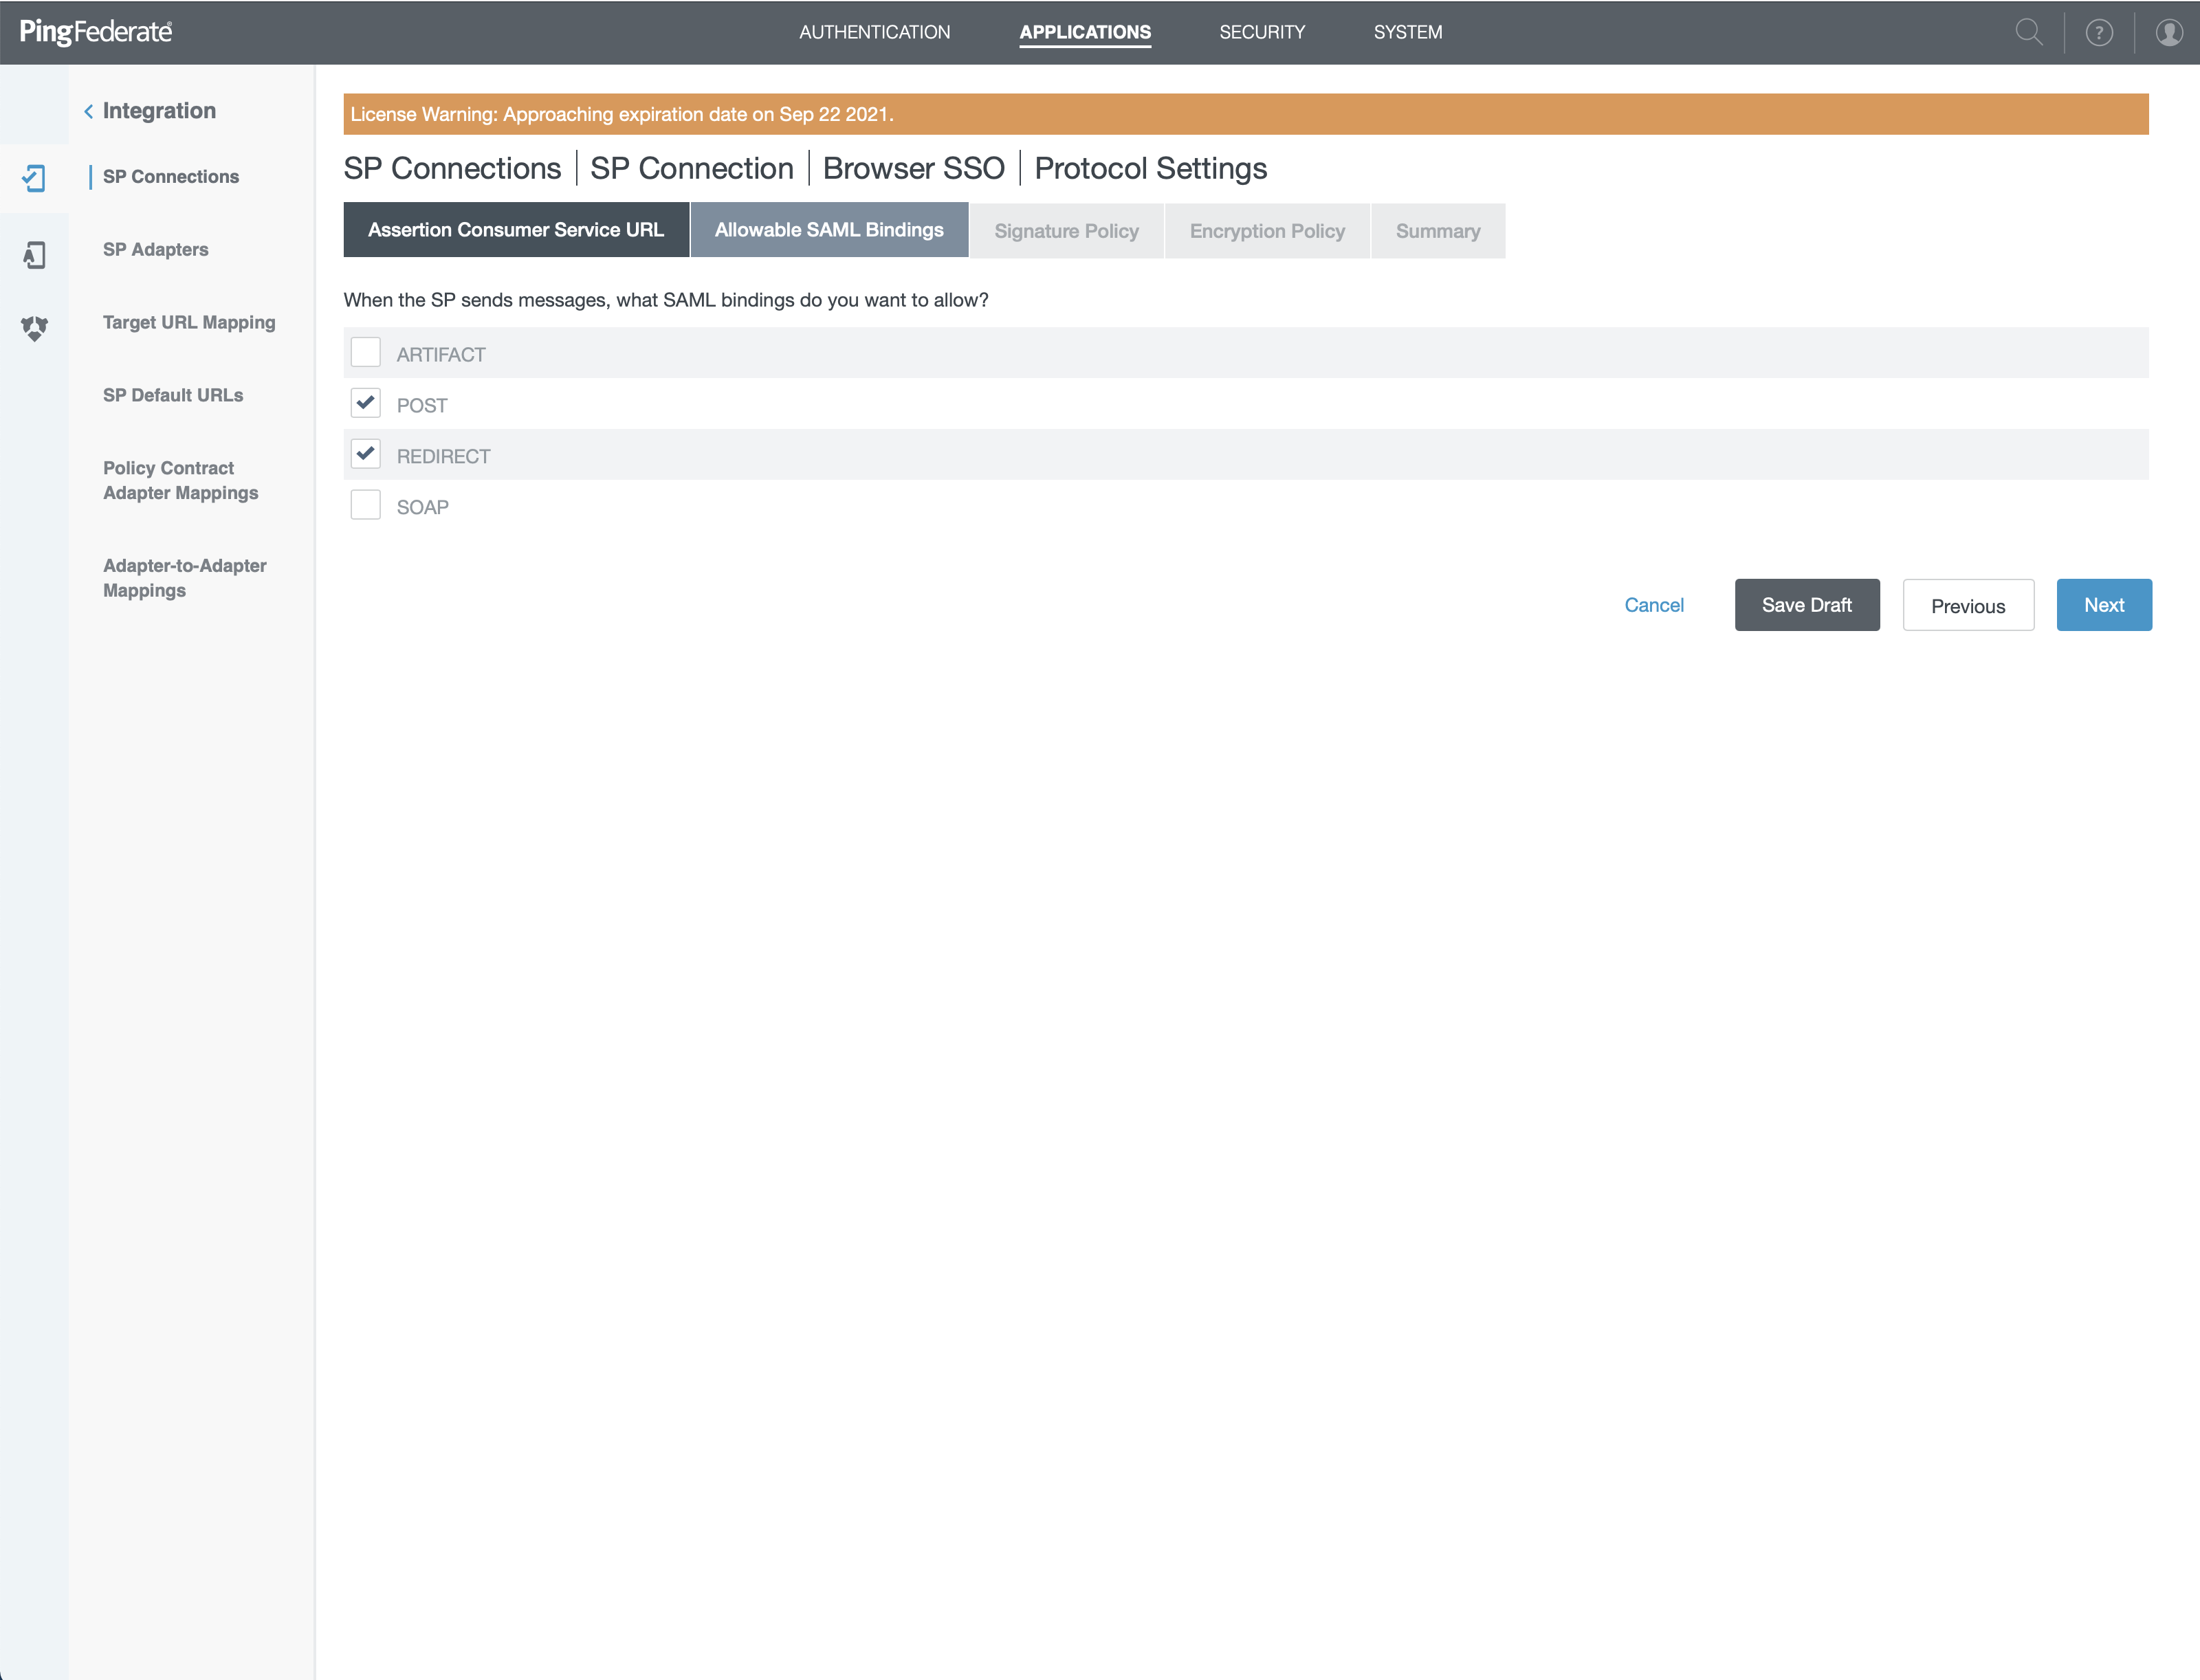
- Only check "POST" and "REDIRECT"
- Click "Next"
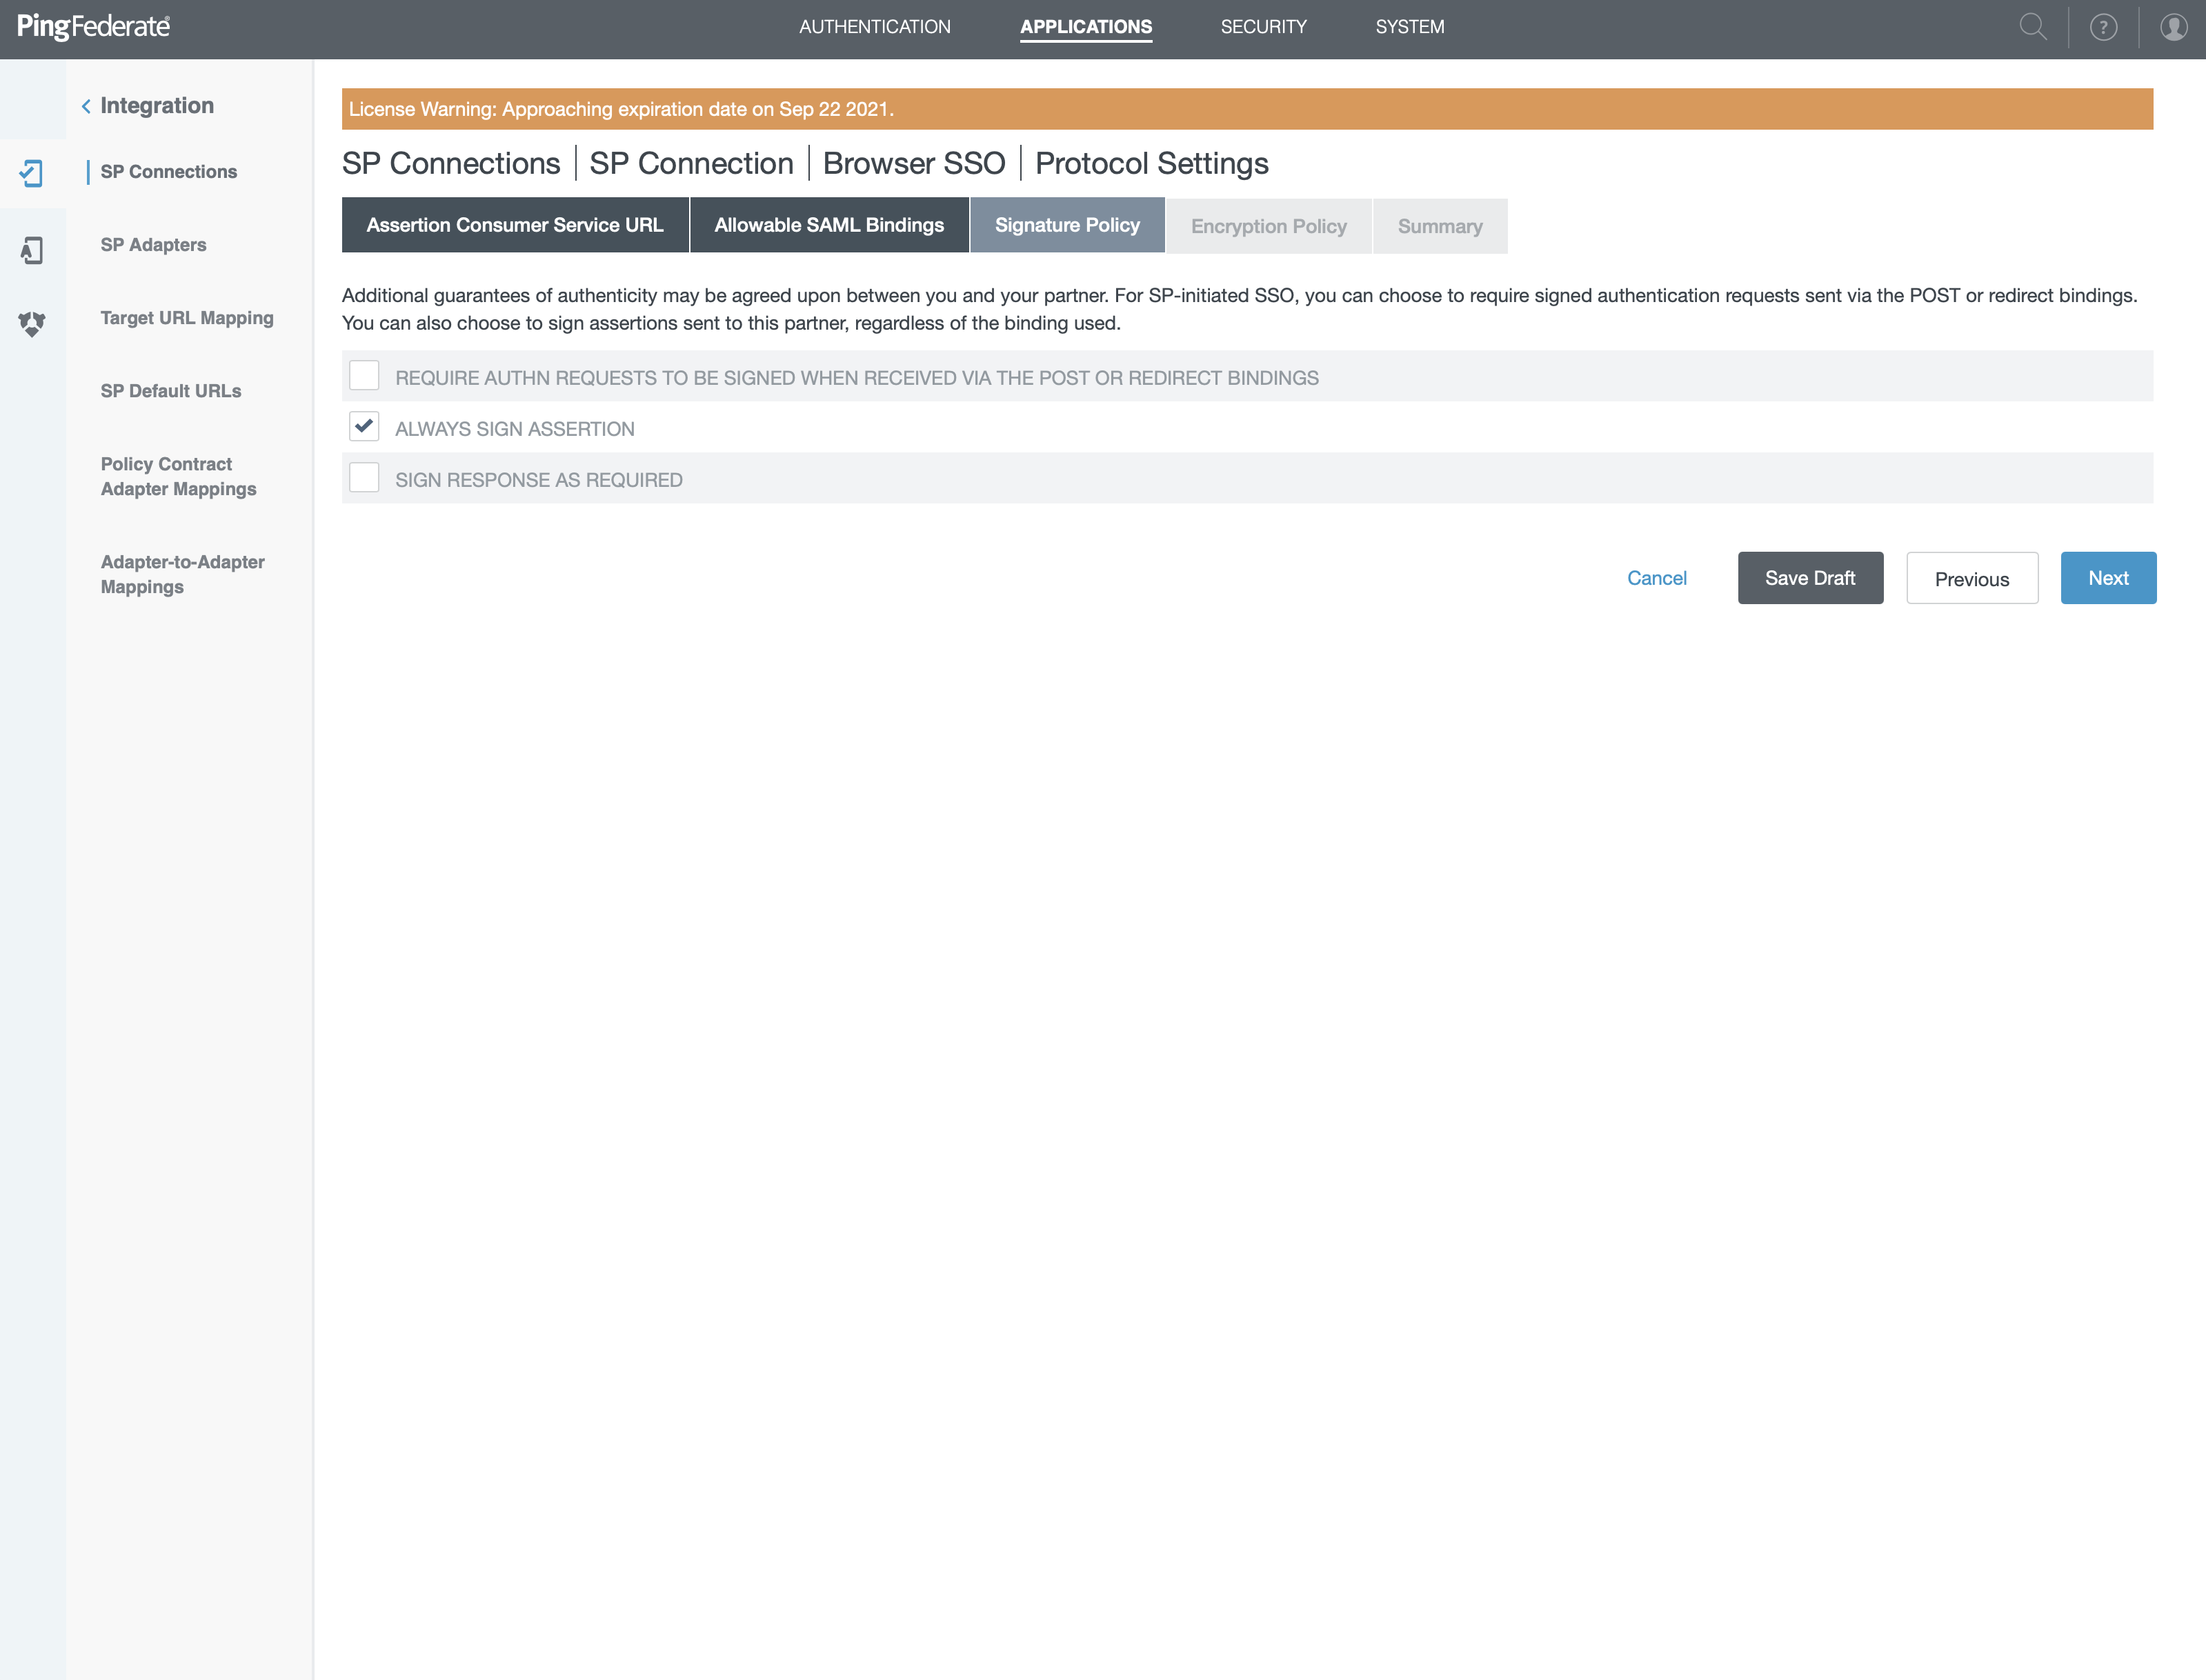
- Only check "ALWAYS SIGN ASSERTION"
- Click "Next"
- Choose "NONE"
- Click "Next"
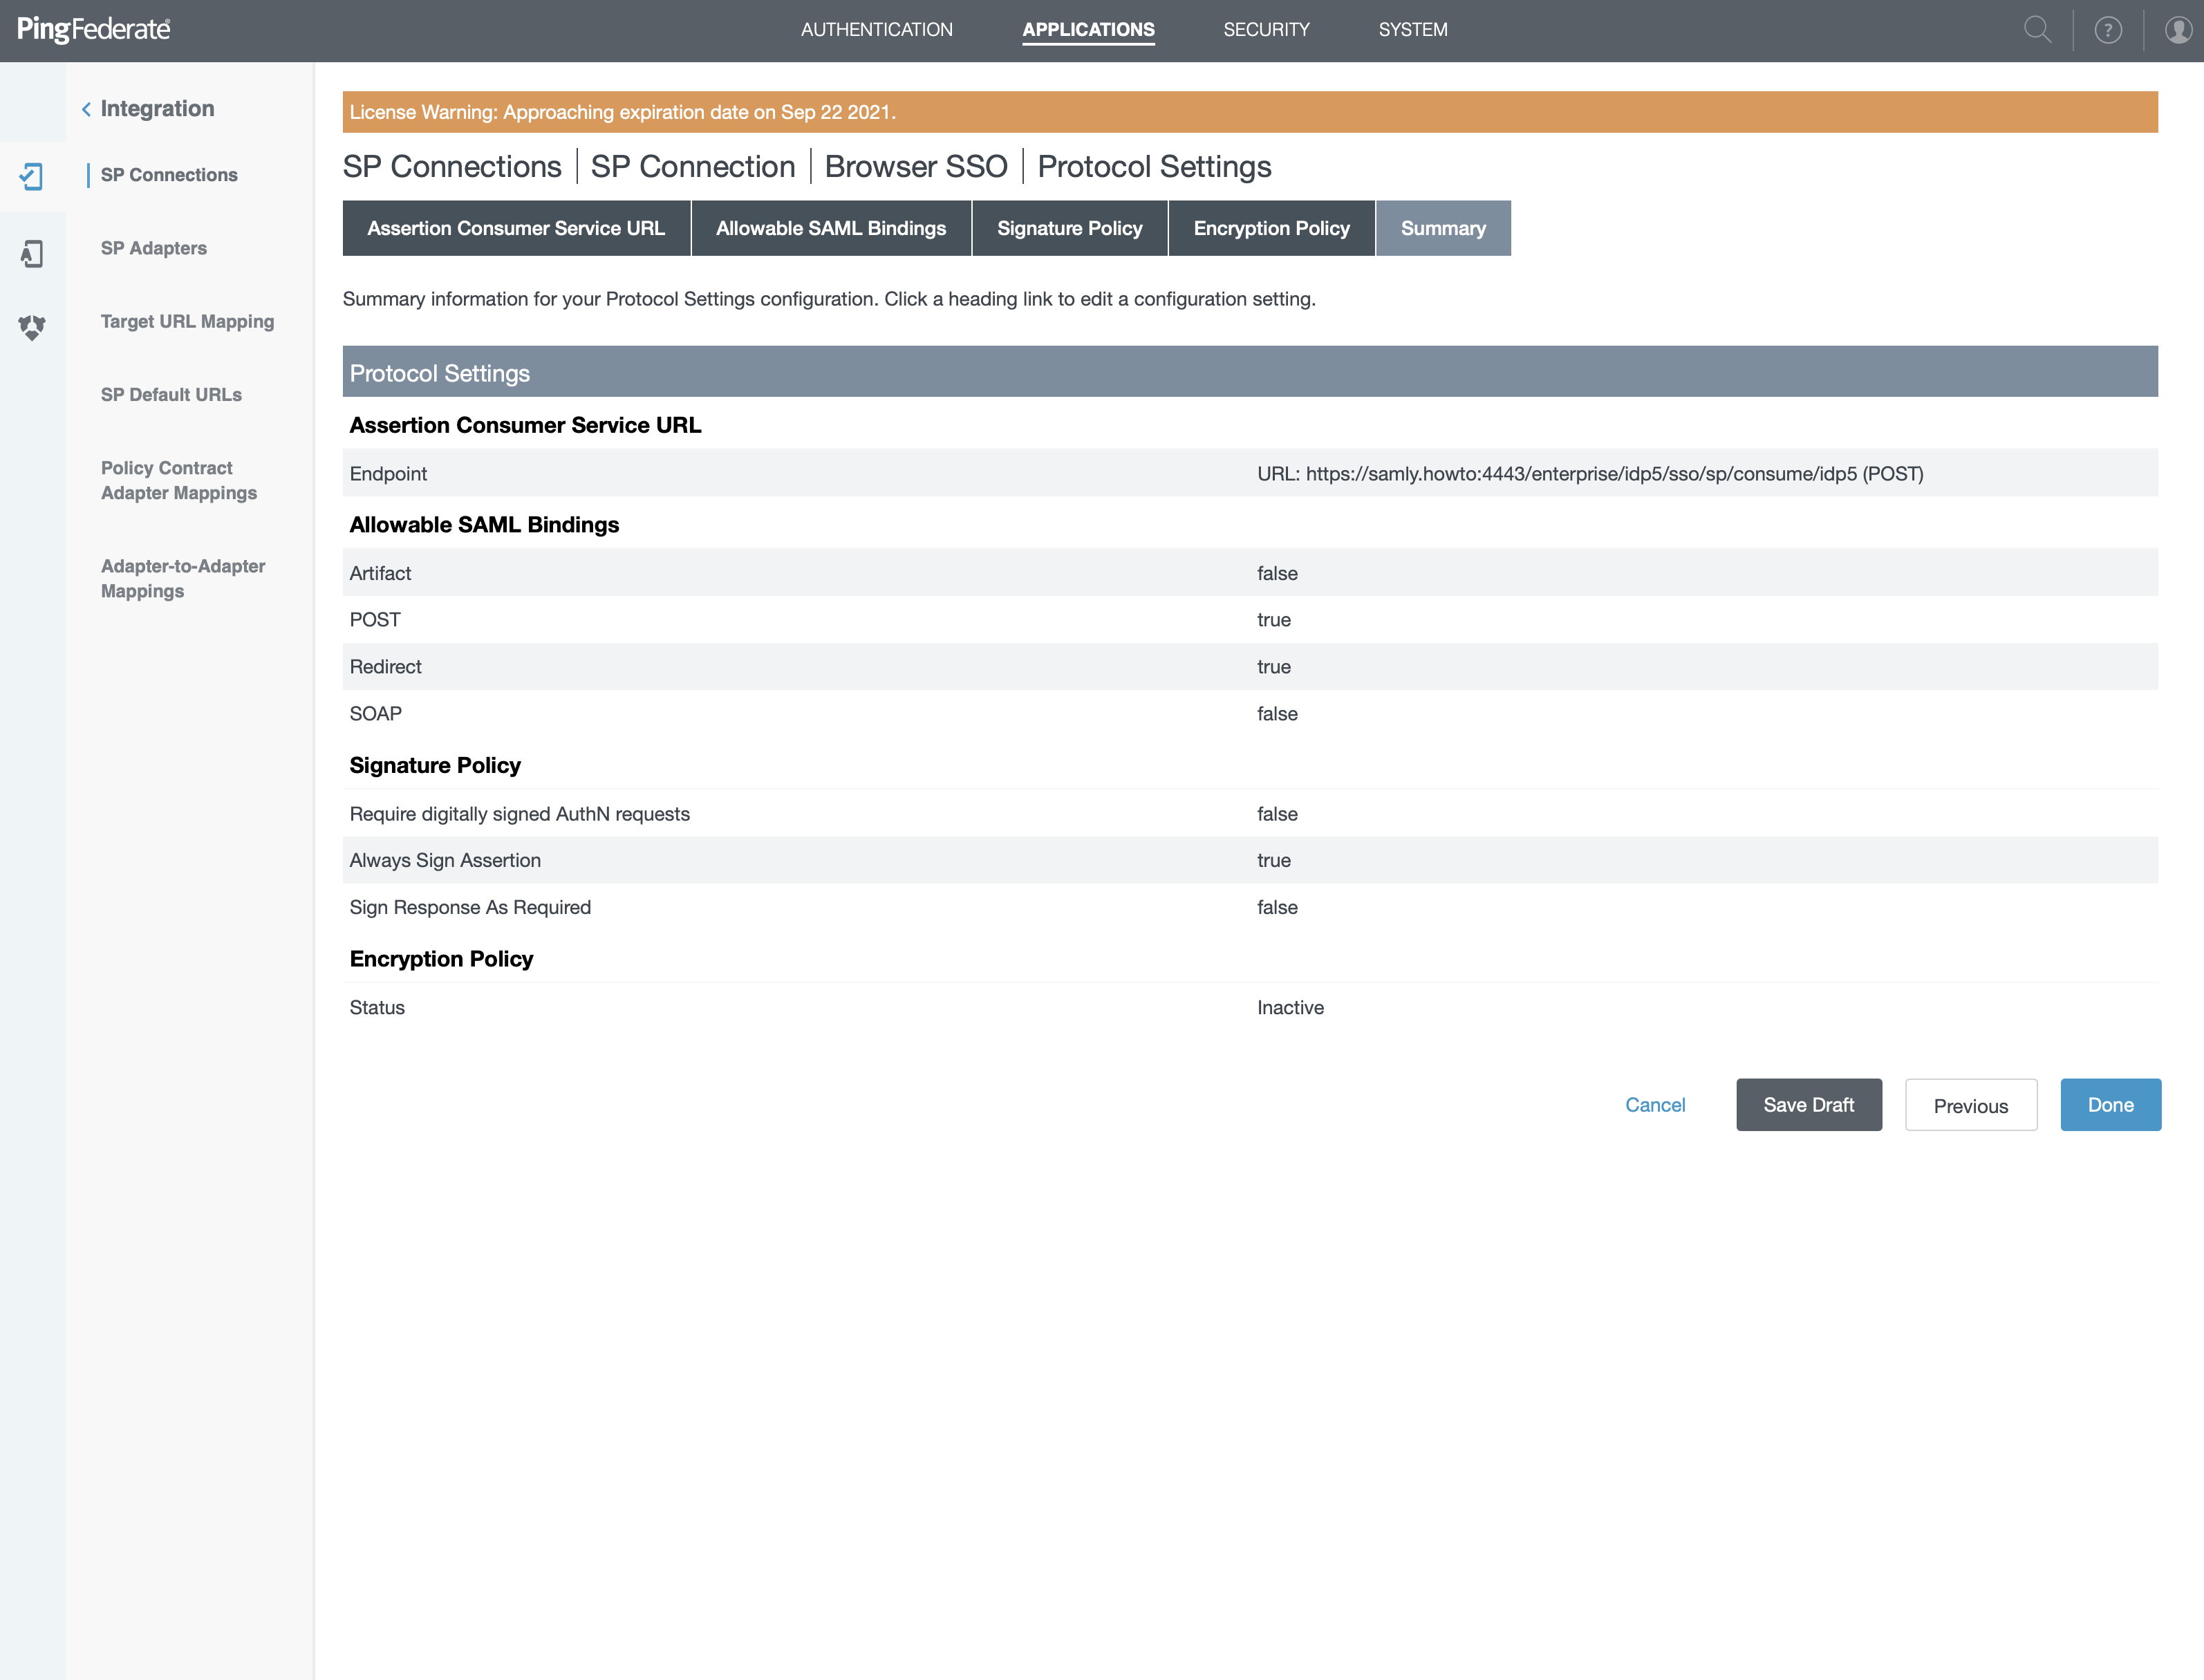
- Verify that in the summary, the endpoint equals the ACS URL from cryptr
- Click "Done"

- Click "Next" until you Arrive on "Browser SSO" summary and click "Done"
Certificate
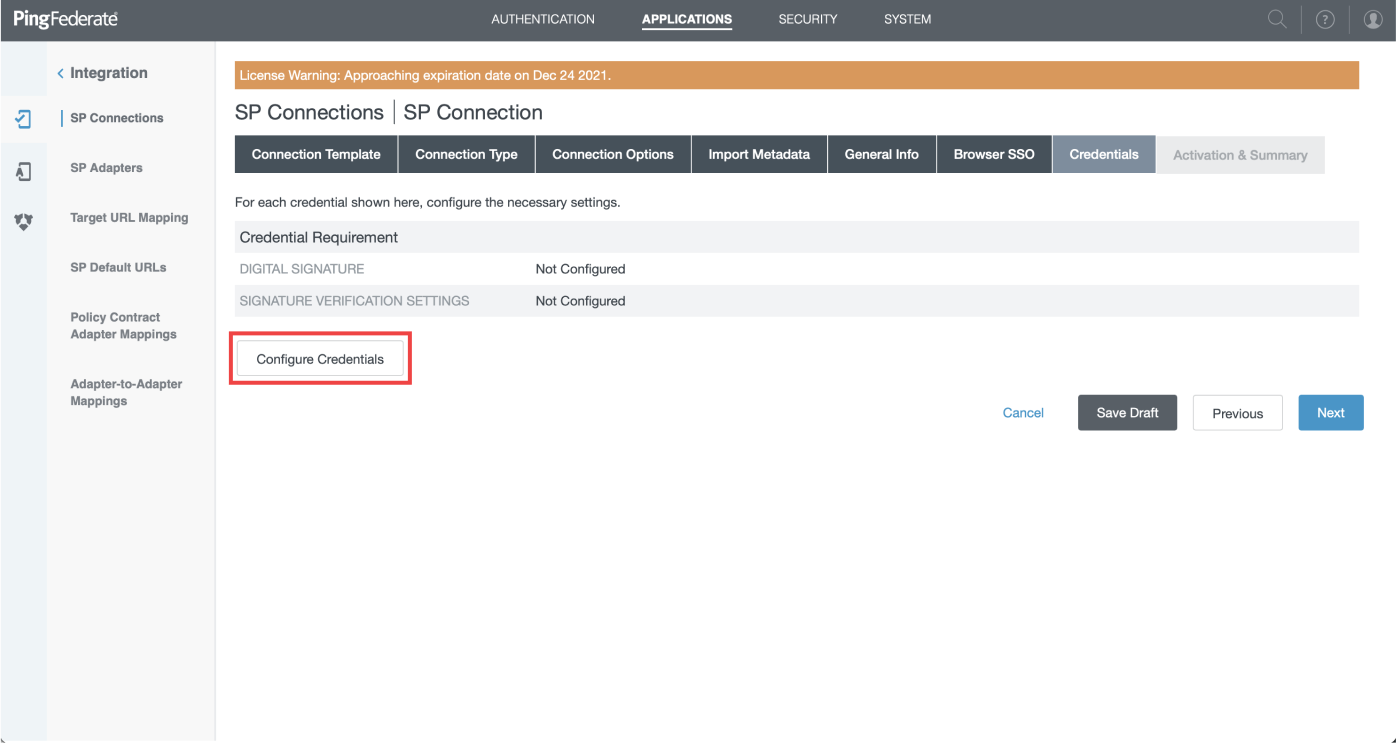
- On the new screen, click on "Configure Credentials"
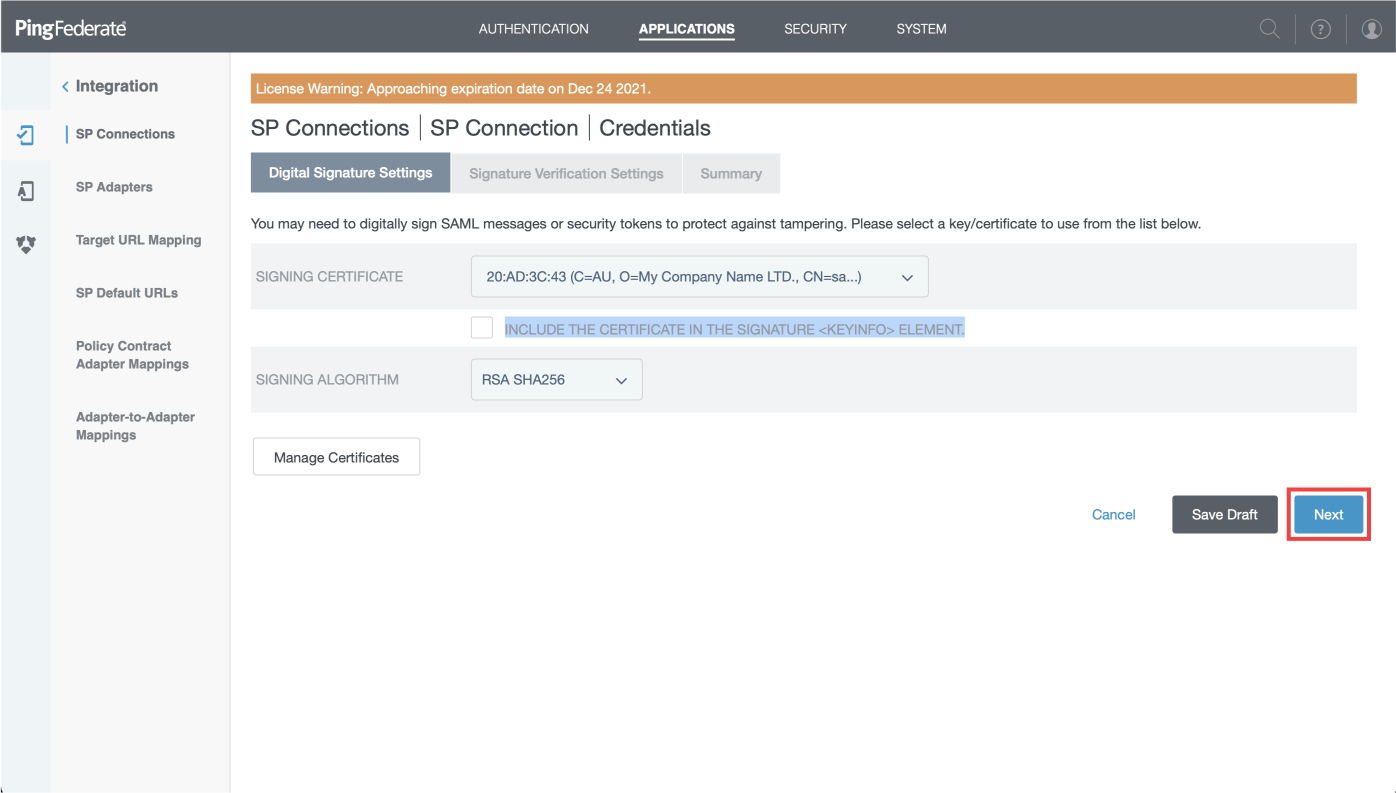
- Choose for "Signin Certificate" the default certificate you have
- Leave unchecked "INCLUDE THE CERTIFICATE IN THE SIGNATURE
<KEYINFO>ELEMENT." - Select "RSA SHA256" as signing algorithm
- Then click "Next"

- Click on "Manage Signature Verification Settings"
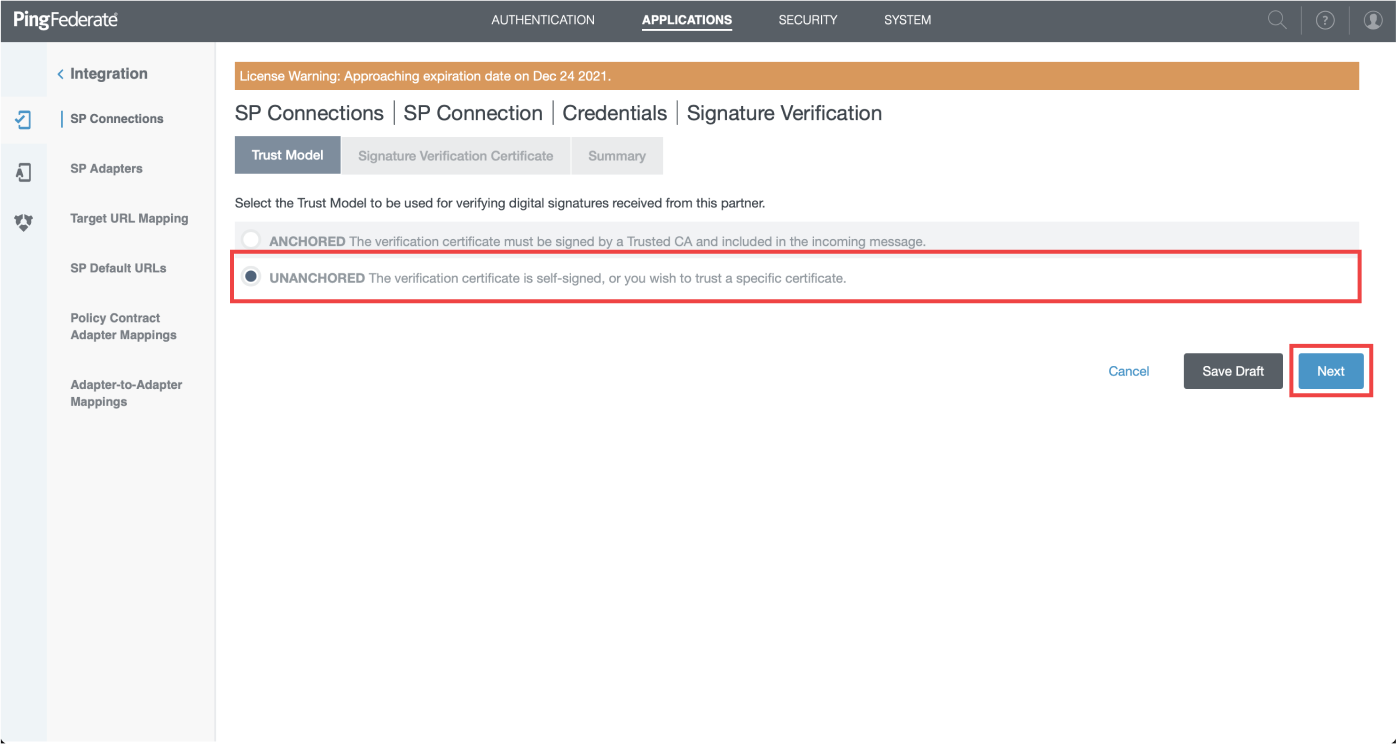
- Select "Unanchored" For trust model and click "Next"
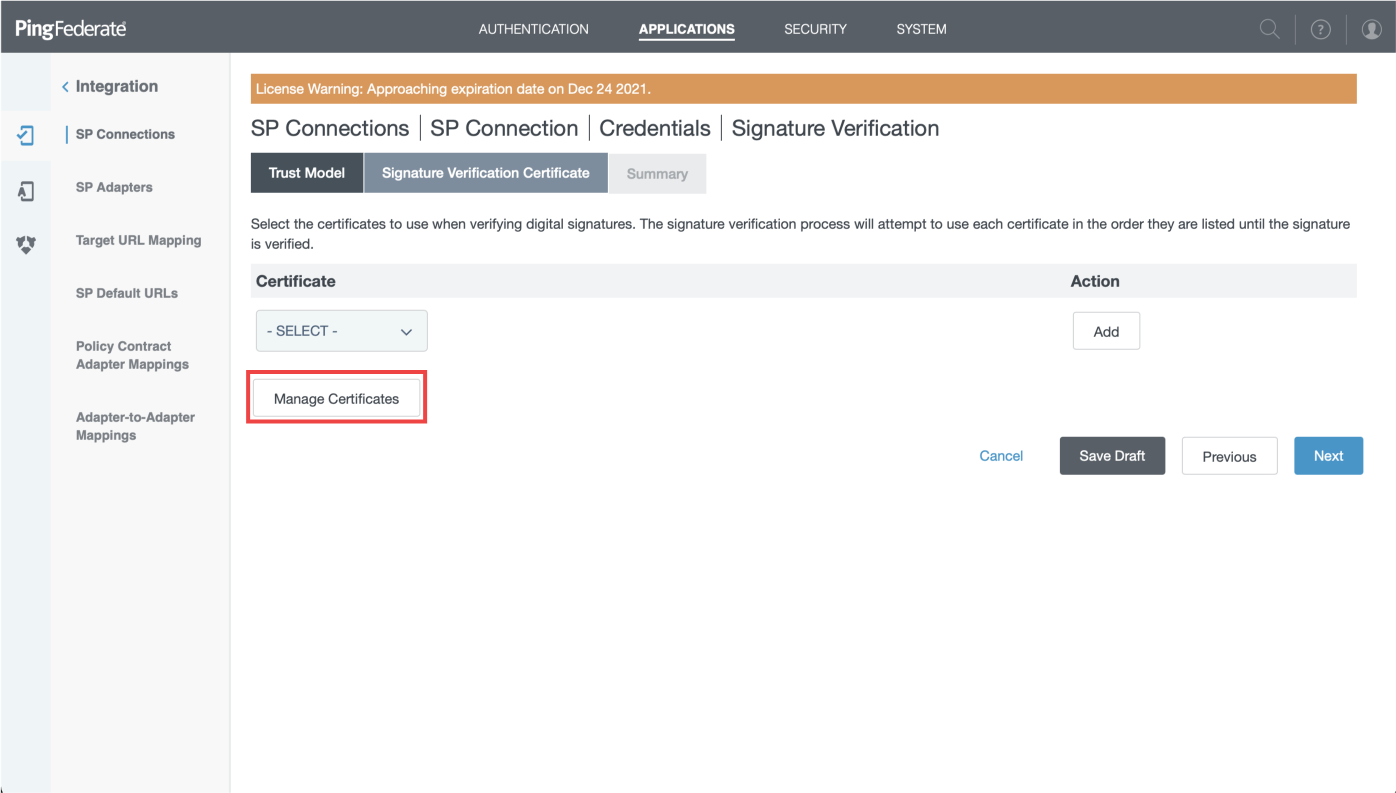
- Click on "Manage Certificates"
- Then dowload certificate in right of this screen
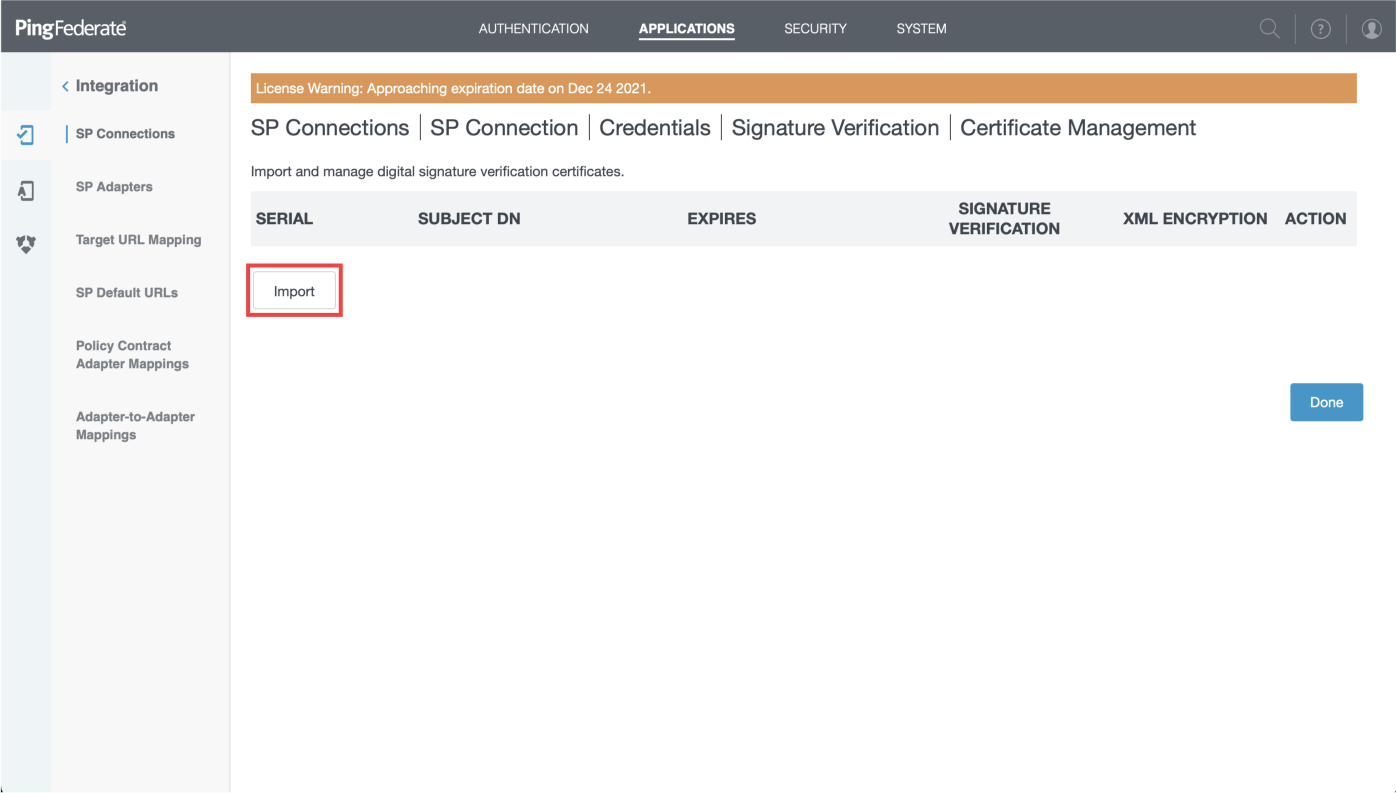
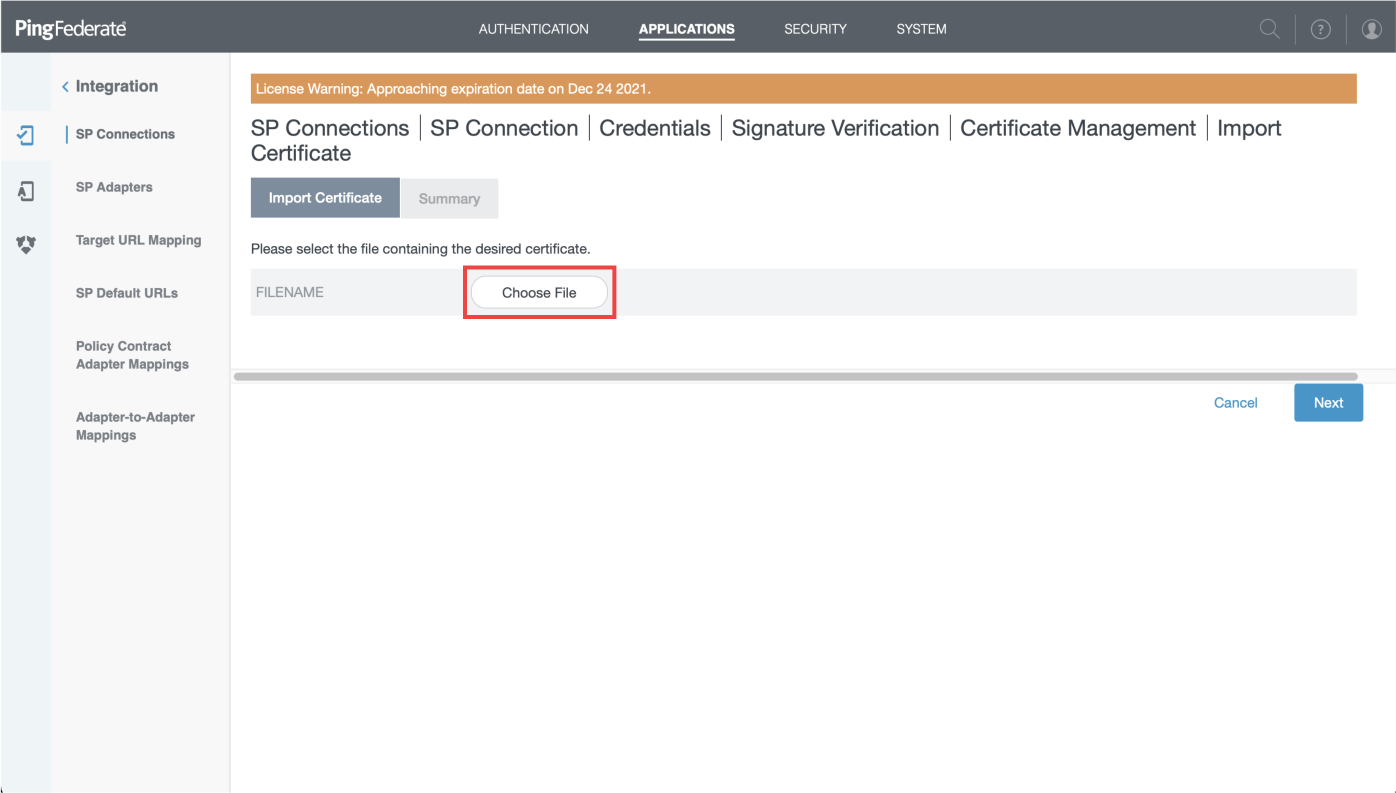
- Click on "Import" and on "Choose file"
- Pick up the downloaded file then click "Next"
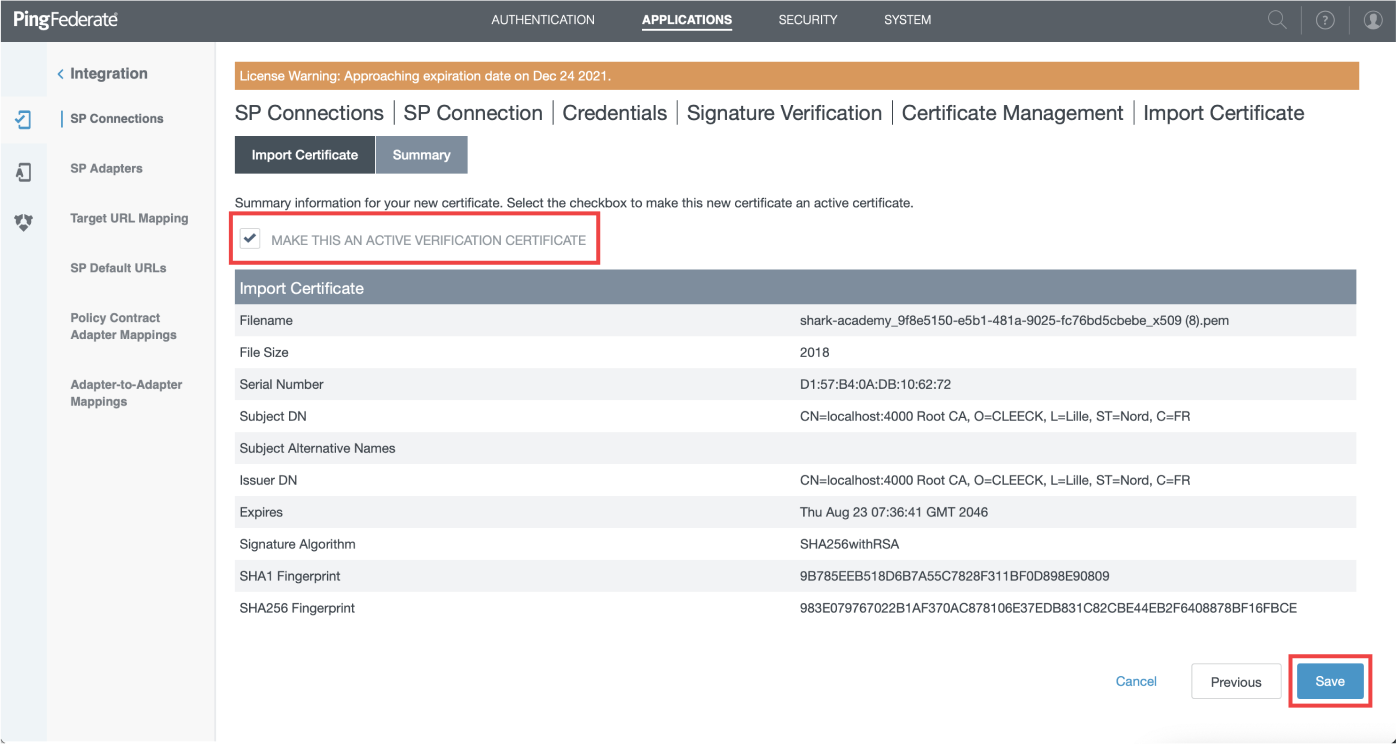
- Ensure "Make sure this an active verification certificate" is checked and click "Save", then on "Done"
- Now you can click "Next" or "Done" on next screens until the Sumary and then click on "Save"
XML Metadata file
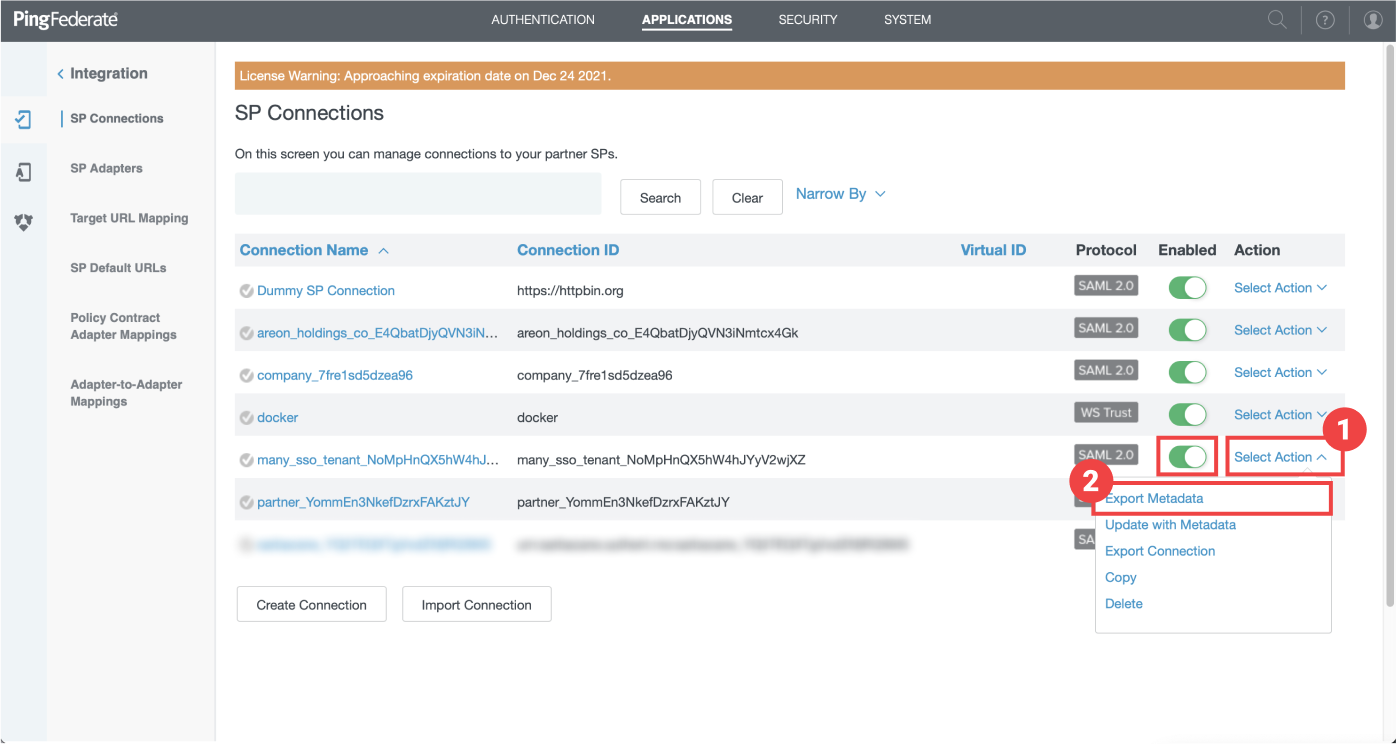
⚠️ Before exporting ensure your SP Connection is Enabled (switch on SP connection listing)
- Click on "Select Action"
- Click on "Export Metadata"
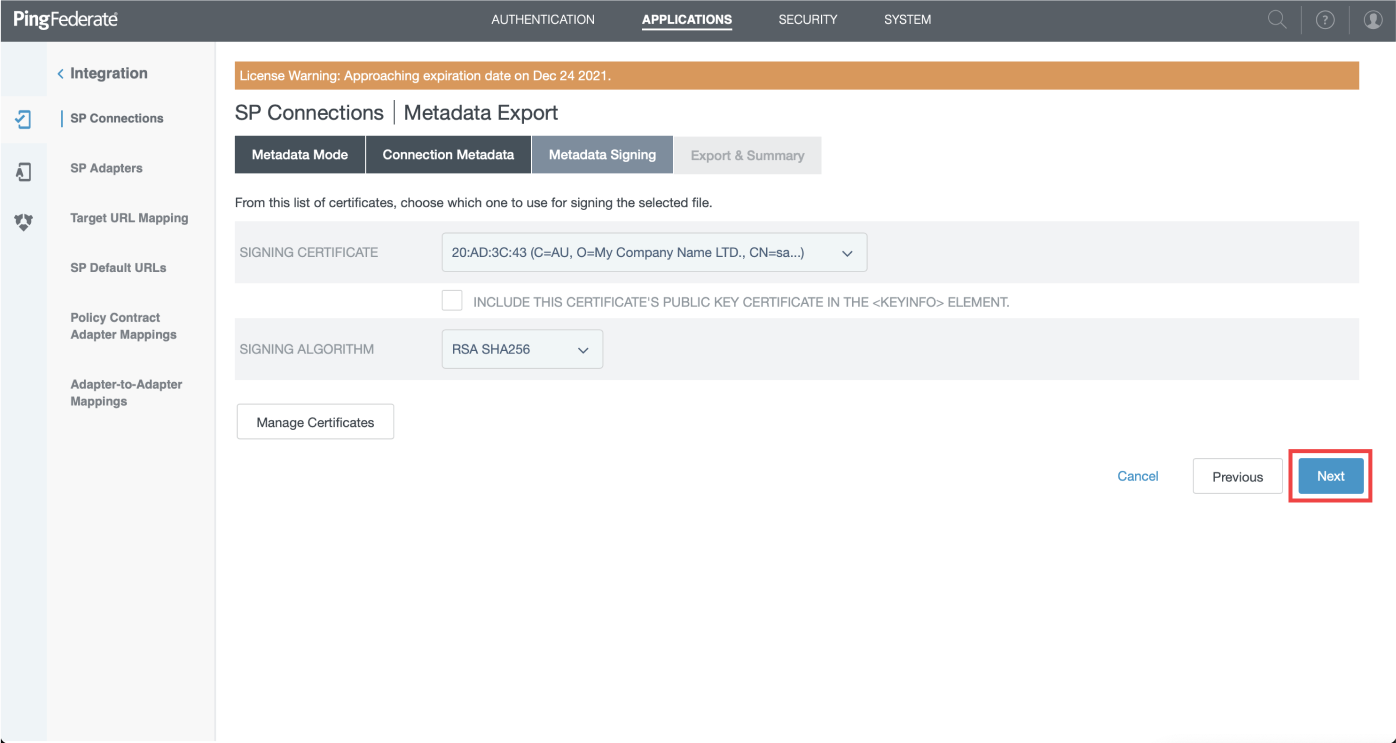
- Choose the default certificate for "signing certificate" field and click "Next"
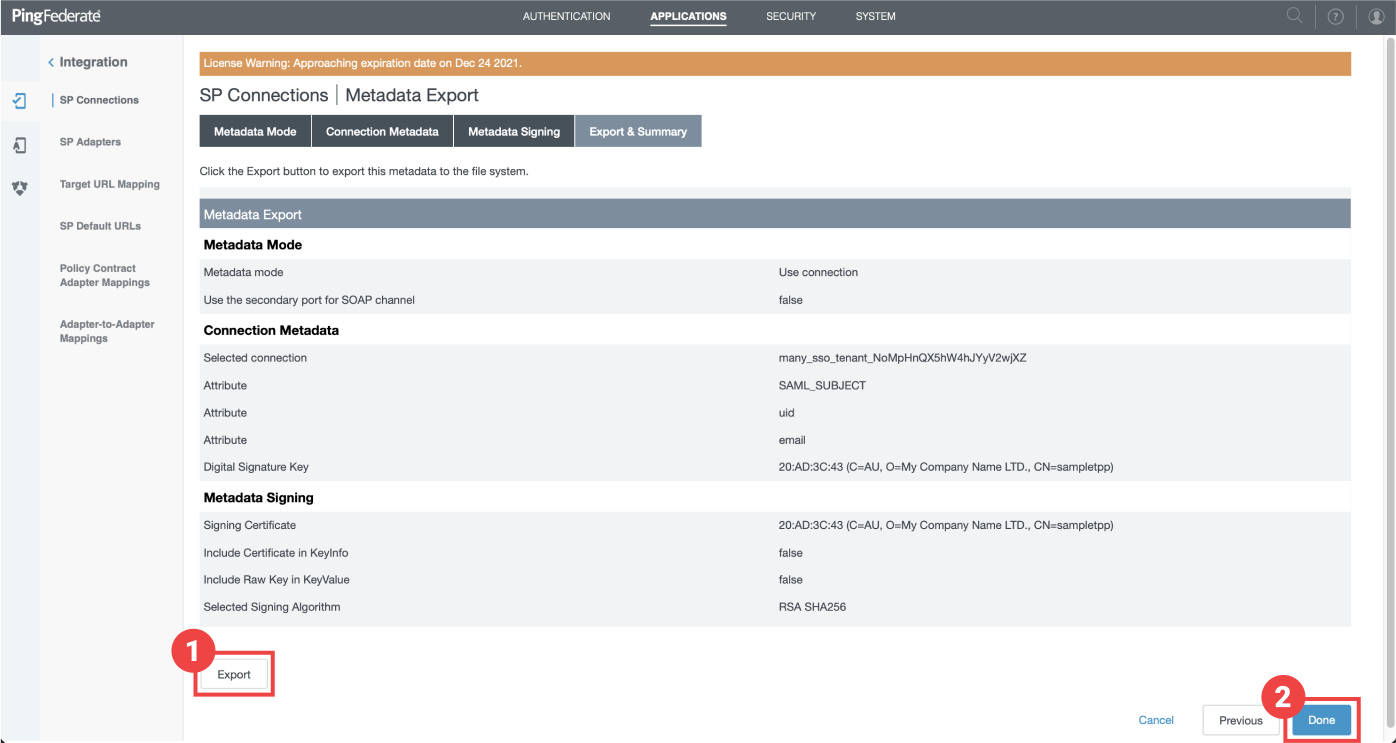
- Click on "Export" in the new screen to download your file on your machine.
- Your are now good to upload in this tutorial your XML file
- Drop your downloaded XML metadata
Add Users to your application
Add some users to this app
Test SSO login
Test SSO login