Onelogin
Discover step-by-step instructions on configuring a connection with Onelogin. Learn how to integrate your application with Onelogin for secure and streamlined SSO authentication.
How to start
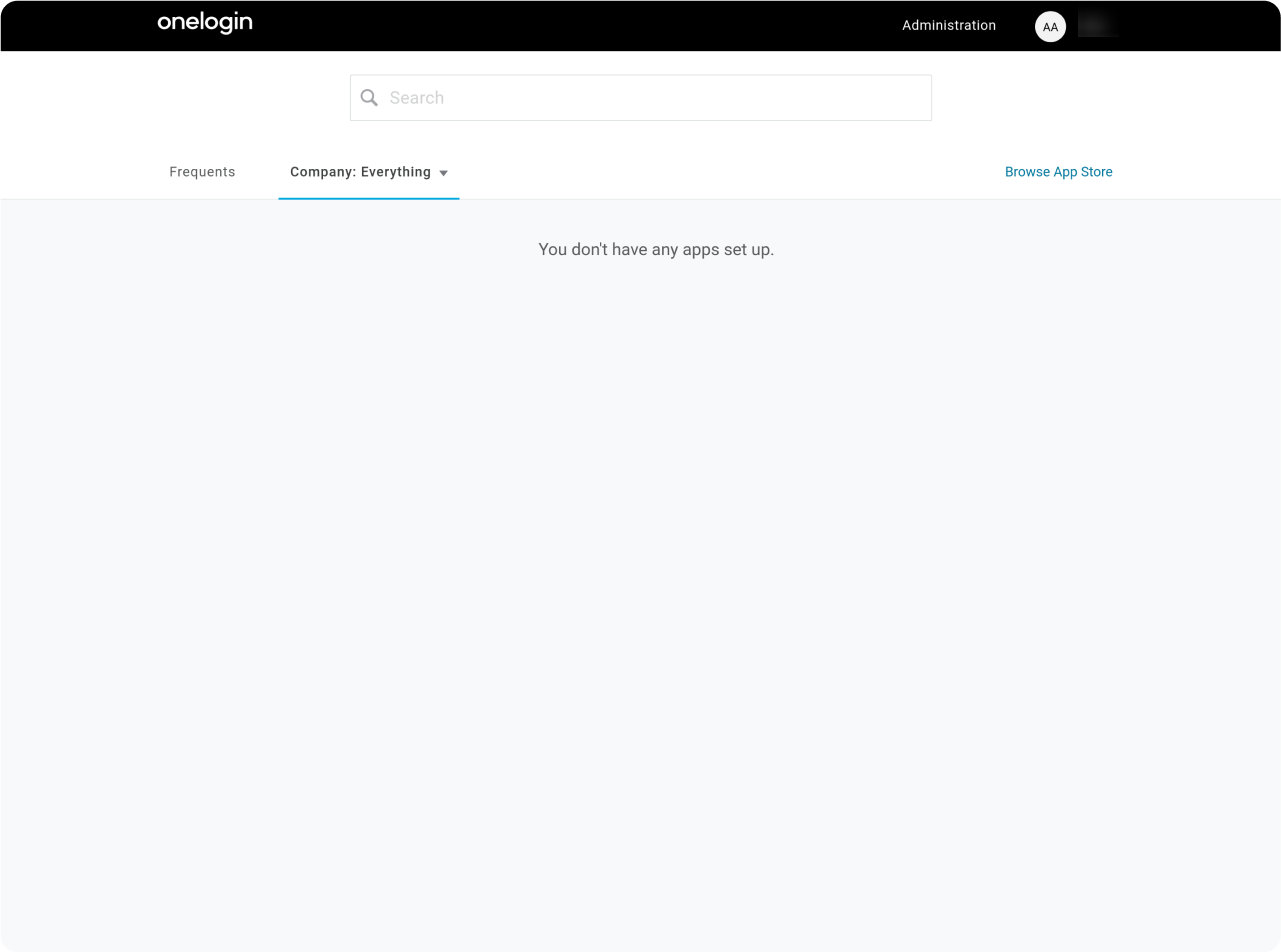
Click on "Administration"
Declare an application
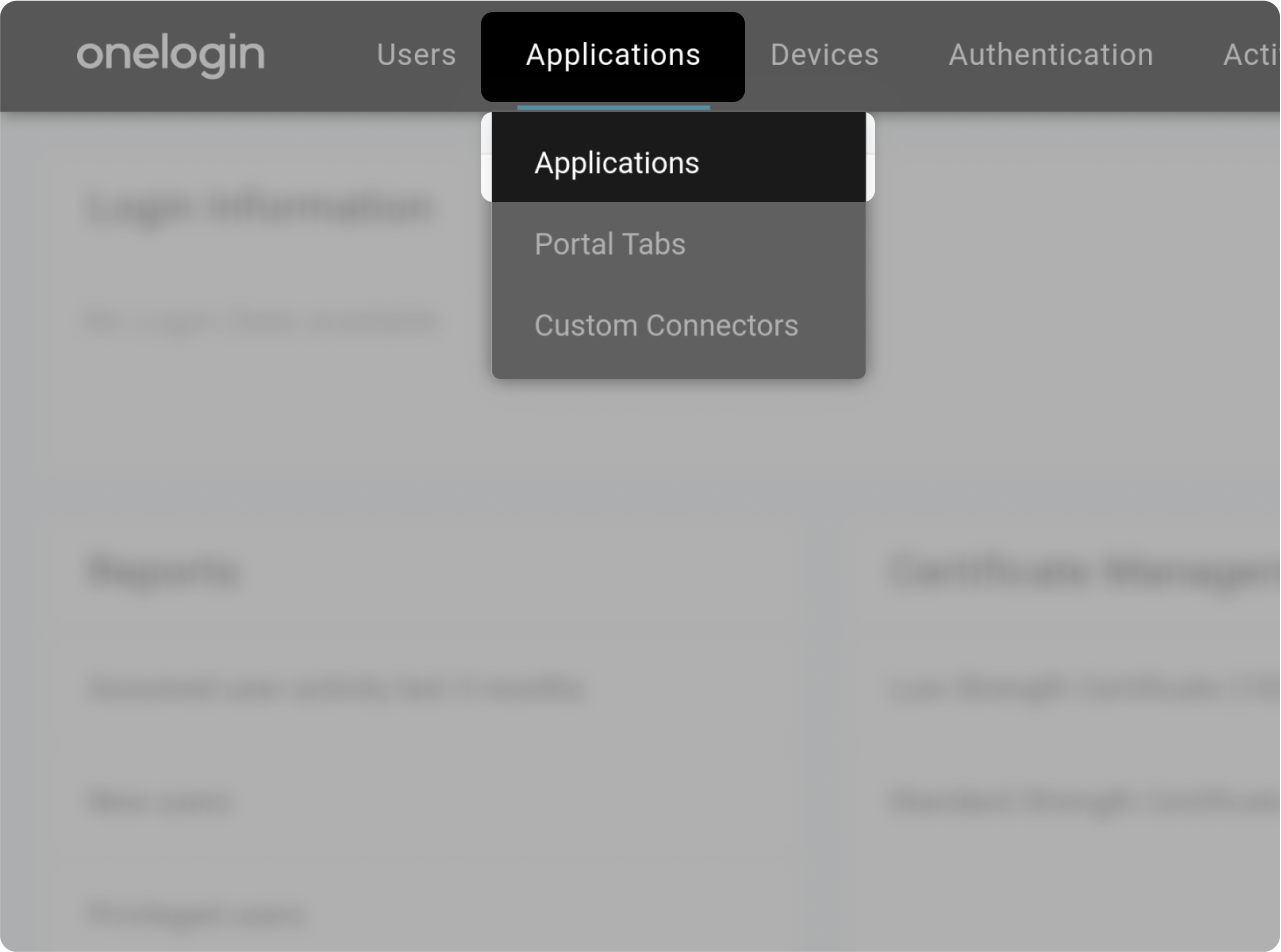
Go to Applications section ("Applications" > "Applications")
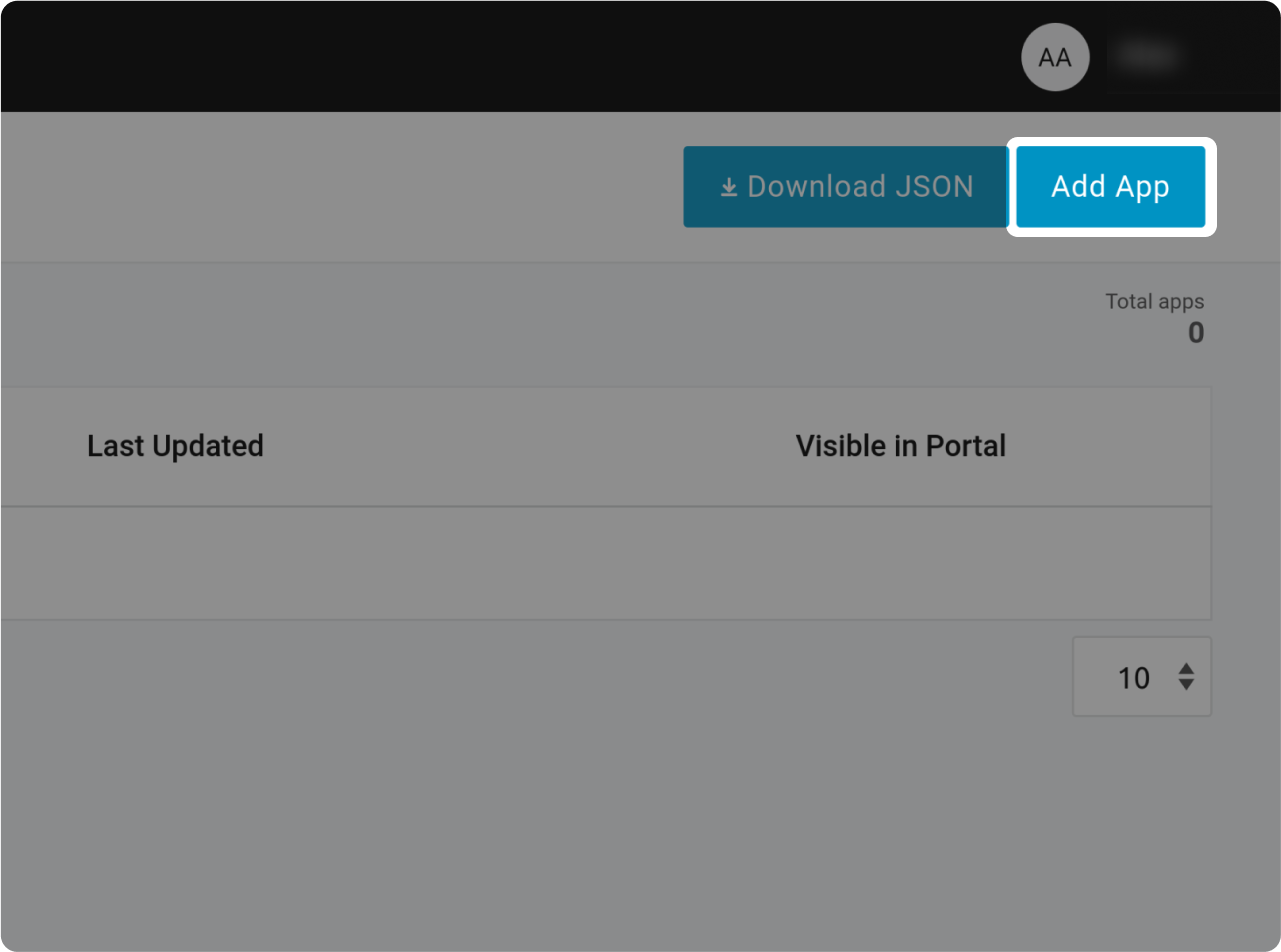
Click on "Add App" button
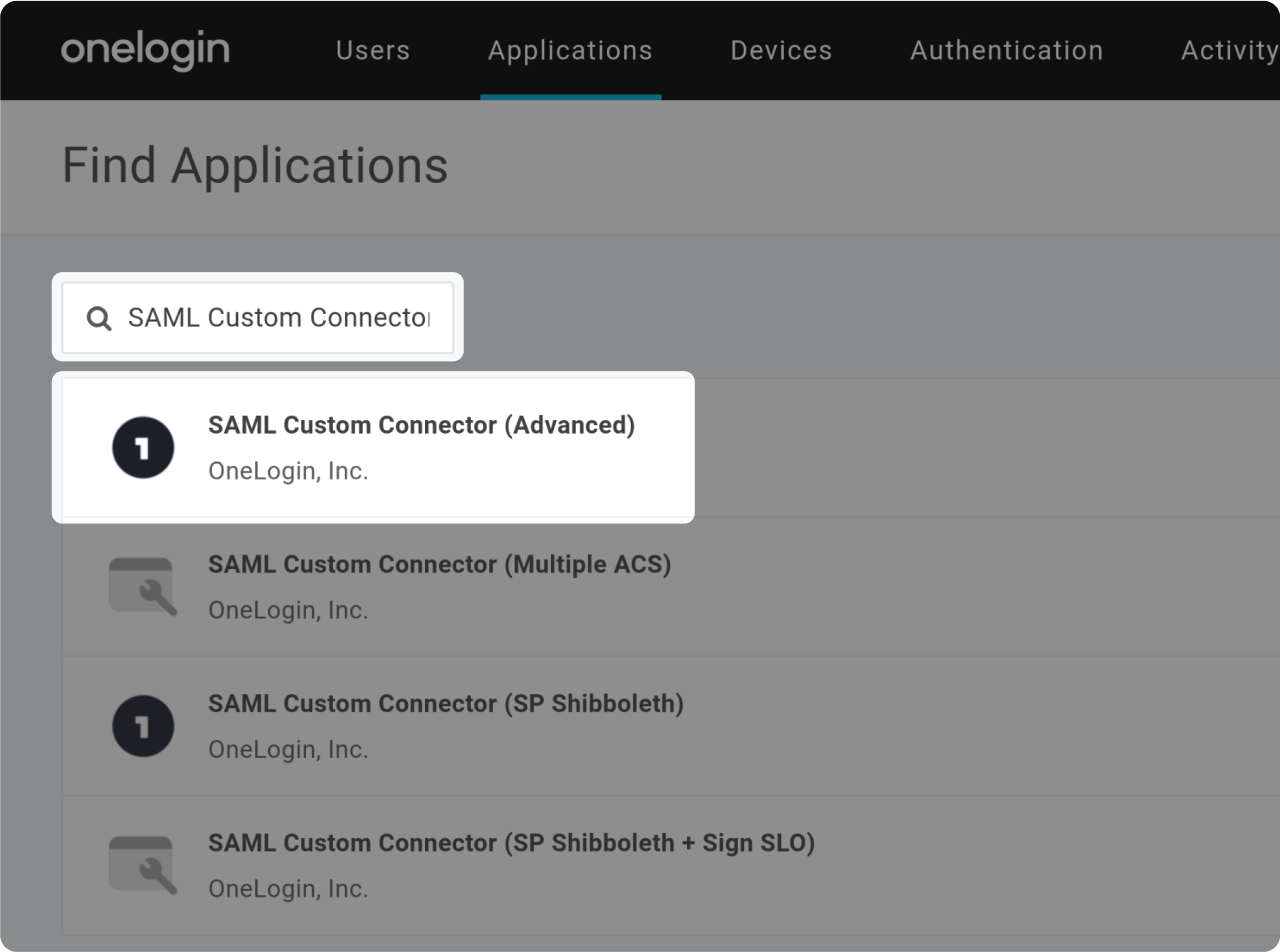
Choose "SAML Custom Connector (Advanced)" by typing "SAML Custom Connector (Advanced)" in the search field.
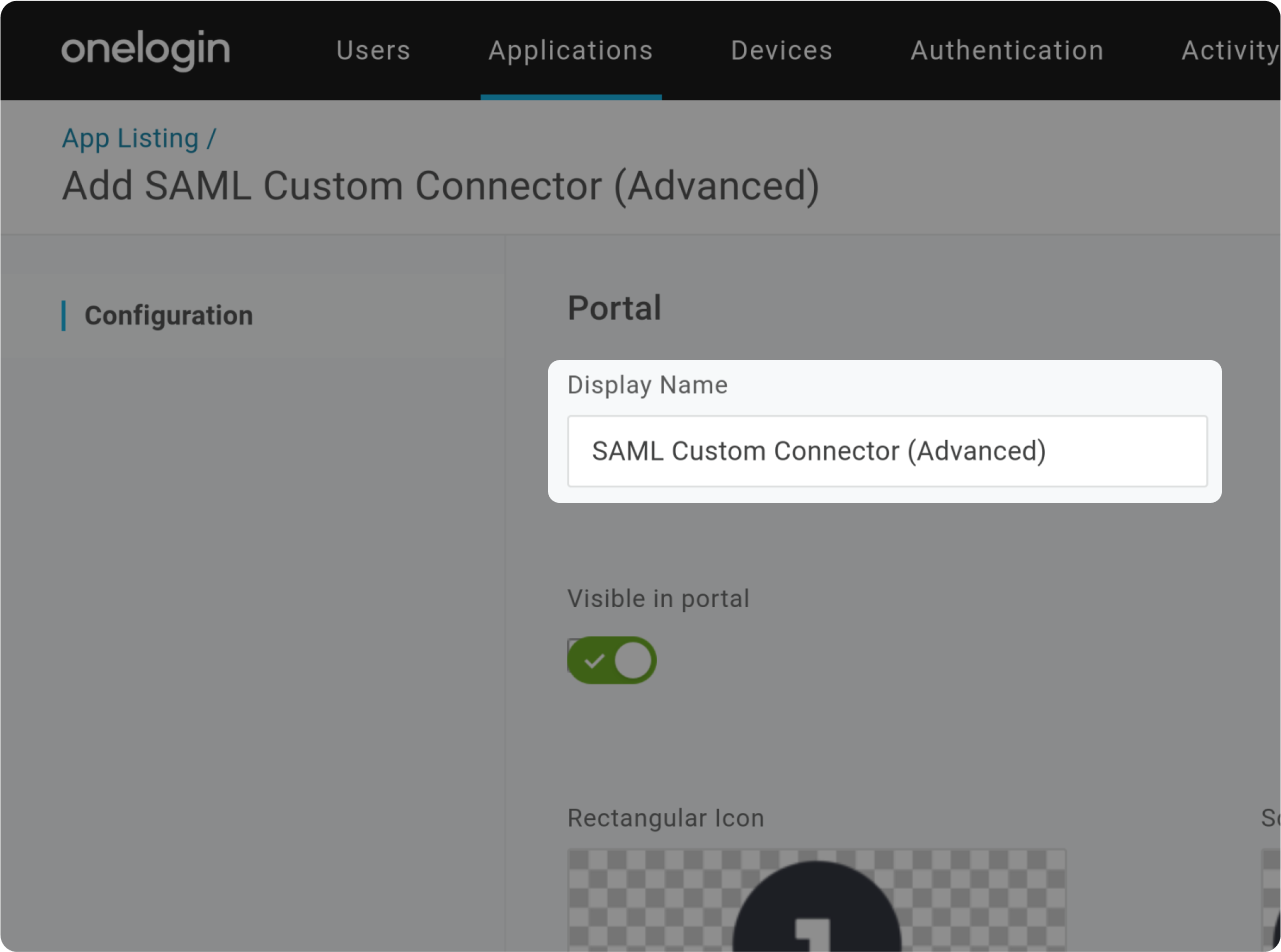
Fill "Display Name" (and description/icon if you want), then click "Save"
SAML configuration
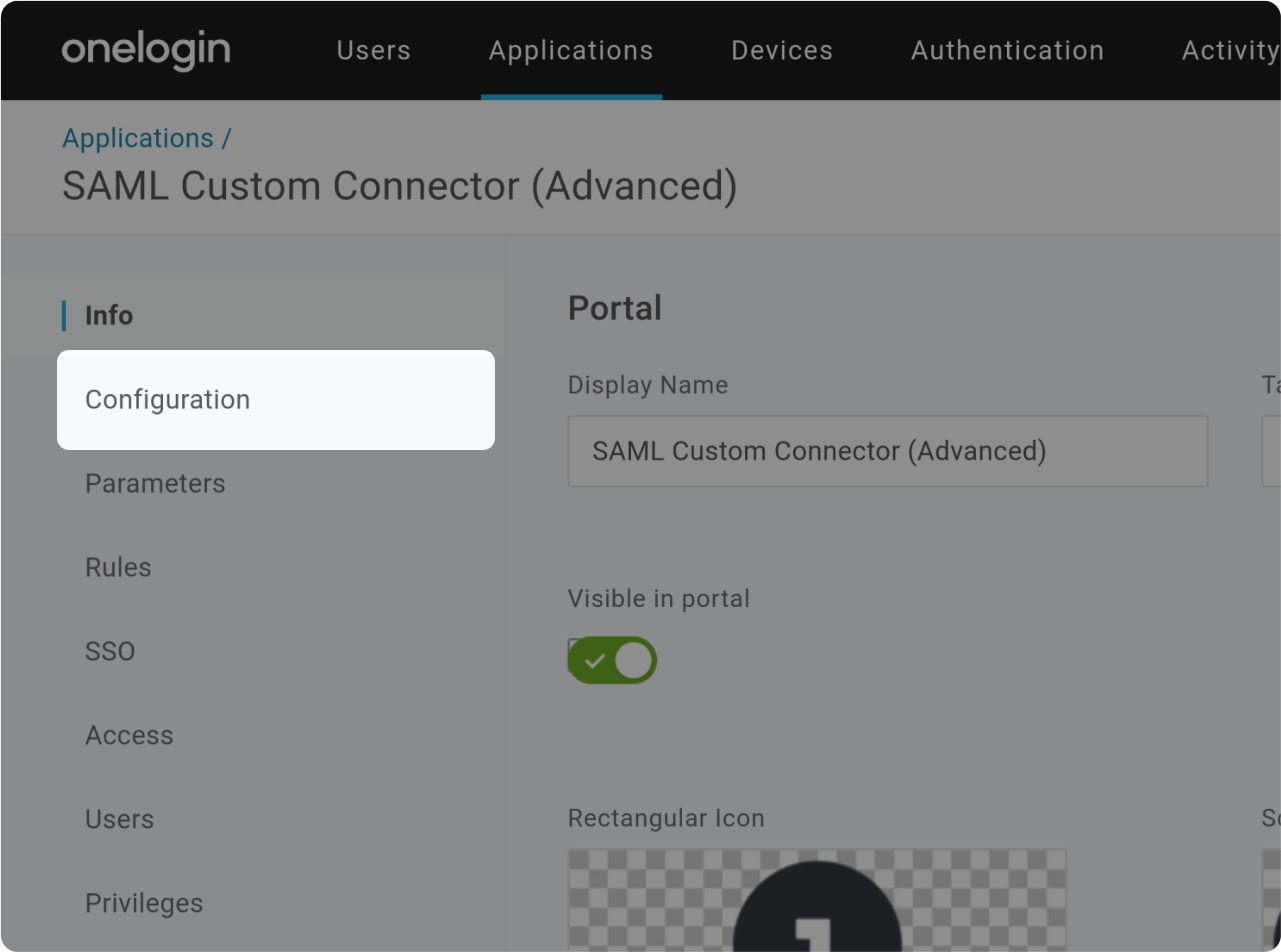
After the redirection, click on "Configuration"
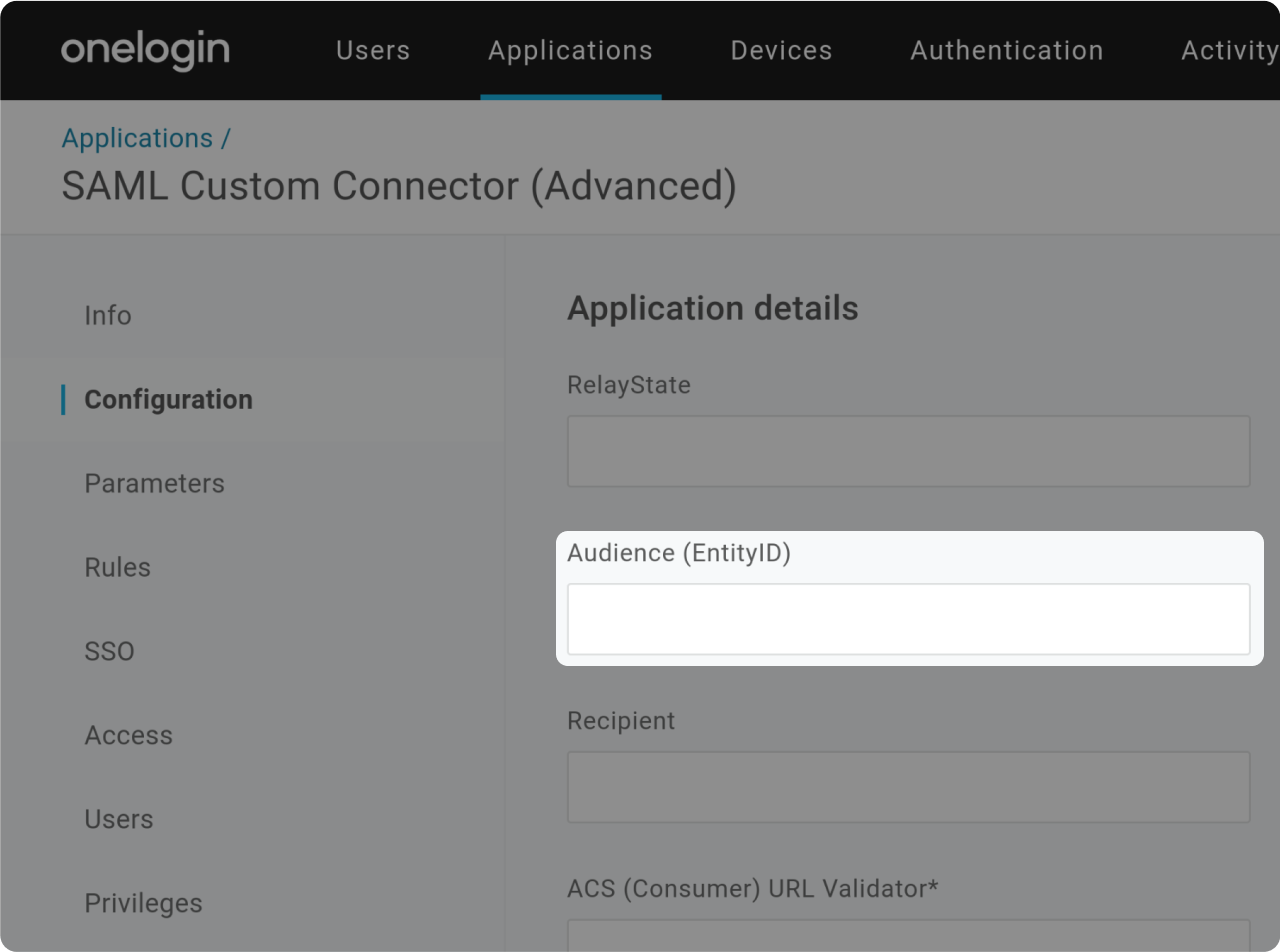
Copy the value of "Audience (EntityID)" and paste it into "Audience (EntityID)" field.
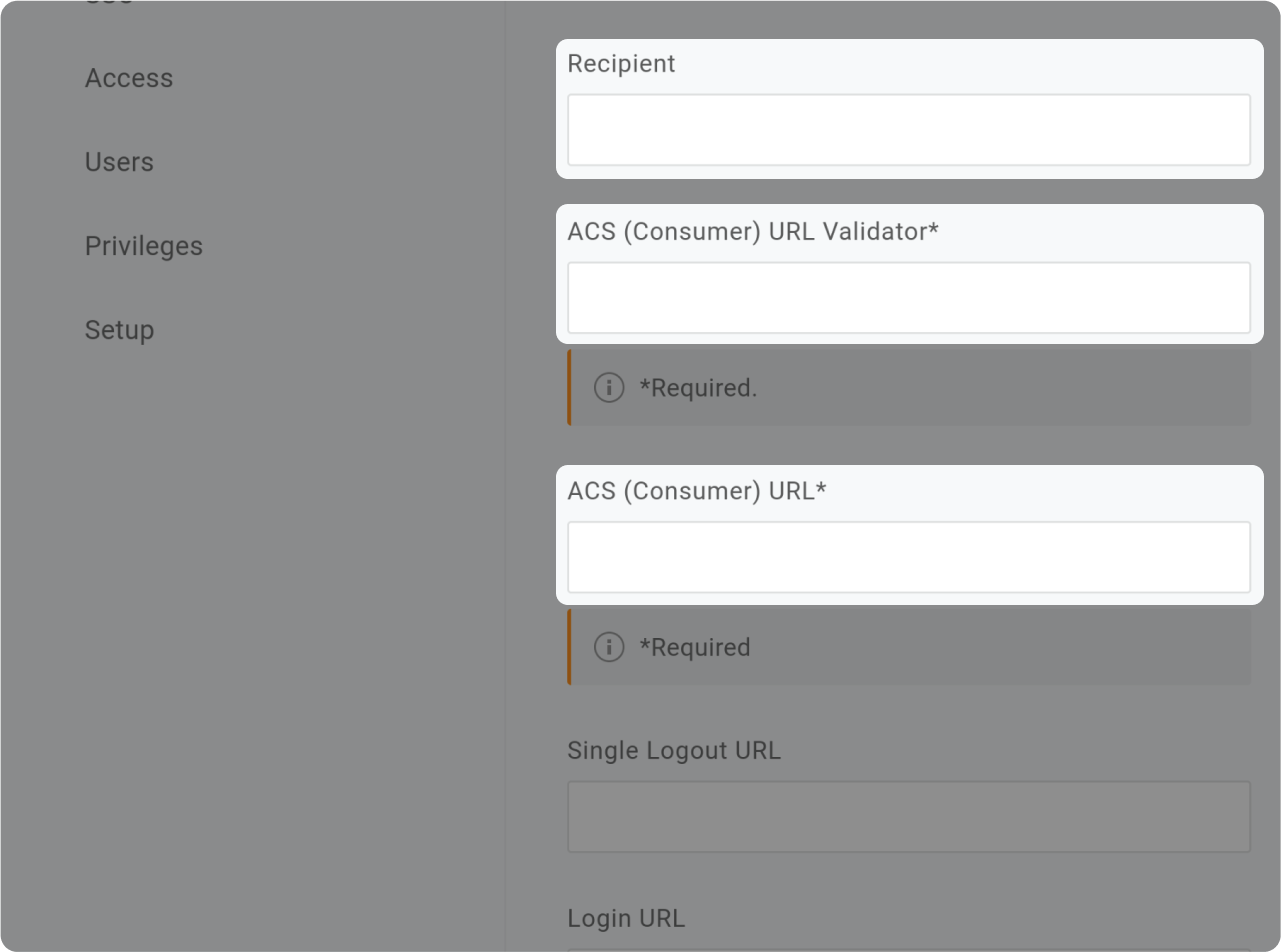
- Copy the value of "Recipient" and paste it into "Recipient" field.
- Copy the value of "ACS (Consumer) URL Validator" field" and paste it into "ACS (Consumer) URL Validator" field.
- Copy the value of "ACS (Consumer) URL" and paste it into "ACS (Consumer) URL" field.
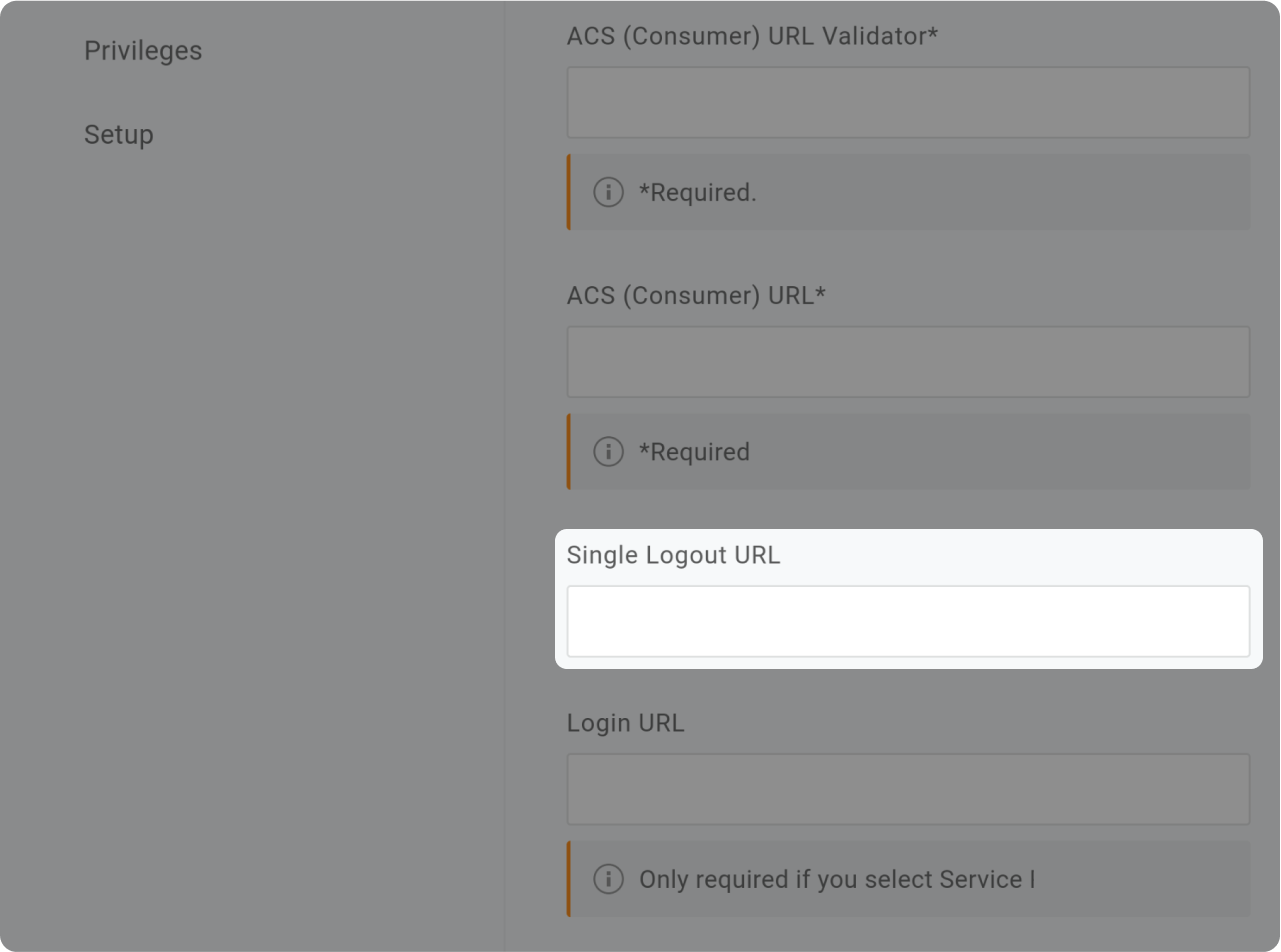
Copy the value of "Single Logout URL" and paste it into "Single Logout URL" field.
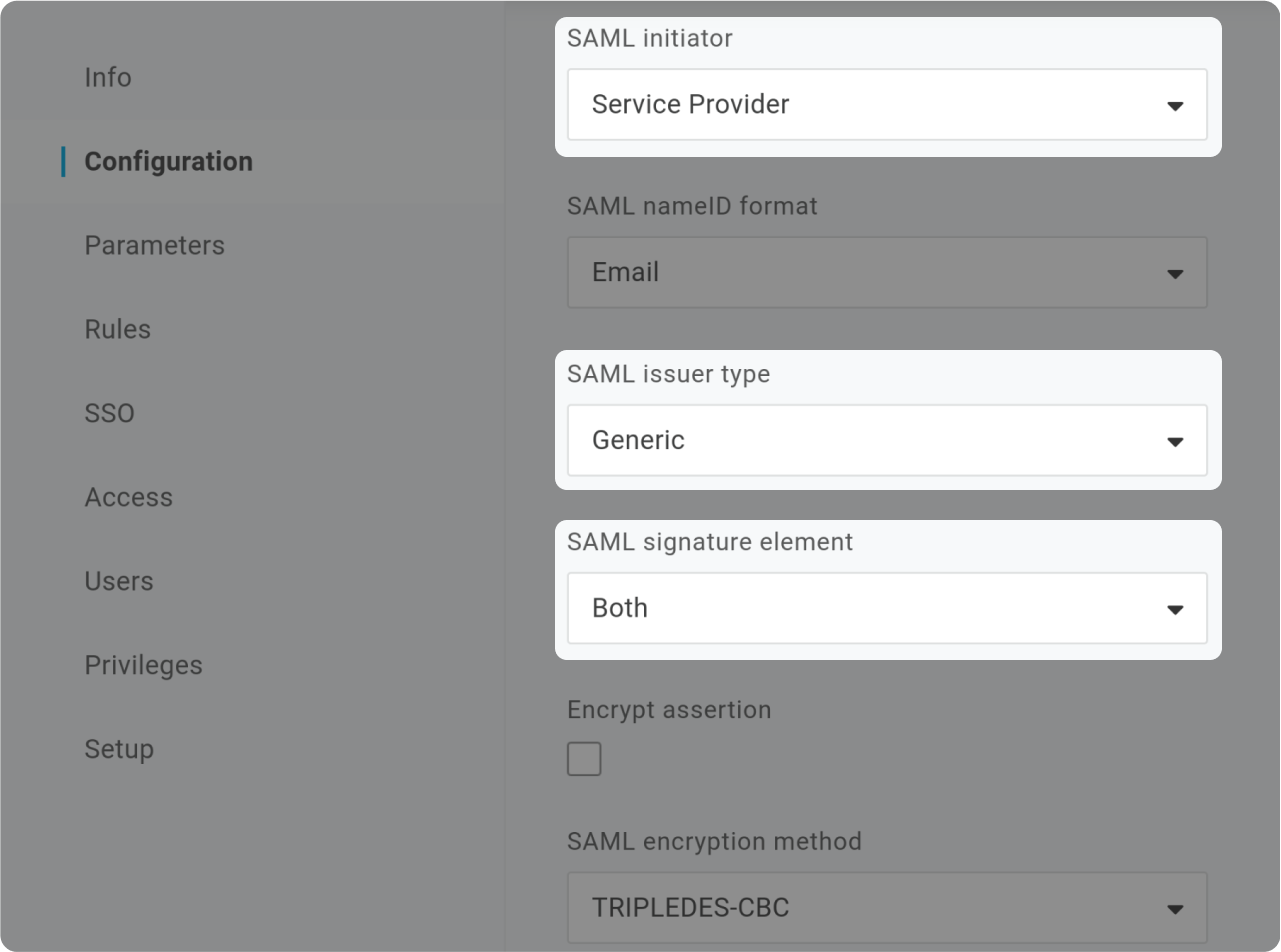
- In "SAML initiator", select "Service Provider"
- In "SAML issuer type", select "Generic"
- In "SAML signature element", select "Both" & Save
Attributes Mapping
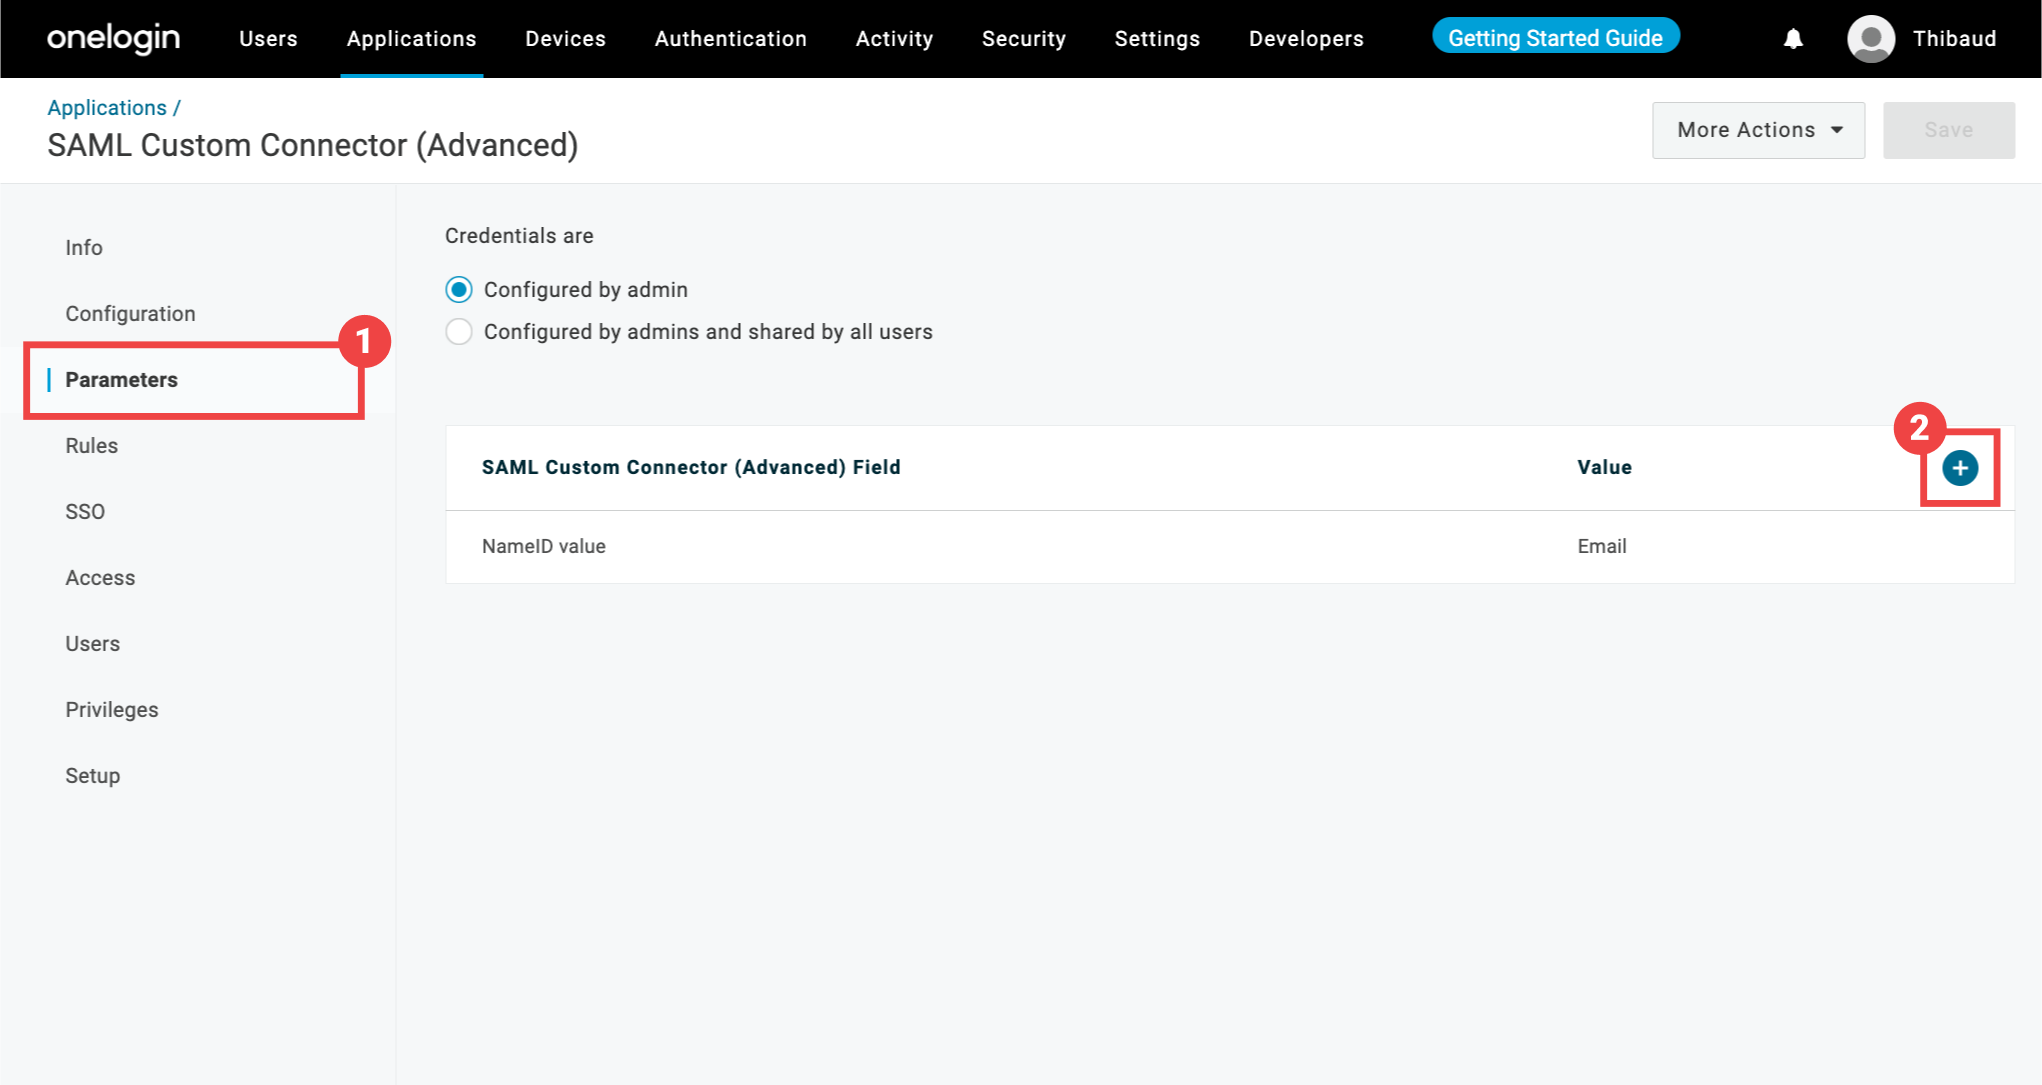
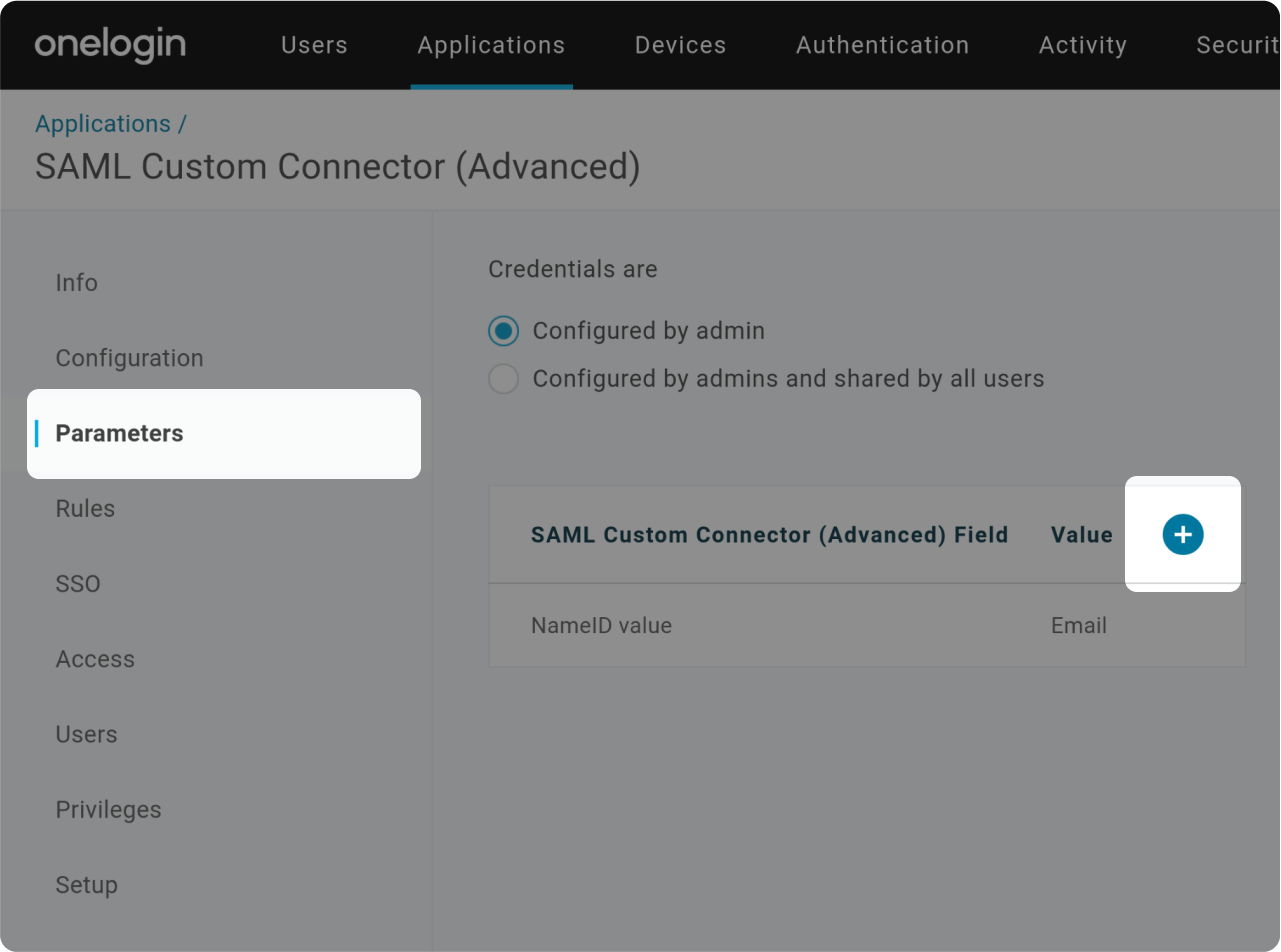
- Go to "Parameters" tab
- Click "+" button to add Attribute Mappings
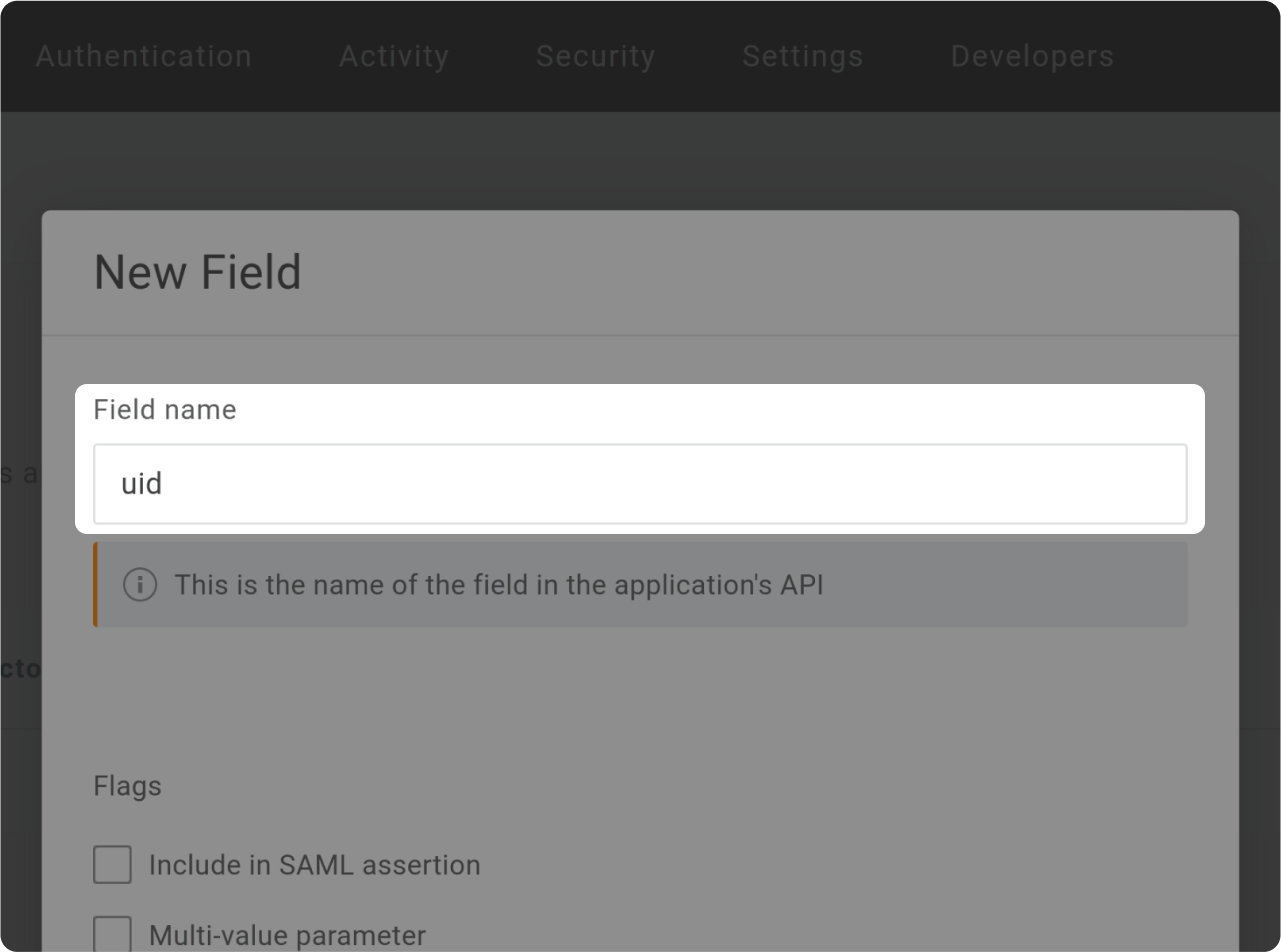
Type "idp_user_id" as Field name
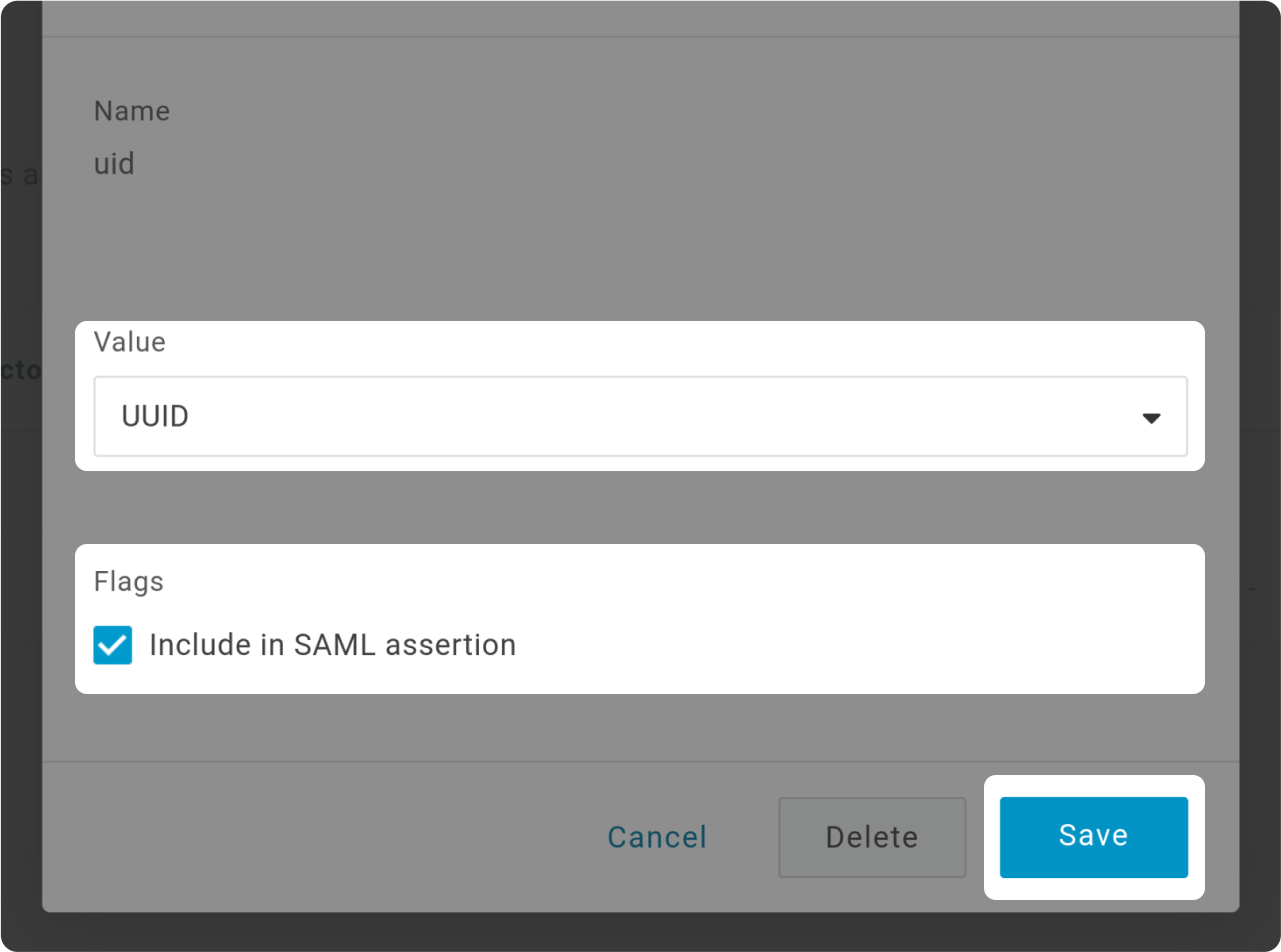
- Select "UUID" as Value
- Check "Include SAML assertion"
- Save
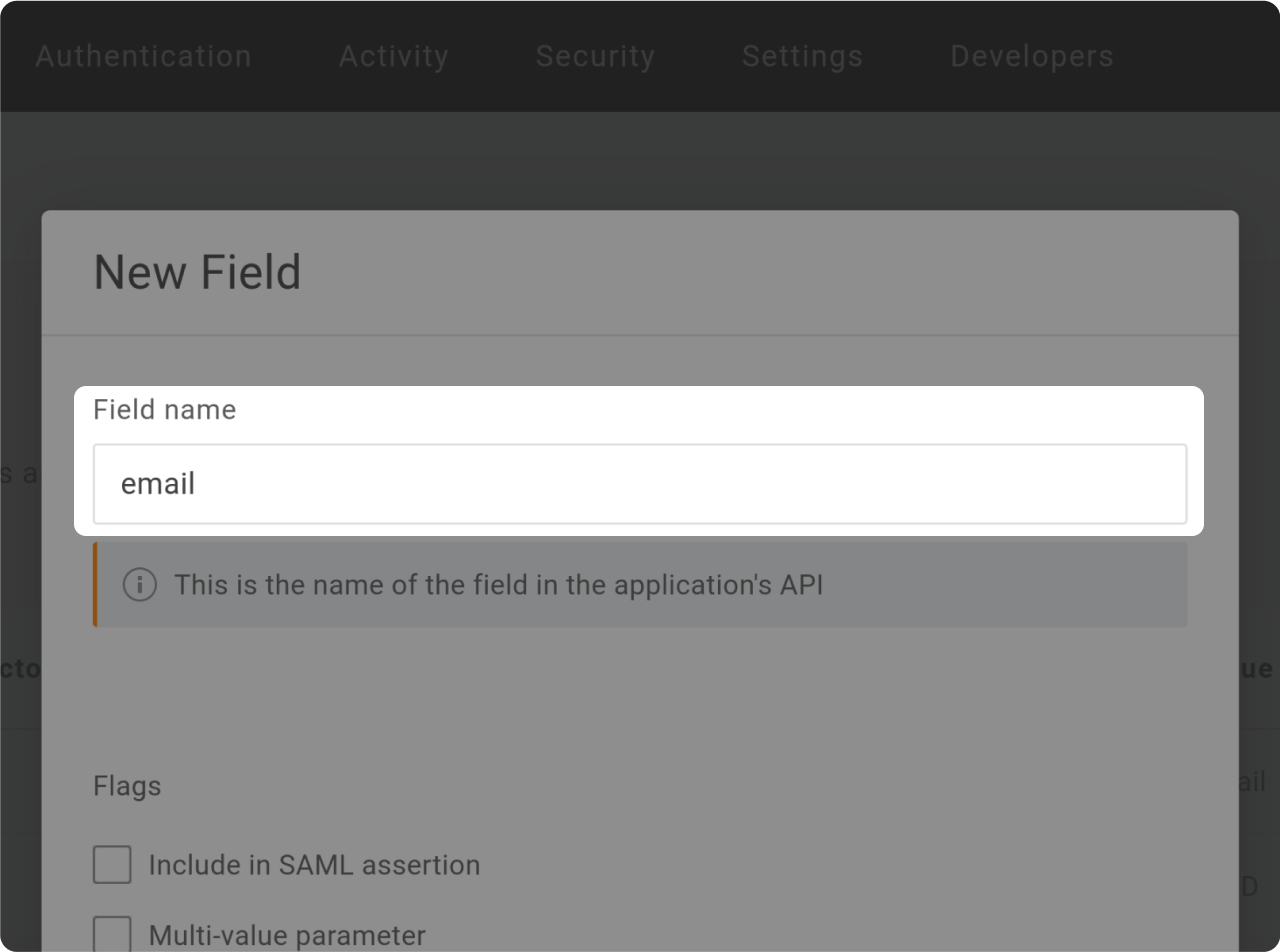
Type "email" as Field name
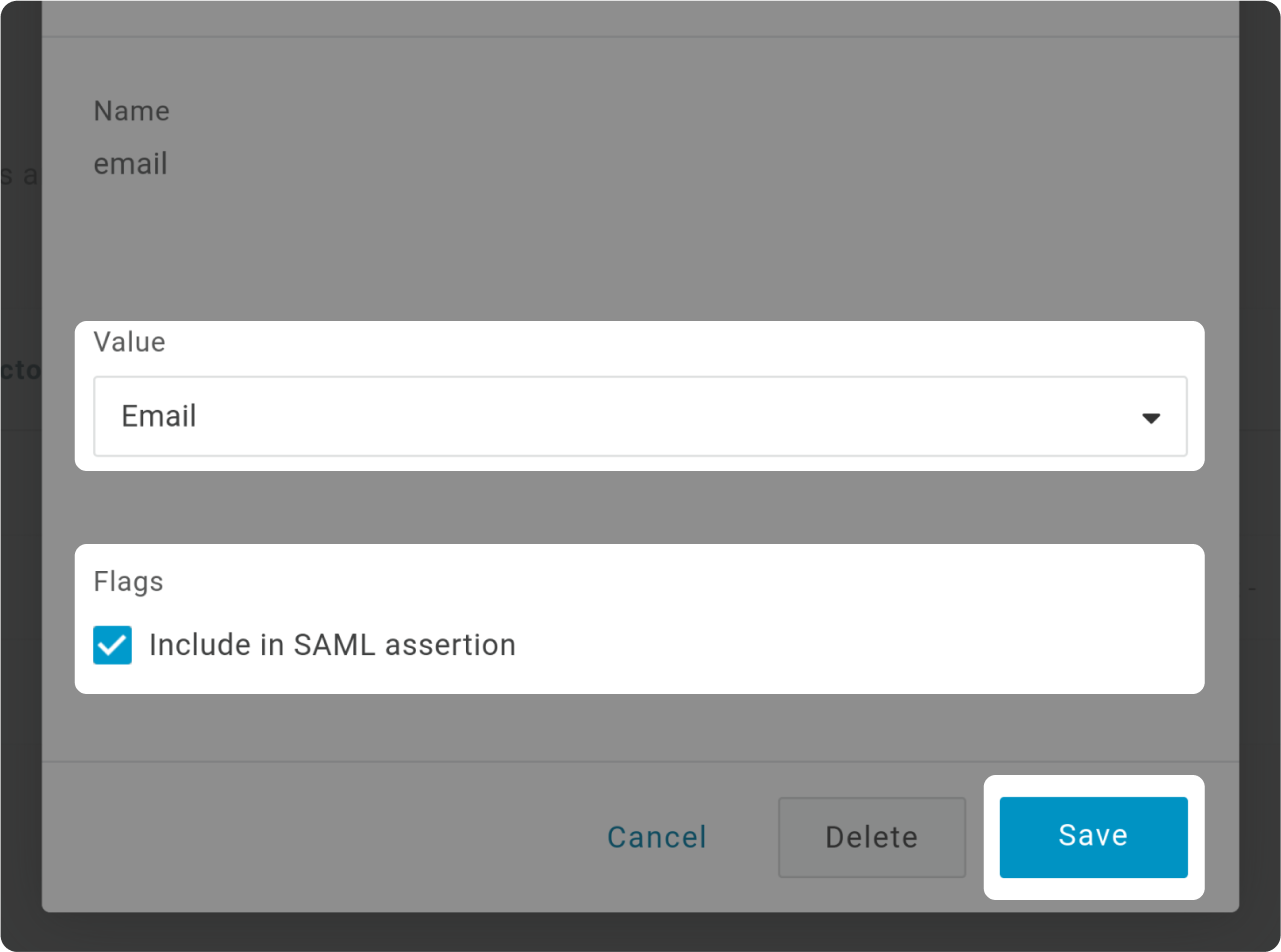
- Select "Email" as Value
- Check "Include SAML assertion"
- Save

Type "given_name" as Field name
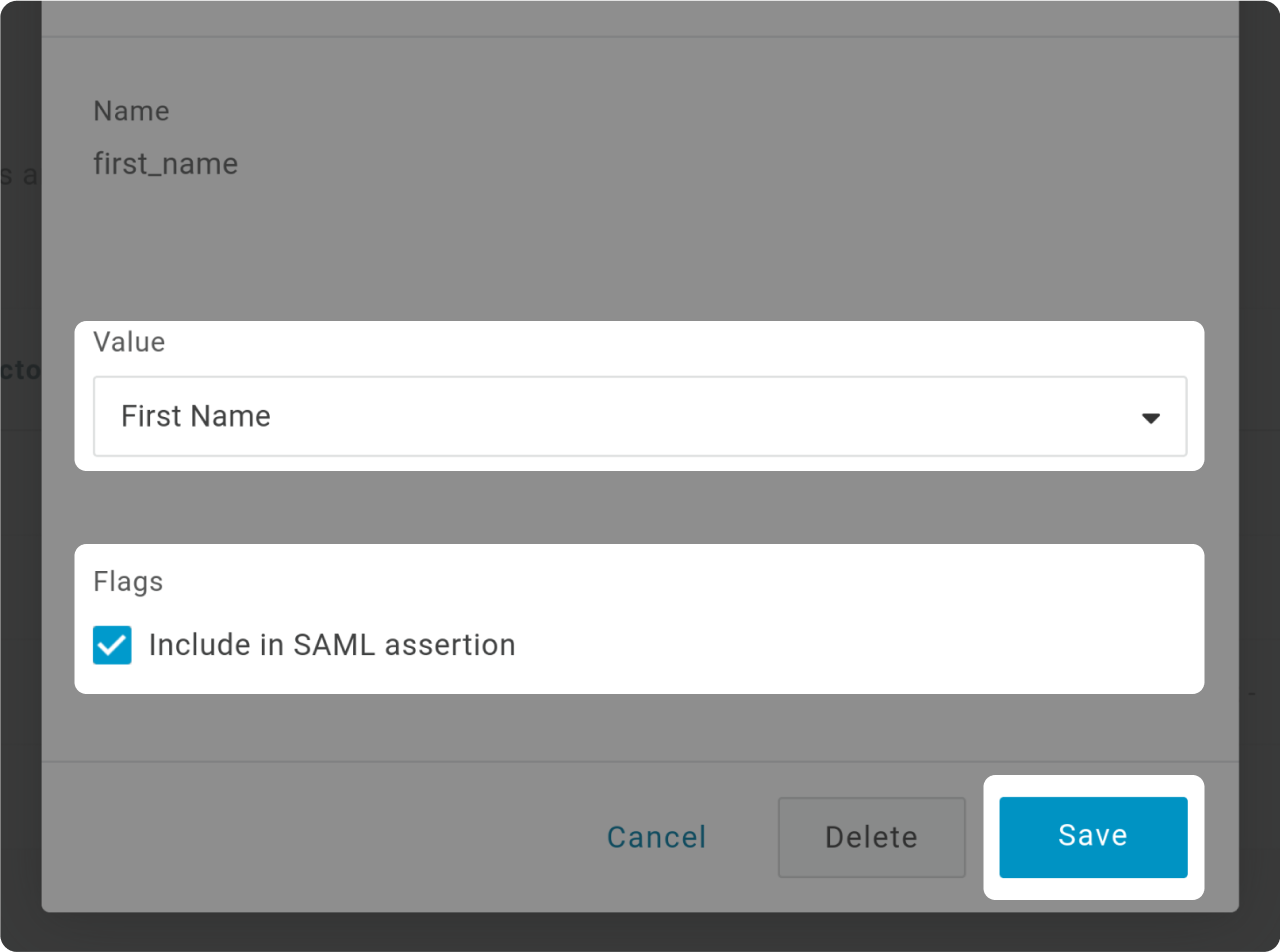
- Select "First Name" as Value
- Check "Include SAML assertion"
- Save
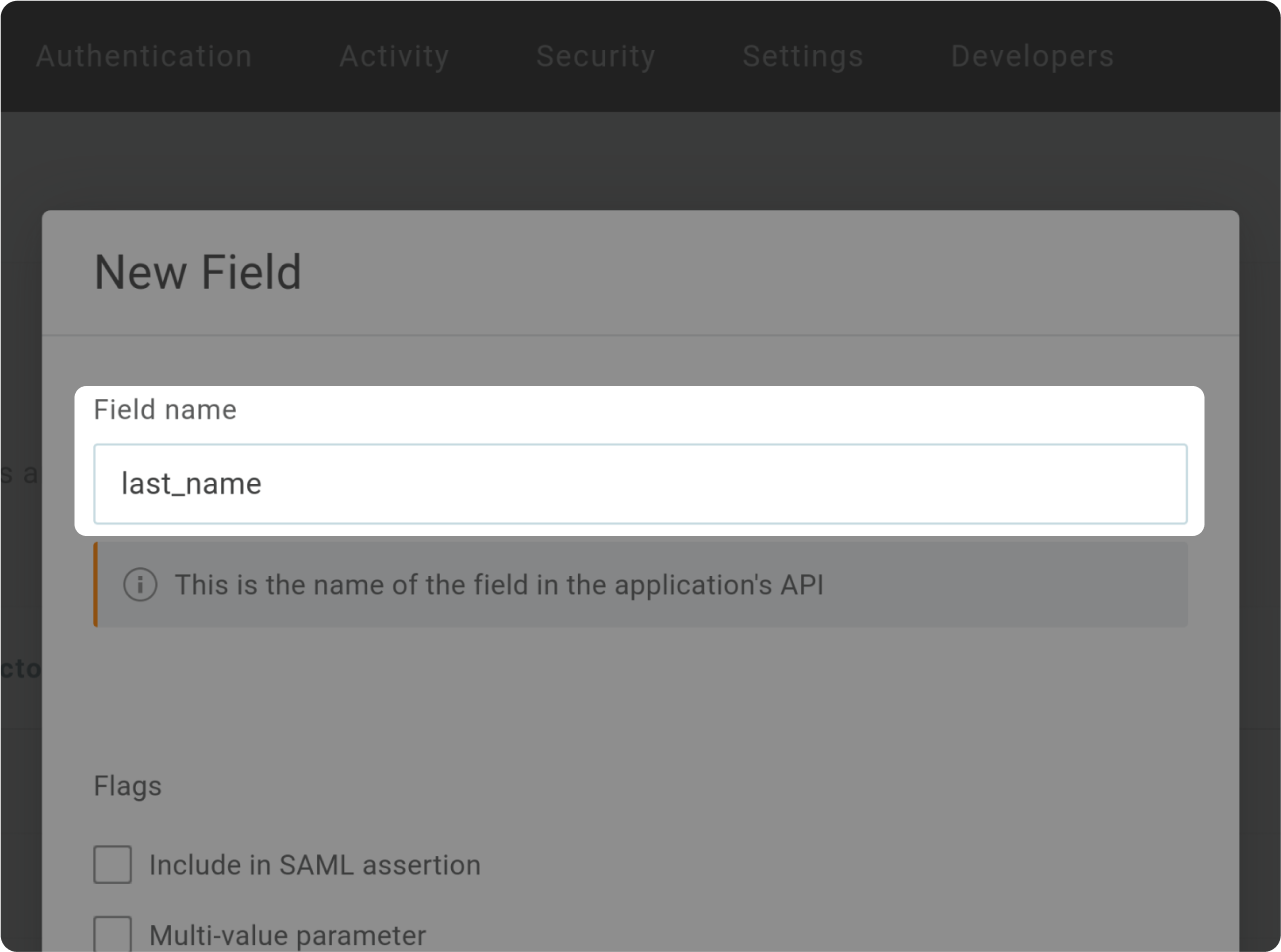
Type "family_name" as Field name
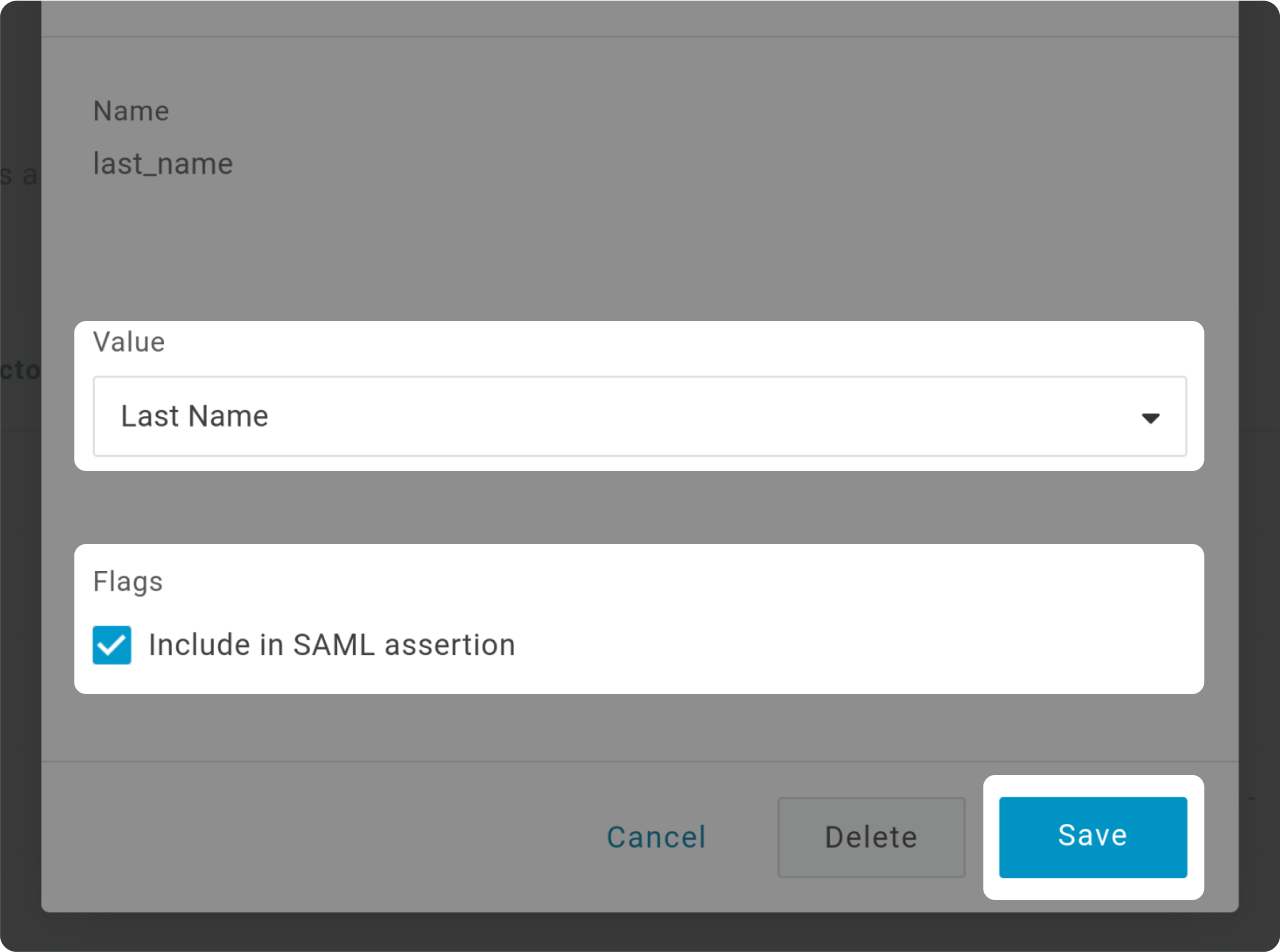
- Select "Last Name" as Value
- Check "Include SAML assertion"
- Save
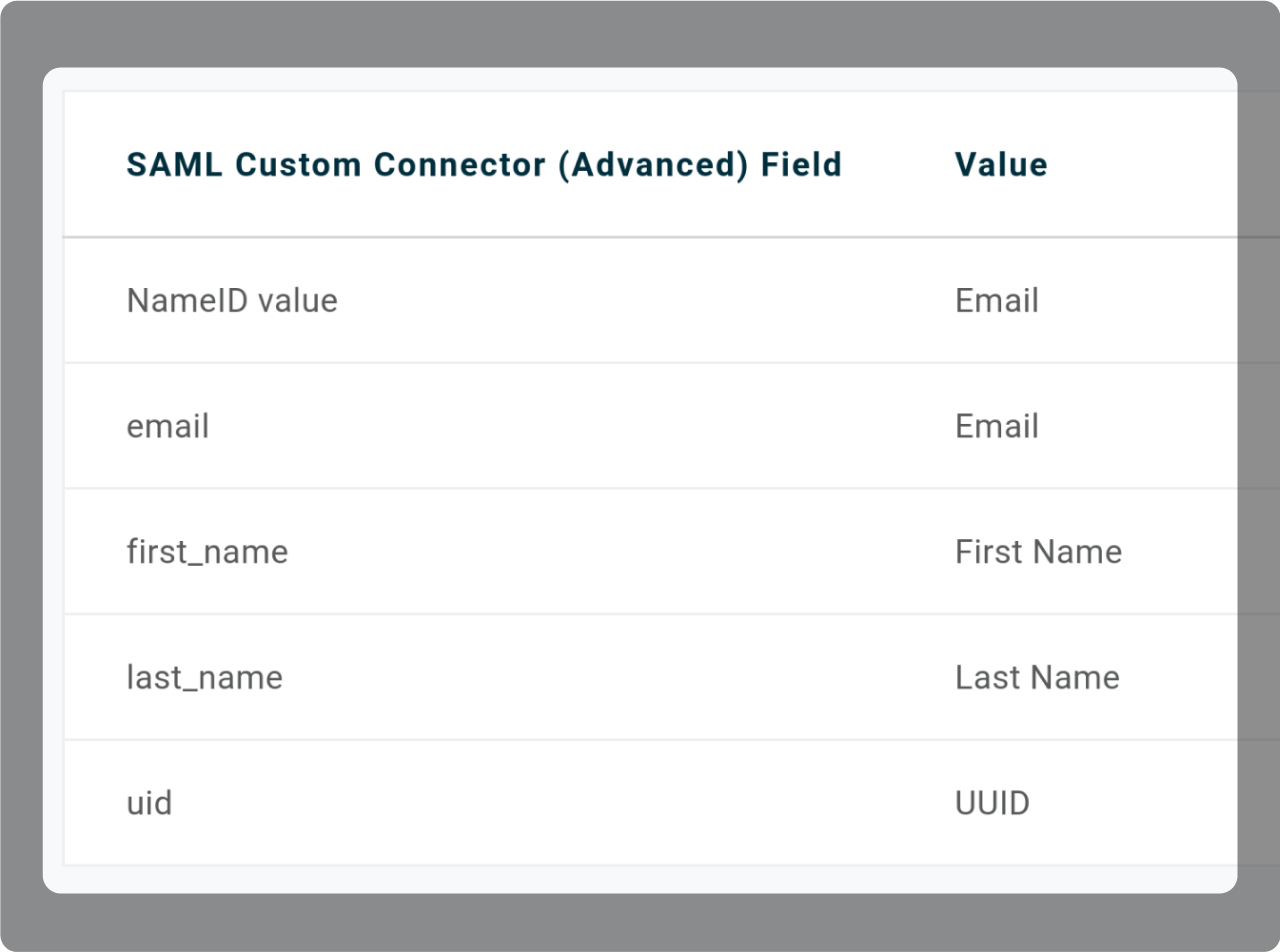
Here are the values that you should have by the end.
XML Metadata file
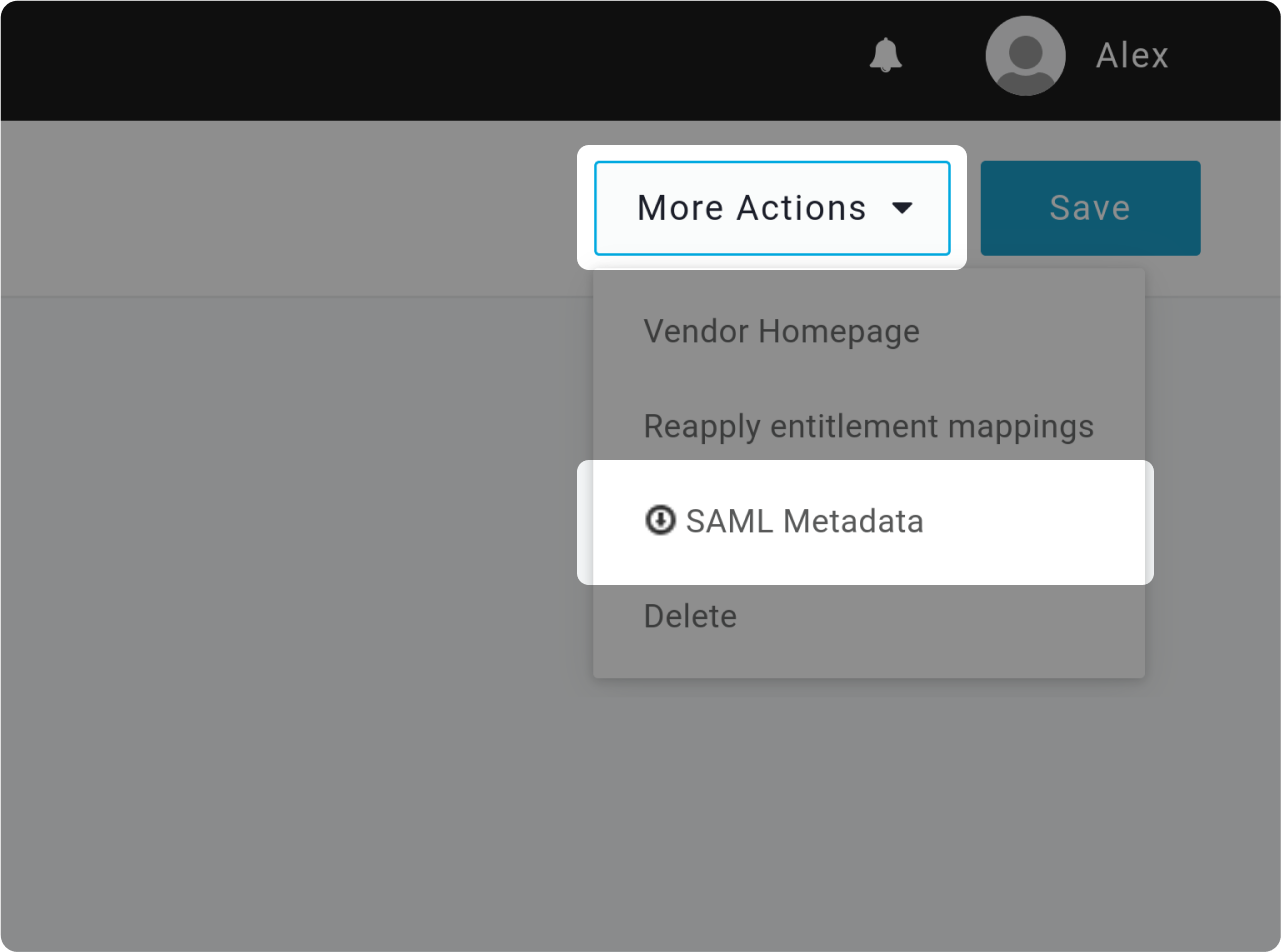
- On the right up side of your screen, click on "More Actions"
- Then, click on "SAML Metadata" to download the XML file
Drop your downloaded XML metadata
Users and groups
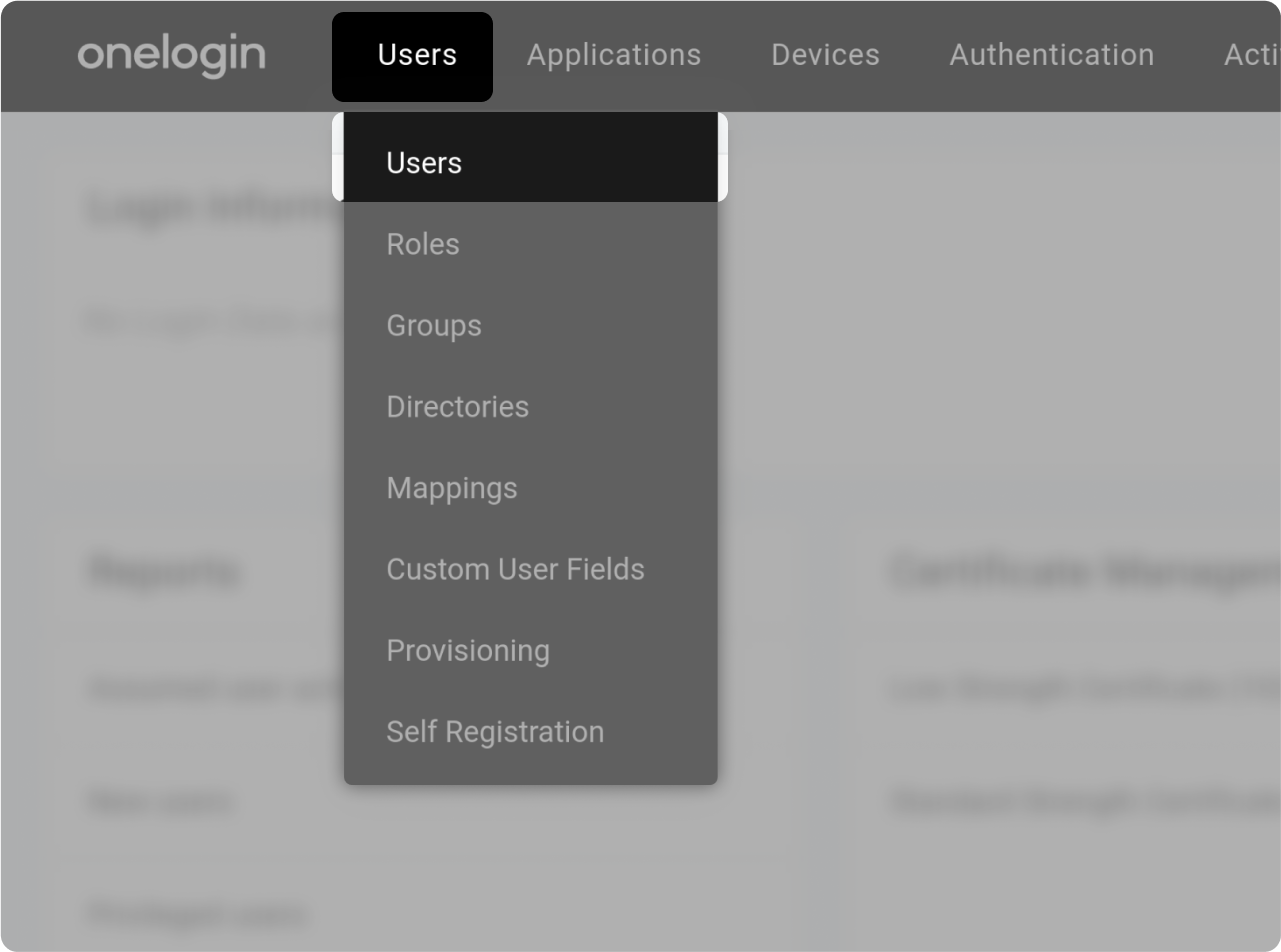
Go to Users section ("Users" > "Users")
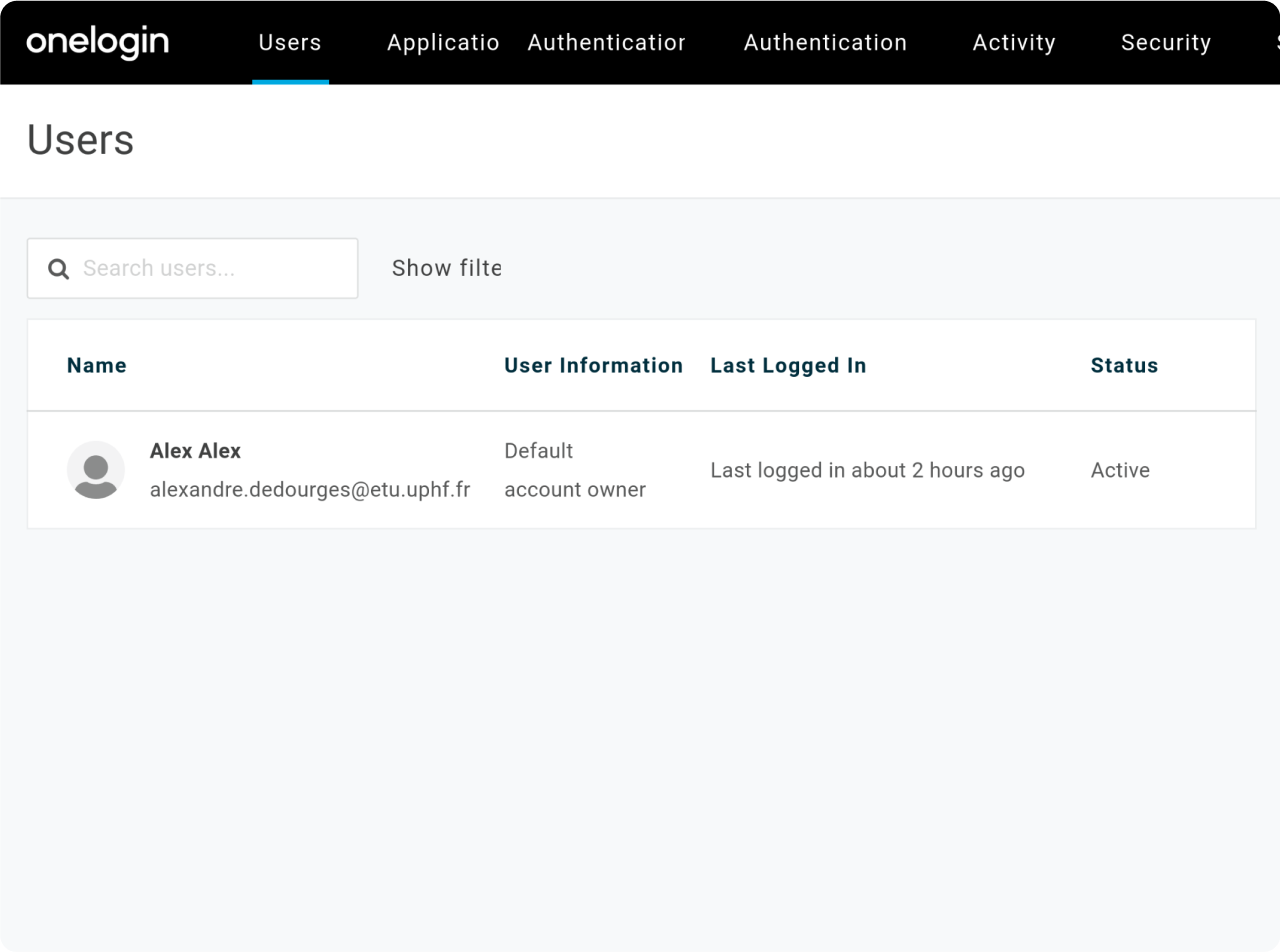
Select a User that you want to add to your Application.

Click on "Applications" in the User Menu.
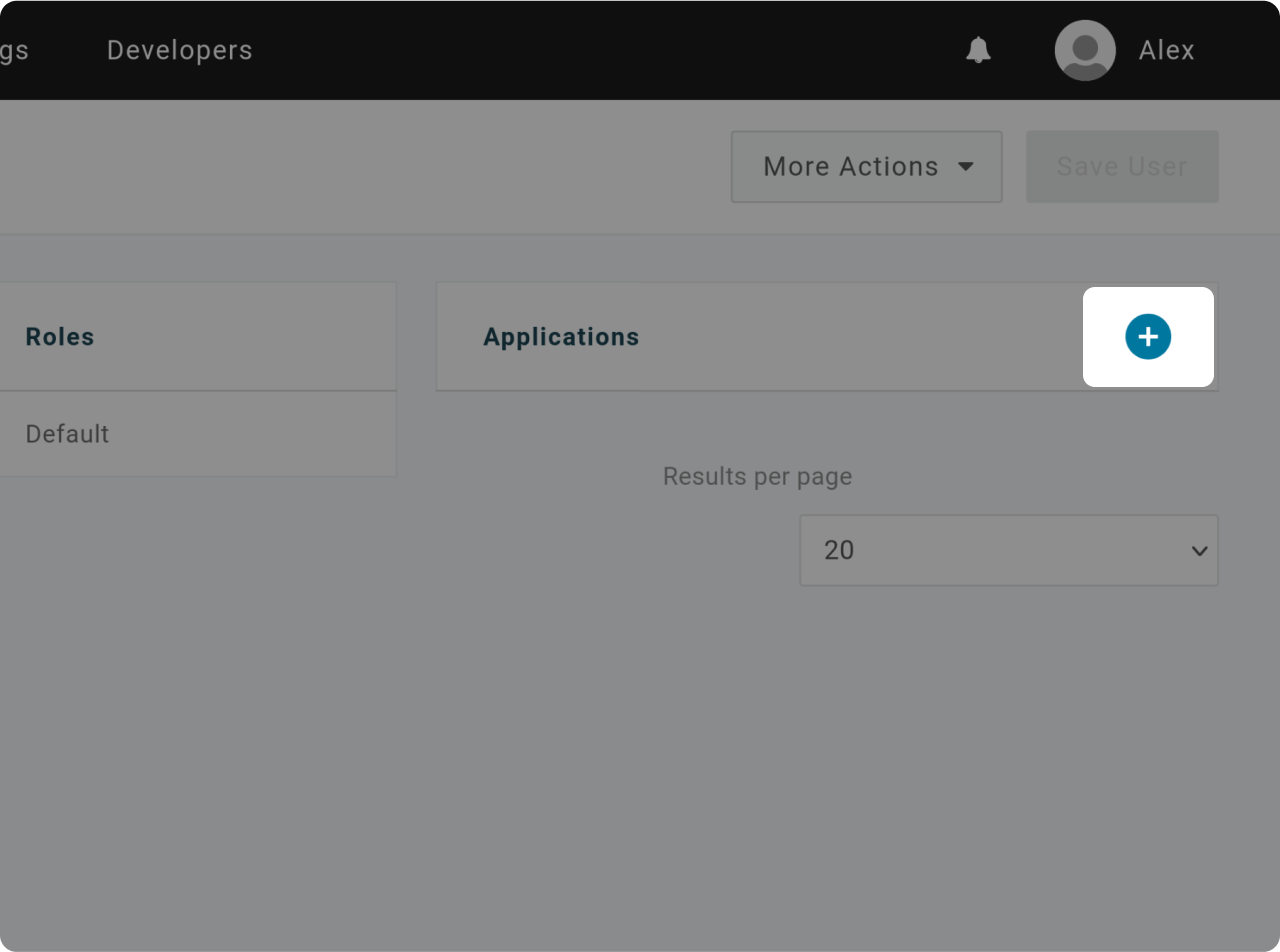
Click on "+" to assign the User to an Application
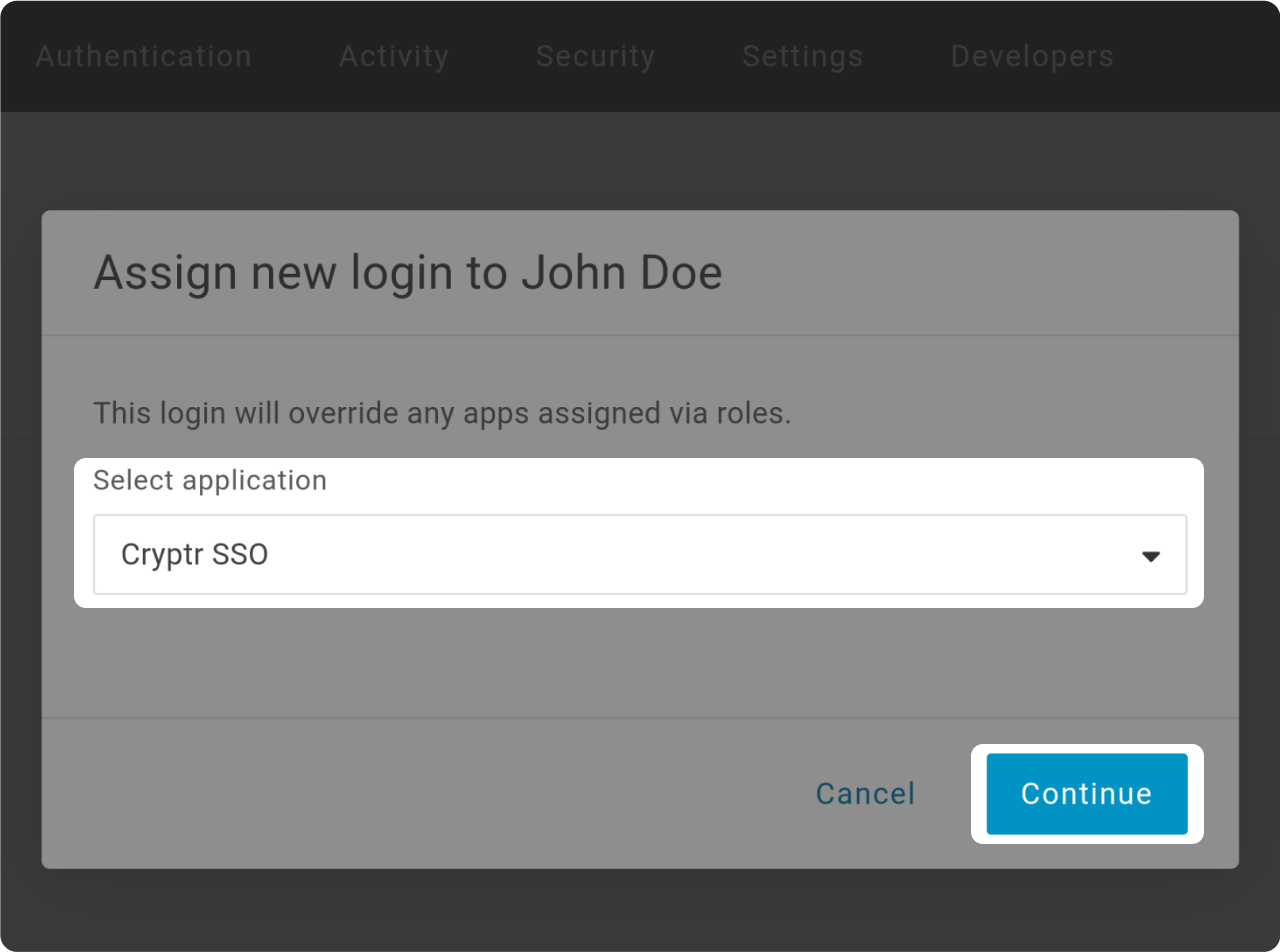
- Select your newly created App to assigns your User to it.
- Click "Continue"
Test SSO login
Test SSO login