Okta
Discover step-by-step instructions on configuring a Directory Sync with Okta. Learn how to integrate your application with Okta.
How to start
- Connect to your Okta developer account
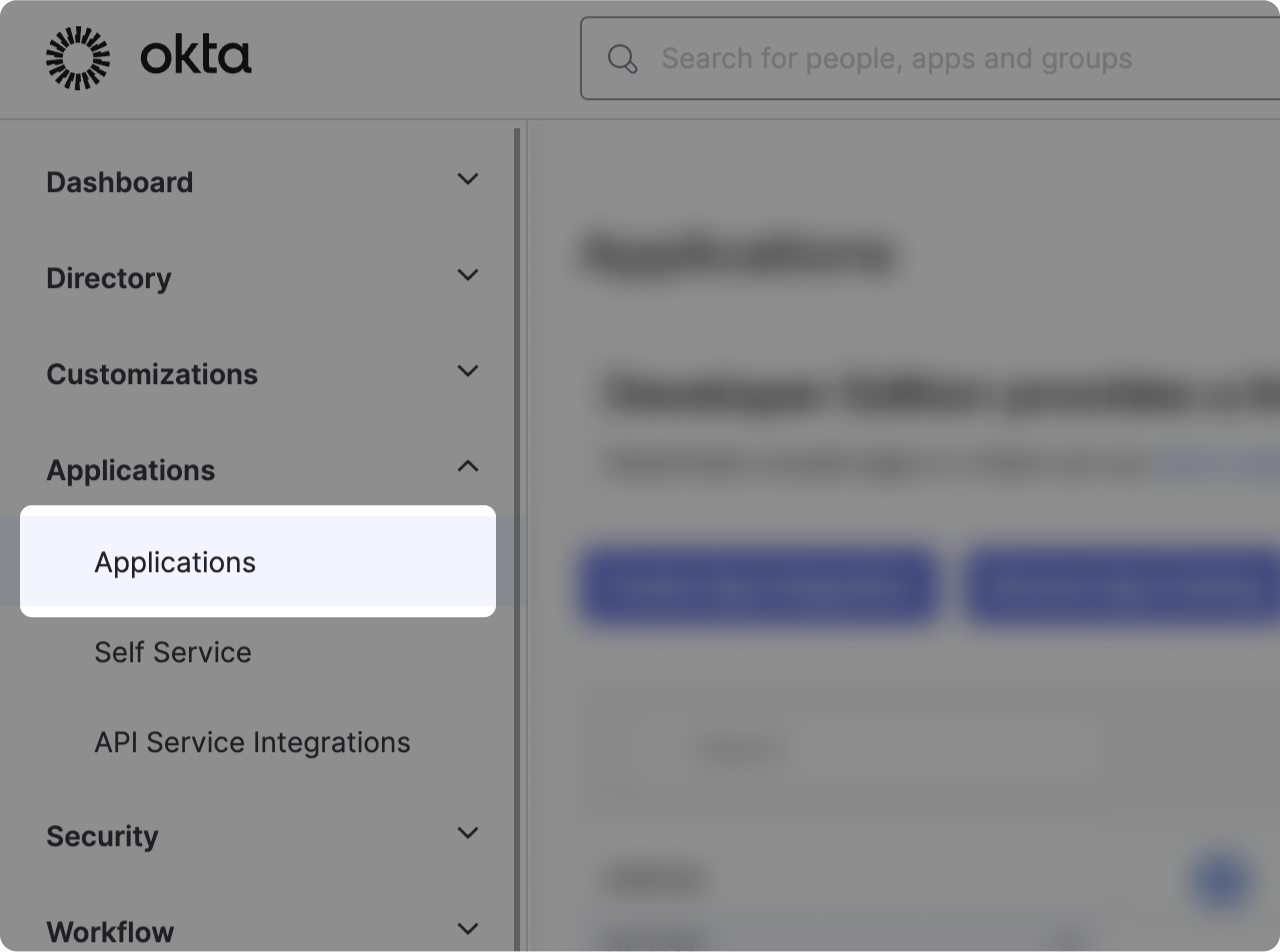
- Click on "Applications" in the left-hand menu, then click on "Applications" again in the dropdown.
Declare an application
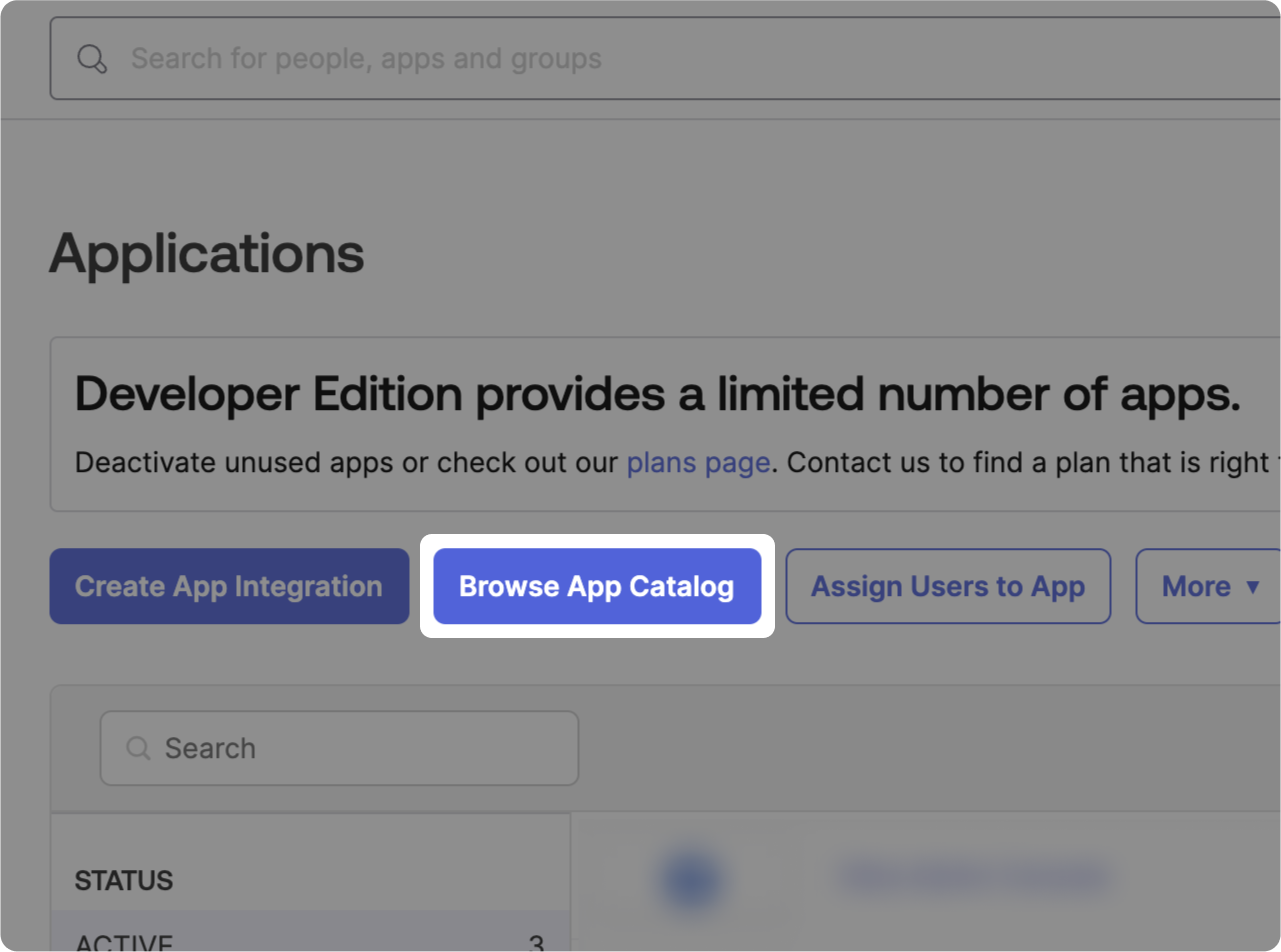
Click on "Browse App Catalog."
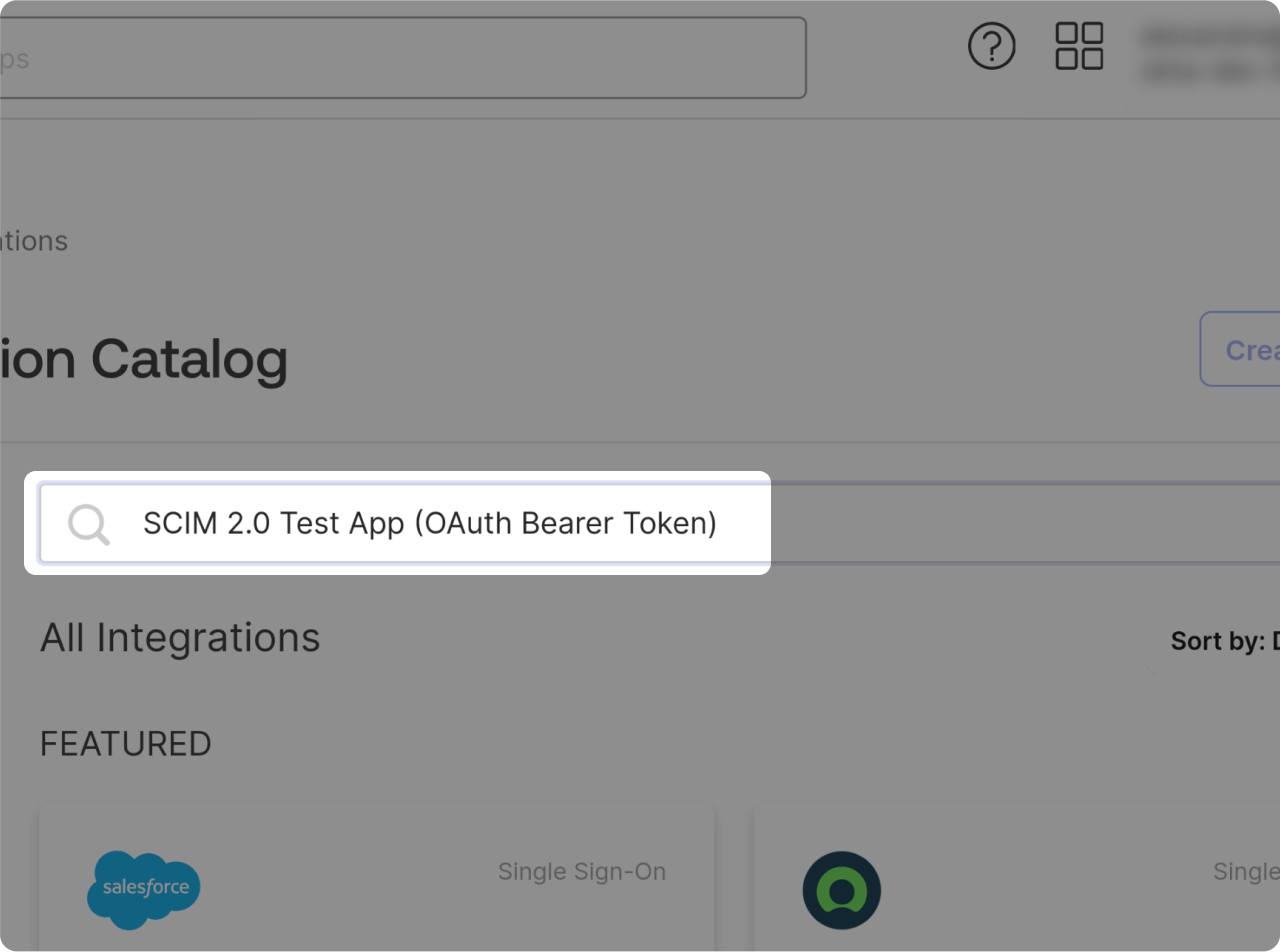
Search for "SCIM 2.0 Test App (OAuth Bearer Token)"
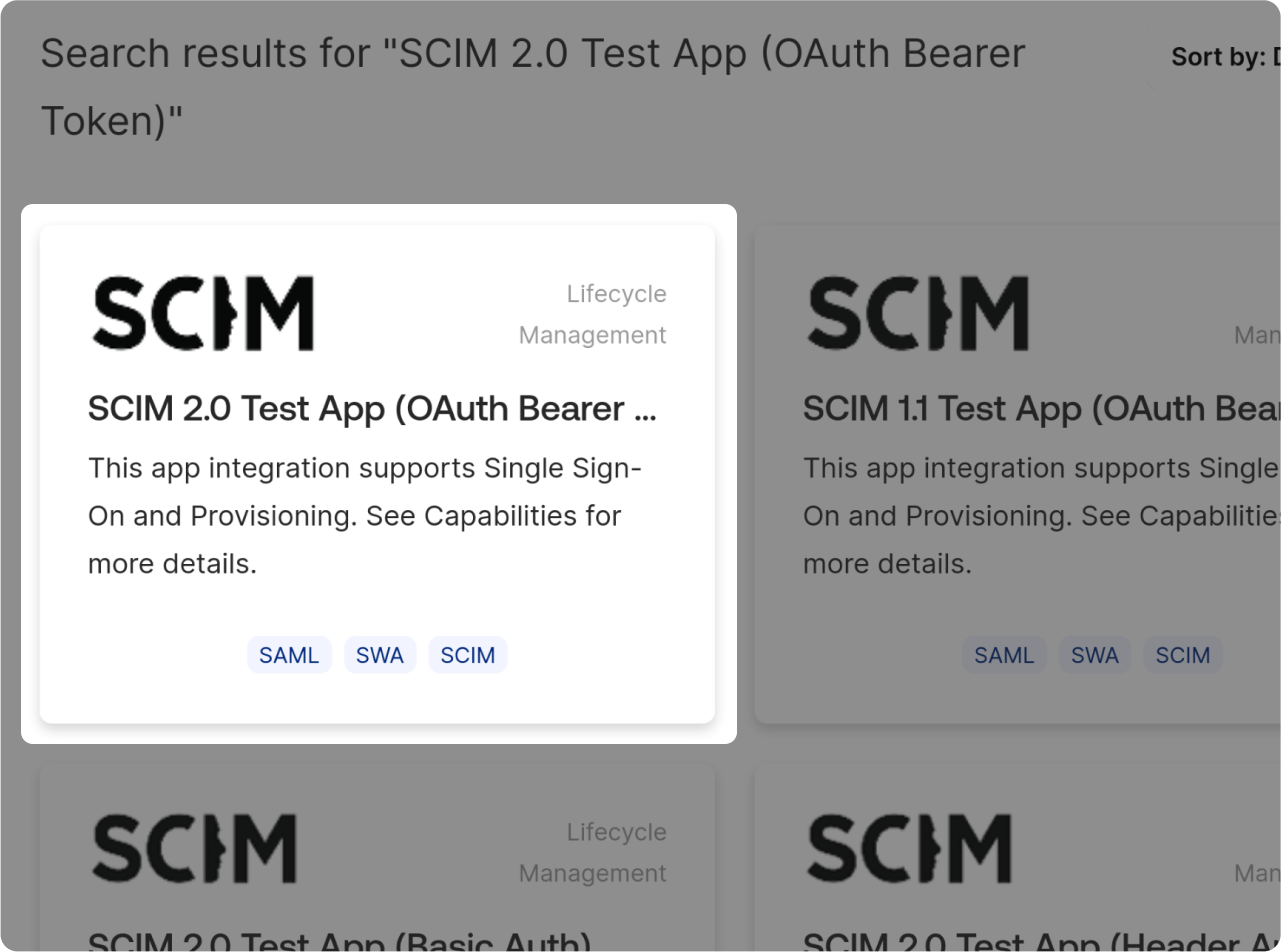
Click on the "SCIM 2.0 Test App (OAuth Bearer Token)" card.
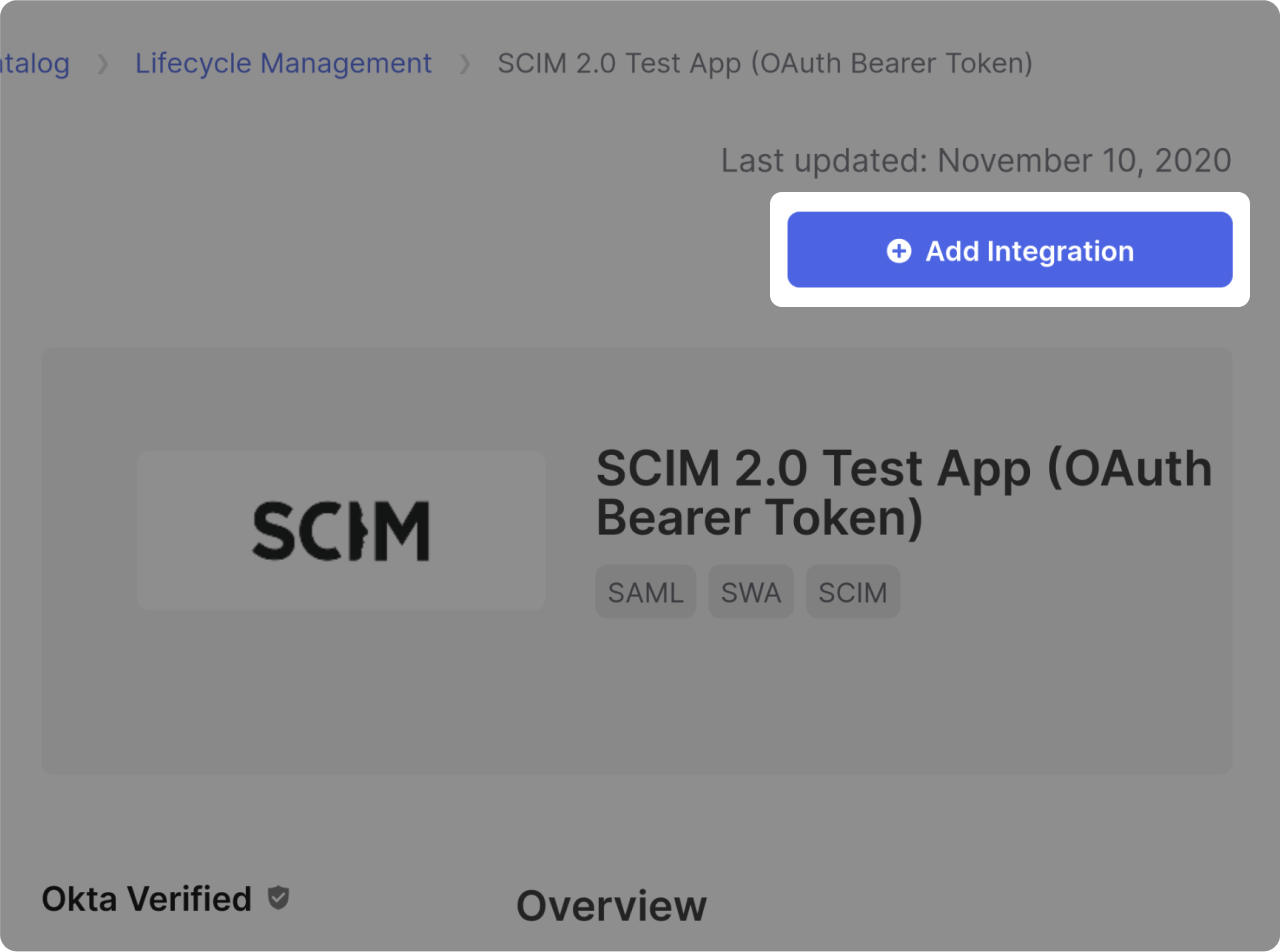
Click on "+ Add Integration."
Configure your application with the supplied identification elements
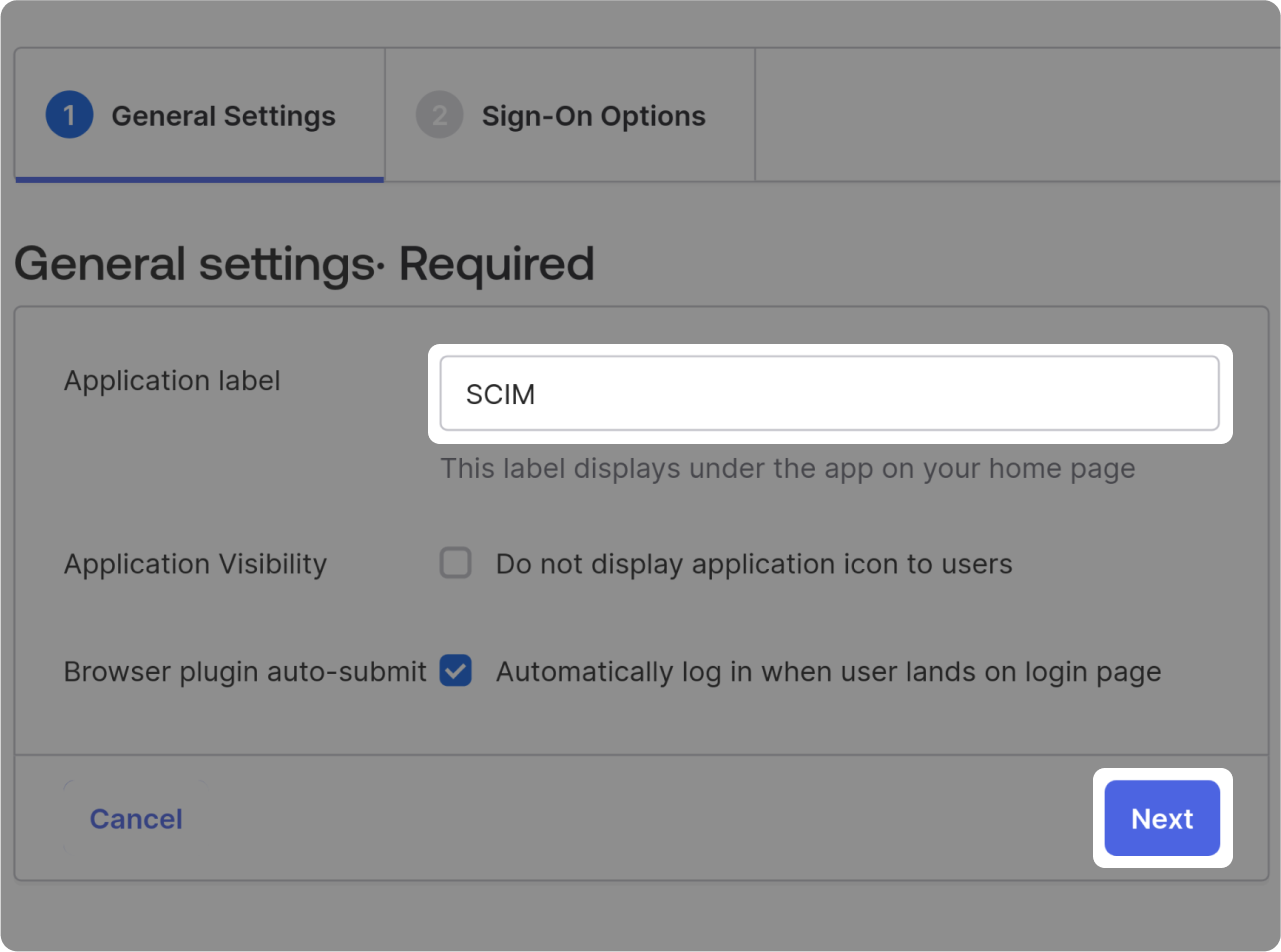
- Enter the name of your app in the "Application label" field.
- Click on "Next"
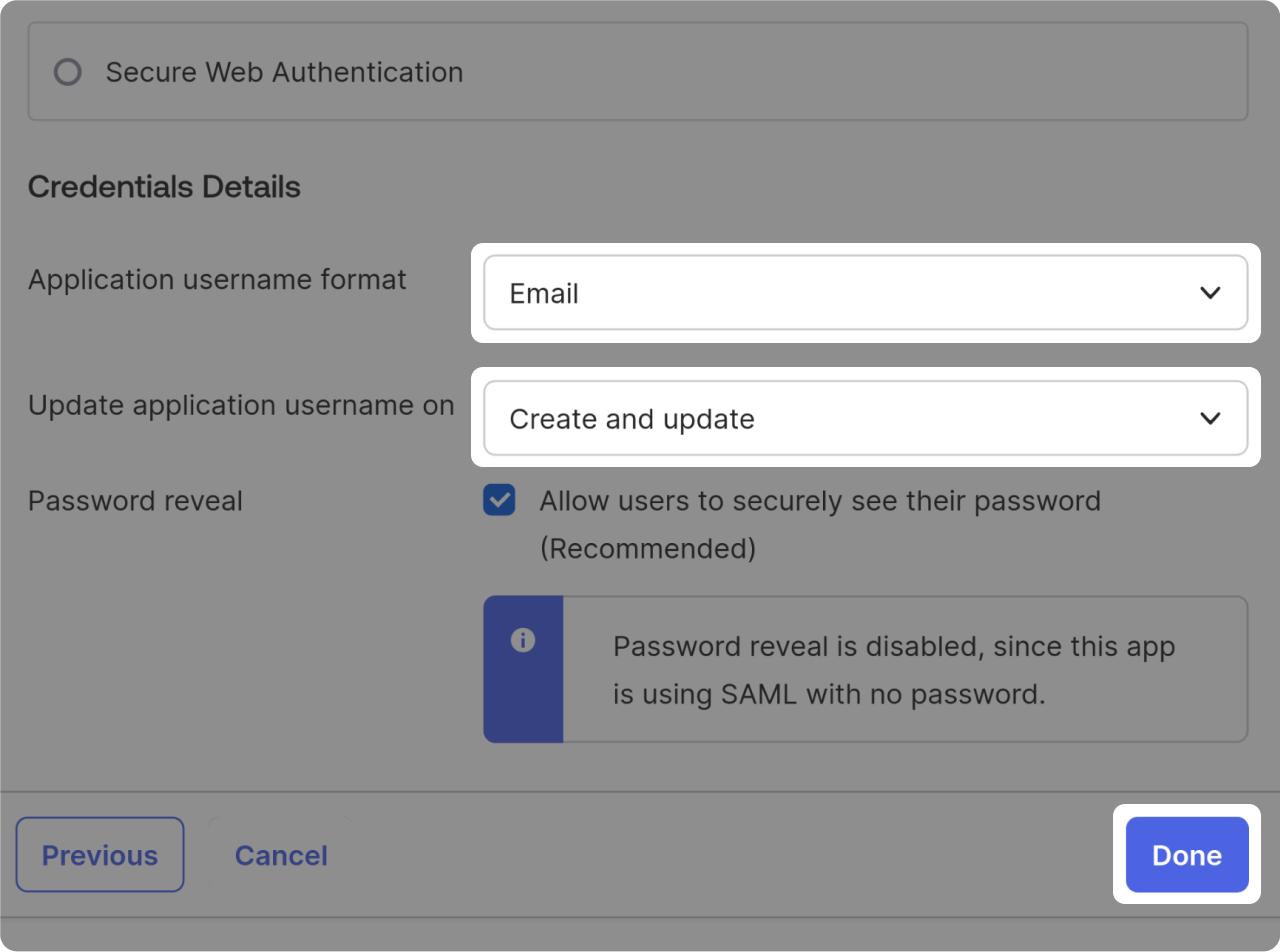
- Scroll to the bottom of the window
- Choose "Email" as the "Application username format."
- Select the option you want for "Update application username on." Then click on "Done."
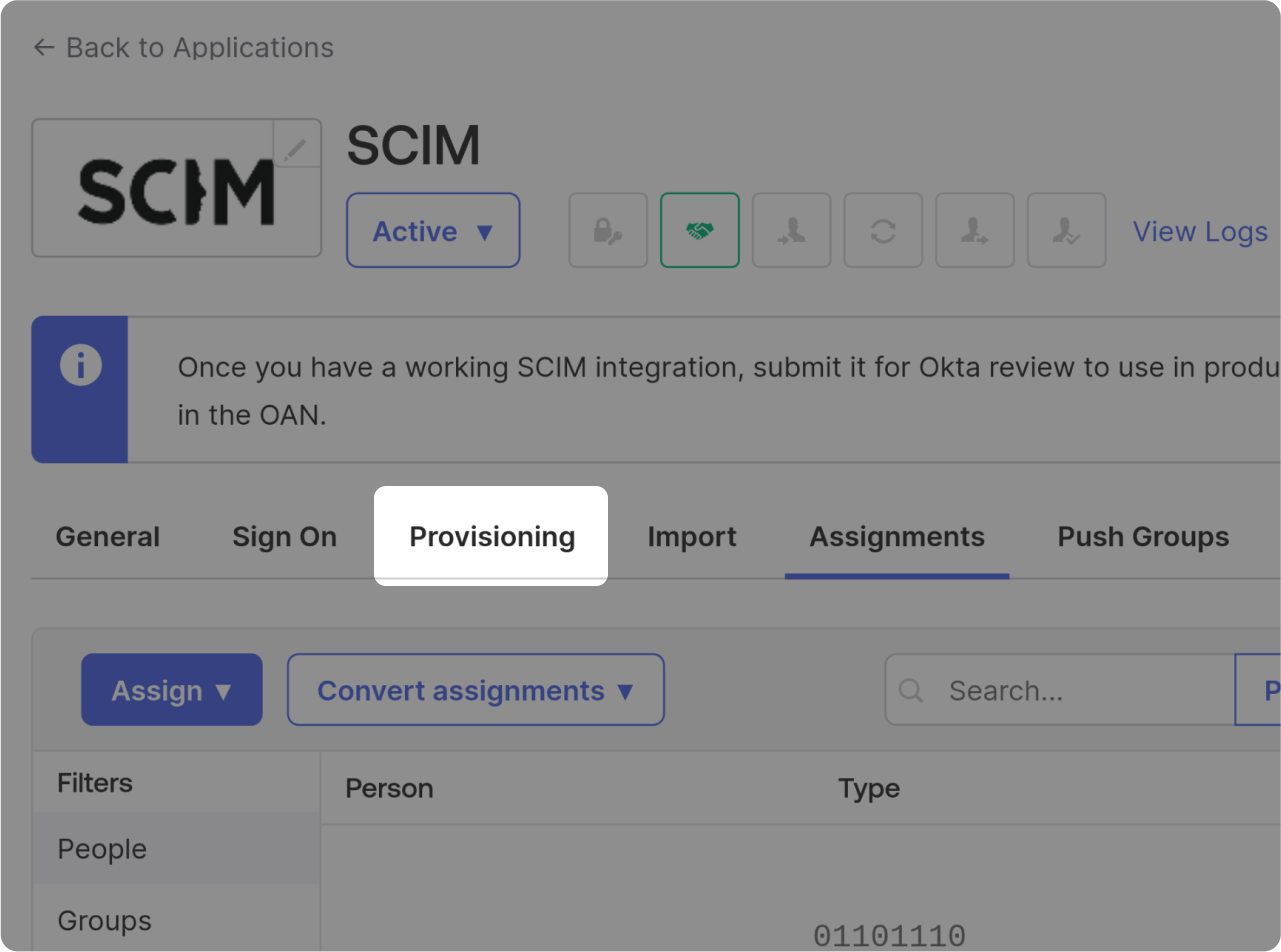
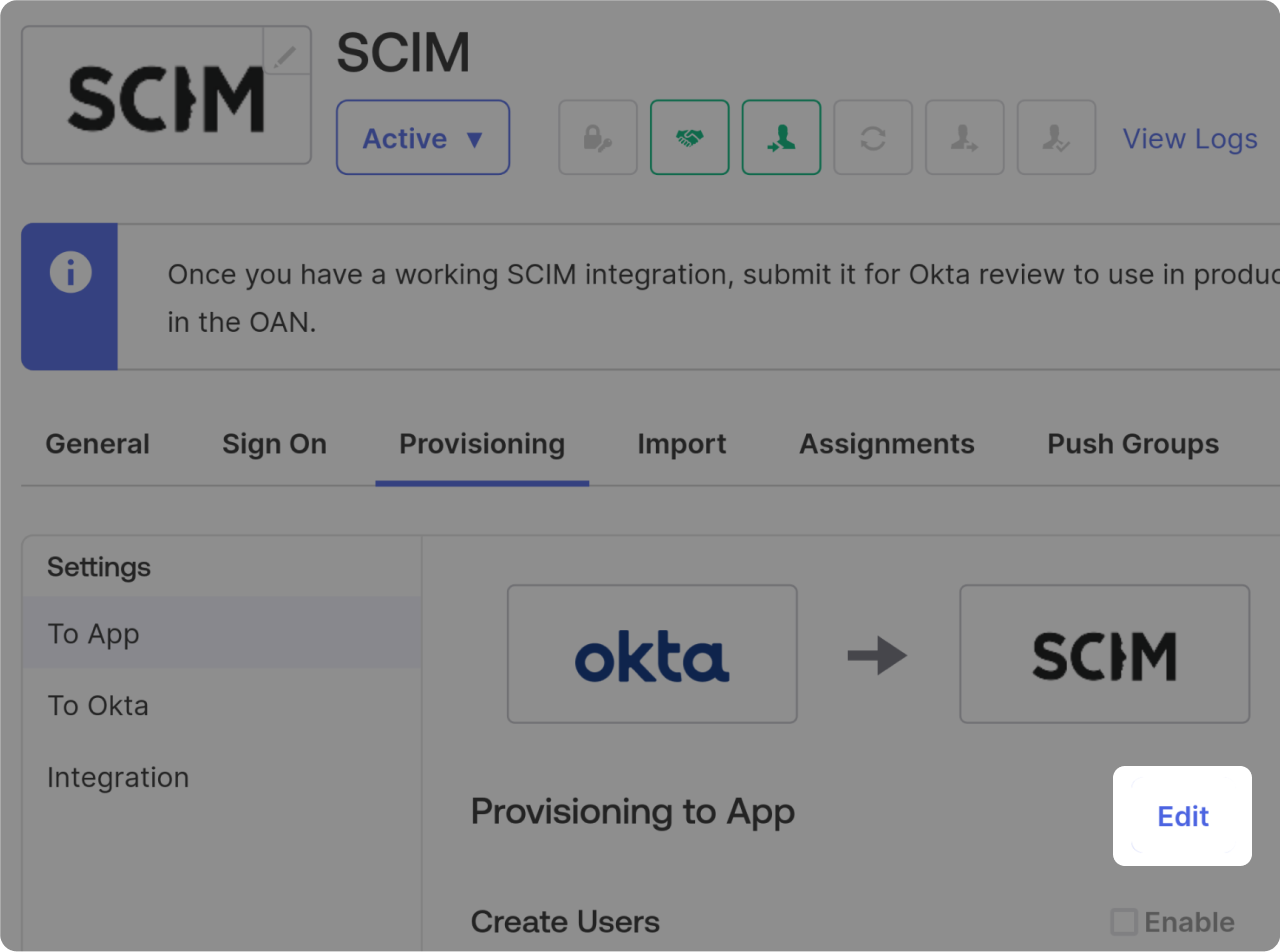
You should now be on your new App Menu.
Select "Provisioning"
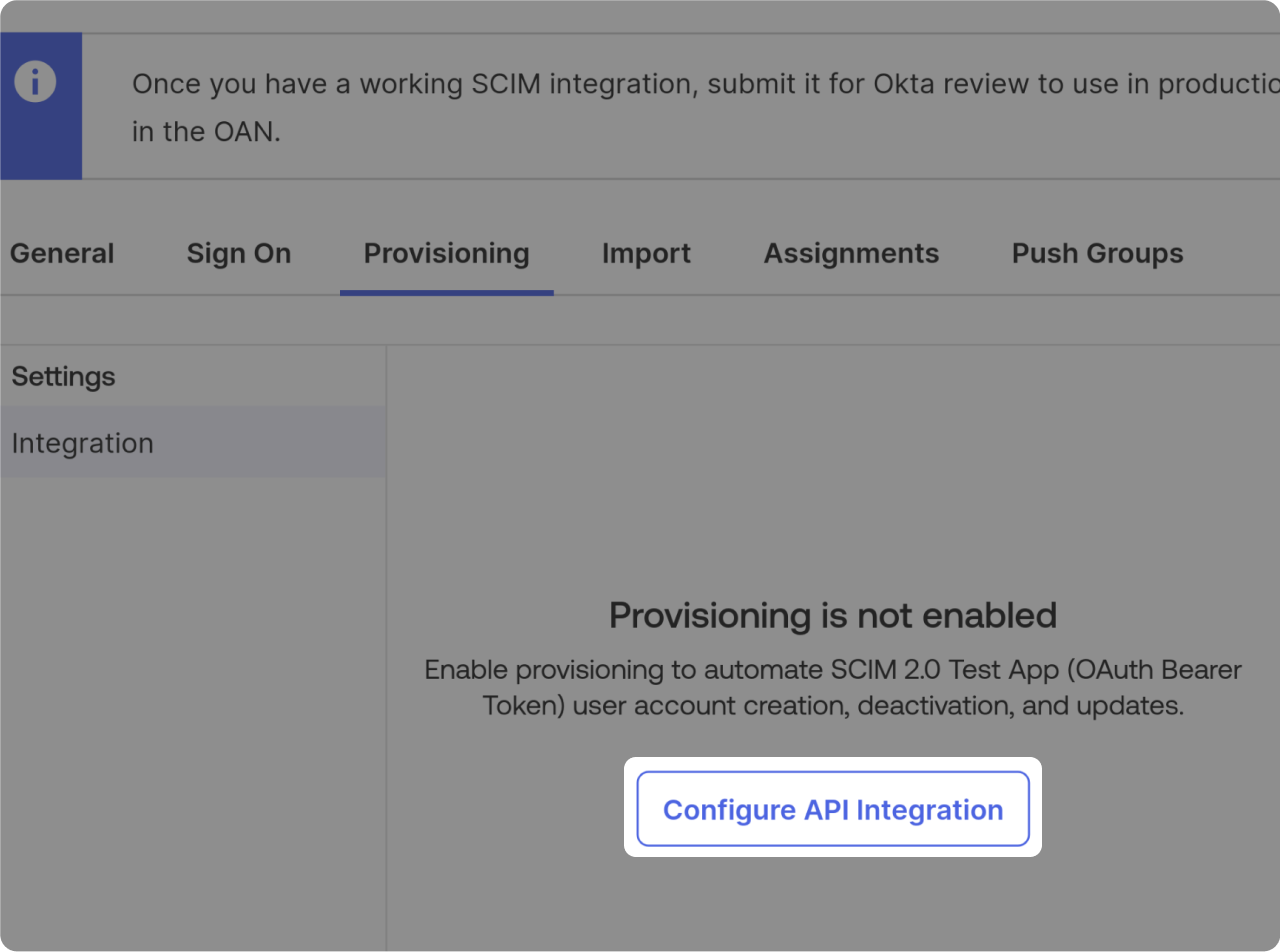
Click on the "Configure API Integration" button
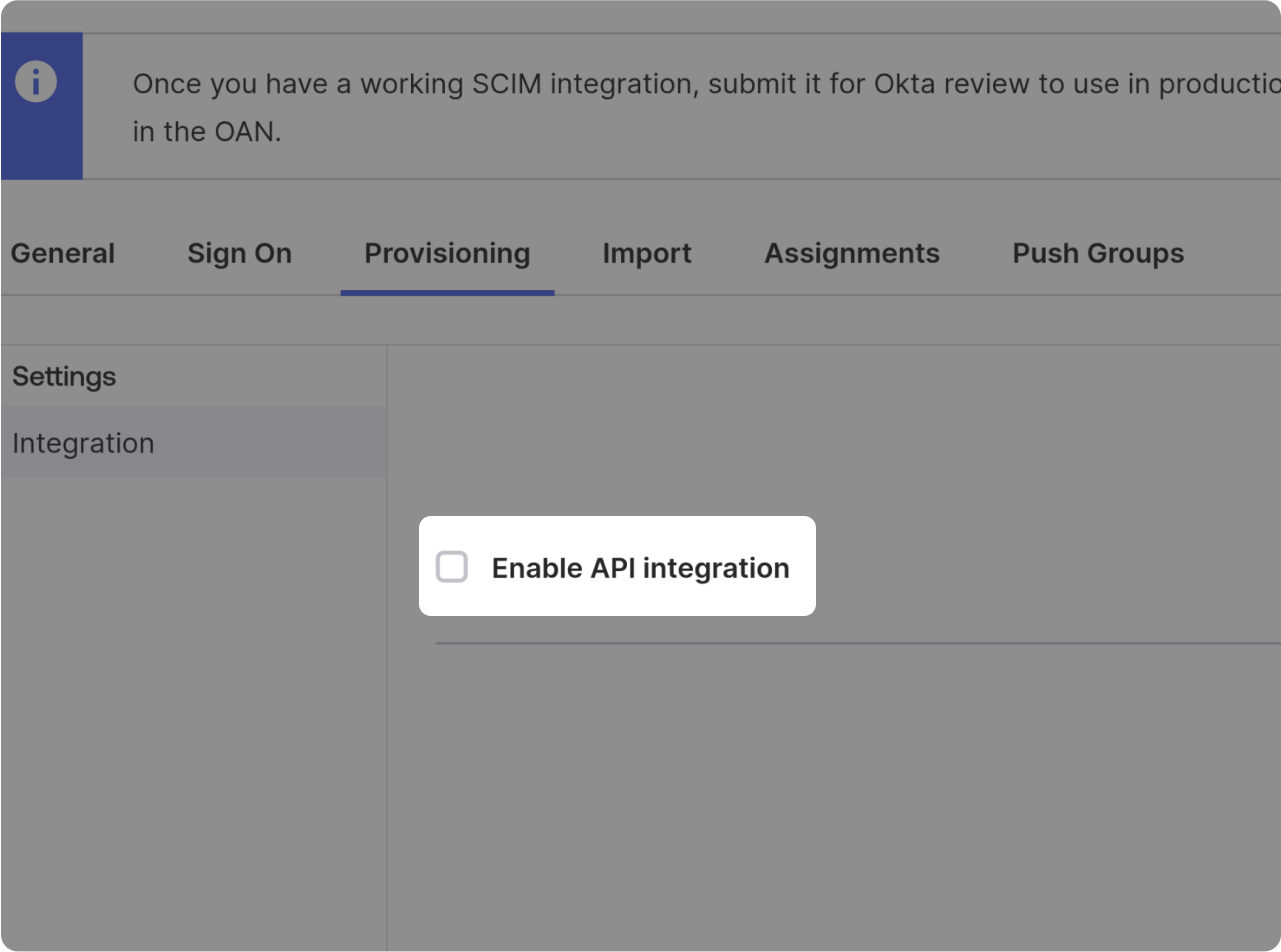
Click on "Enable API integration."
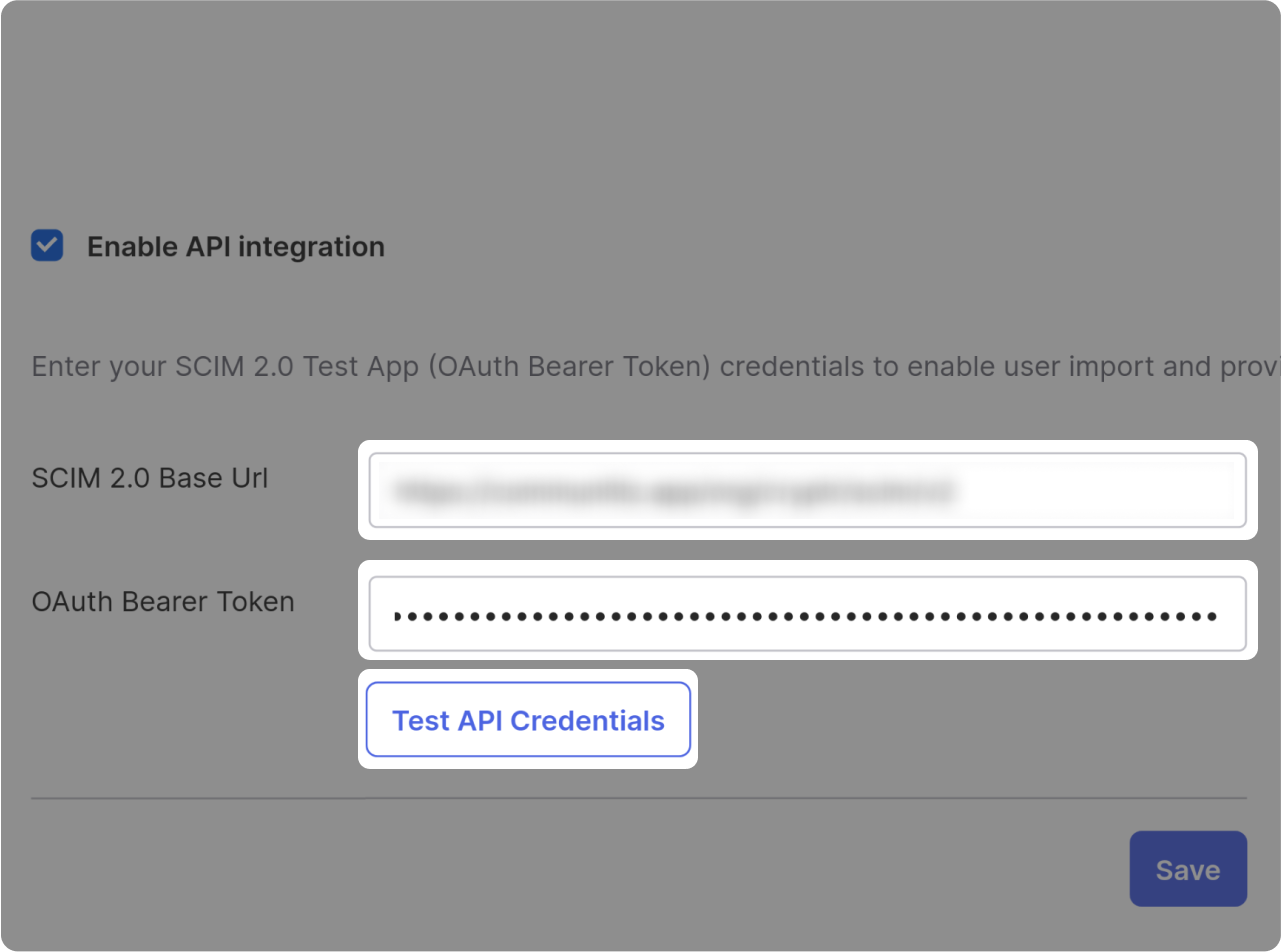
In the new section, fill in the following:
-
In the "SCIM 2.0 Base Url" field, paste the "SCIM Endpoint" value that you find on the right side of this tutorial 👉
-
In the "OAuth Bearer Token" field, paste the "OAuth Bearer Token" value that you find on the right side of this tutorial 👉
-
Click on "Test API Credentials."
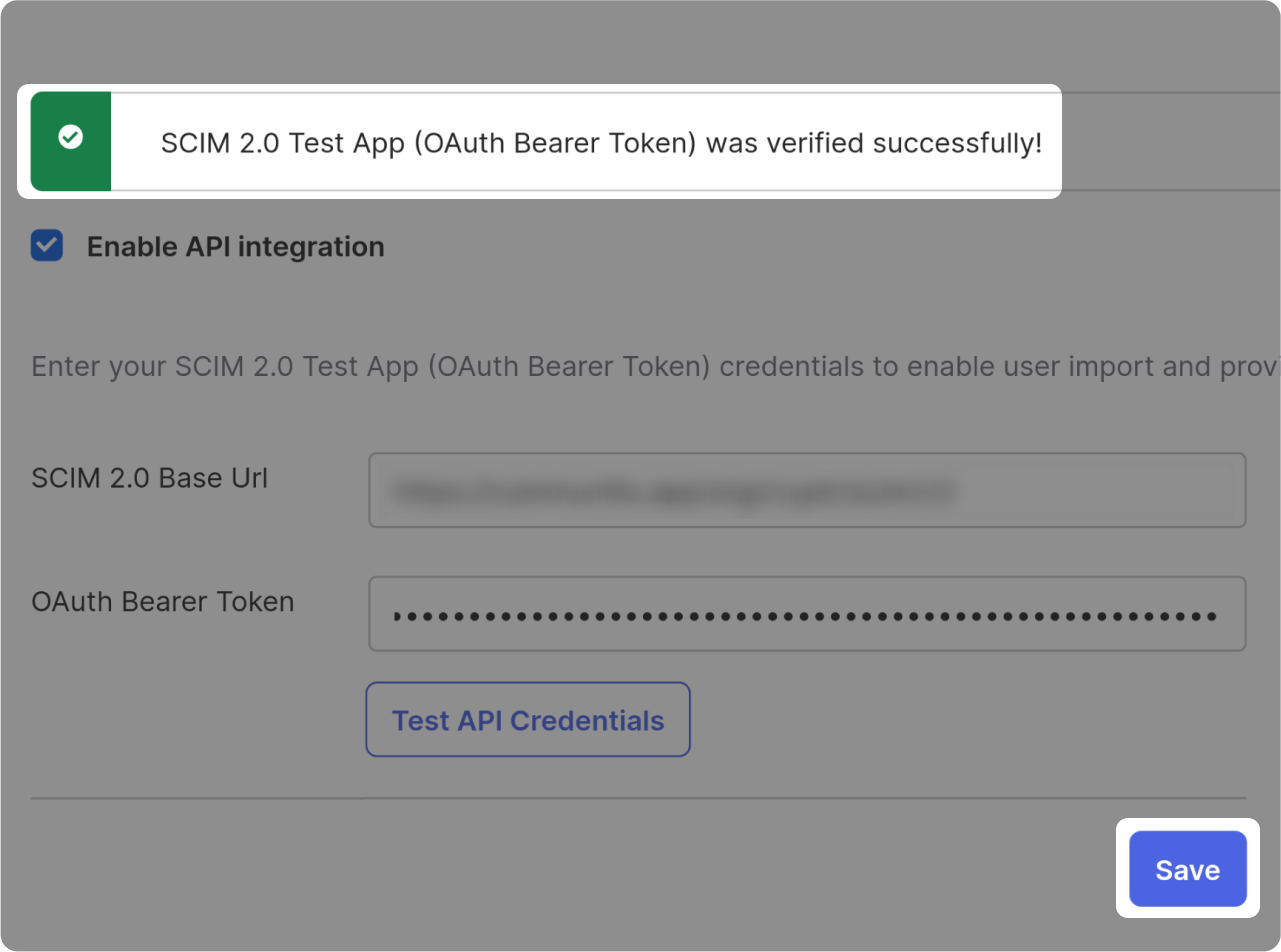
If the integration was successfully validated:
Click on "Save"
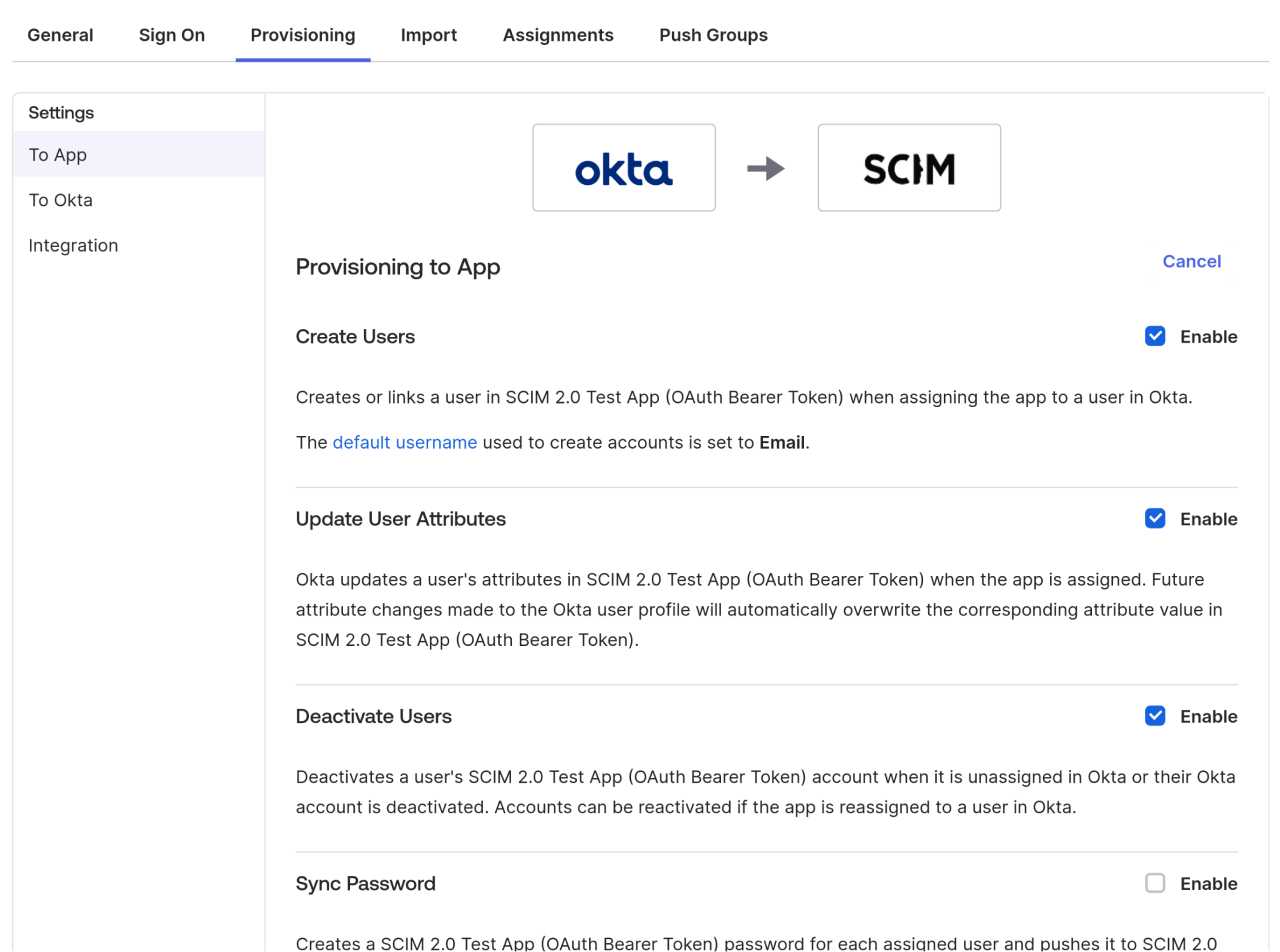
Edit your Provisioning Settings
On the Provisioning tab, in the "Provisioning to App" section:
Click on "Edit"
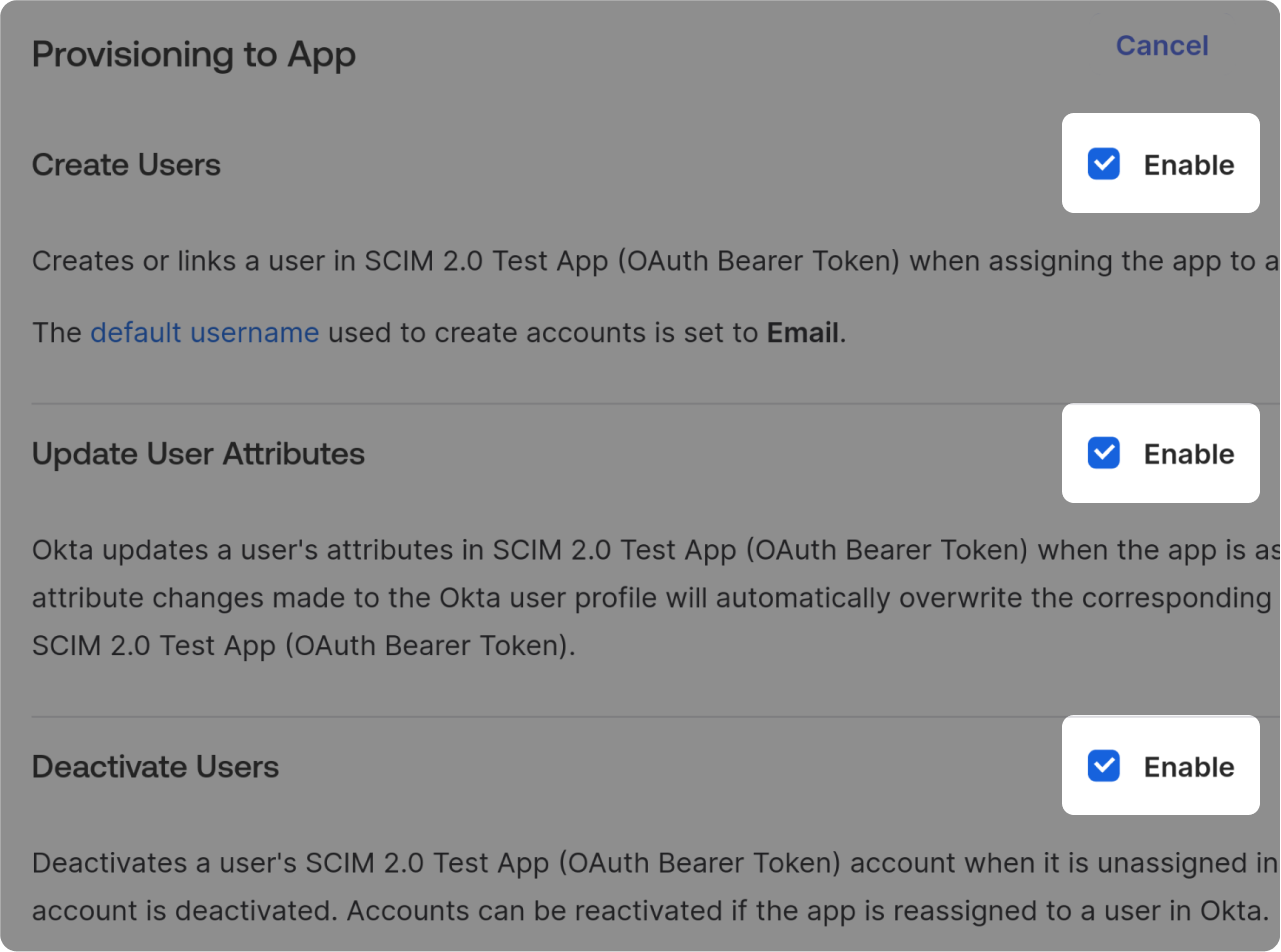
Enable (depending on your needs).
Test your app's synchronization by assigning users to this application.