Lemon LDAP (LLNG)
Discover step-by-step instructions on configuring a connection with Lemon LDAP. Learn how to integrate your application with Lemon LDAP to secure and streamlined SSO authentication.
How to start
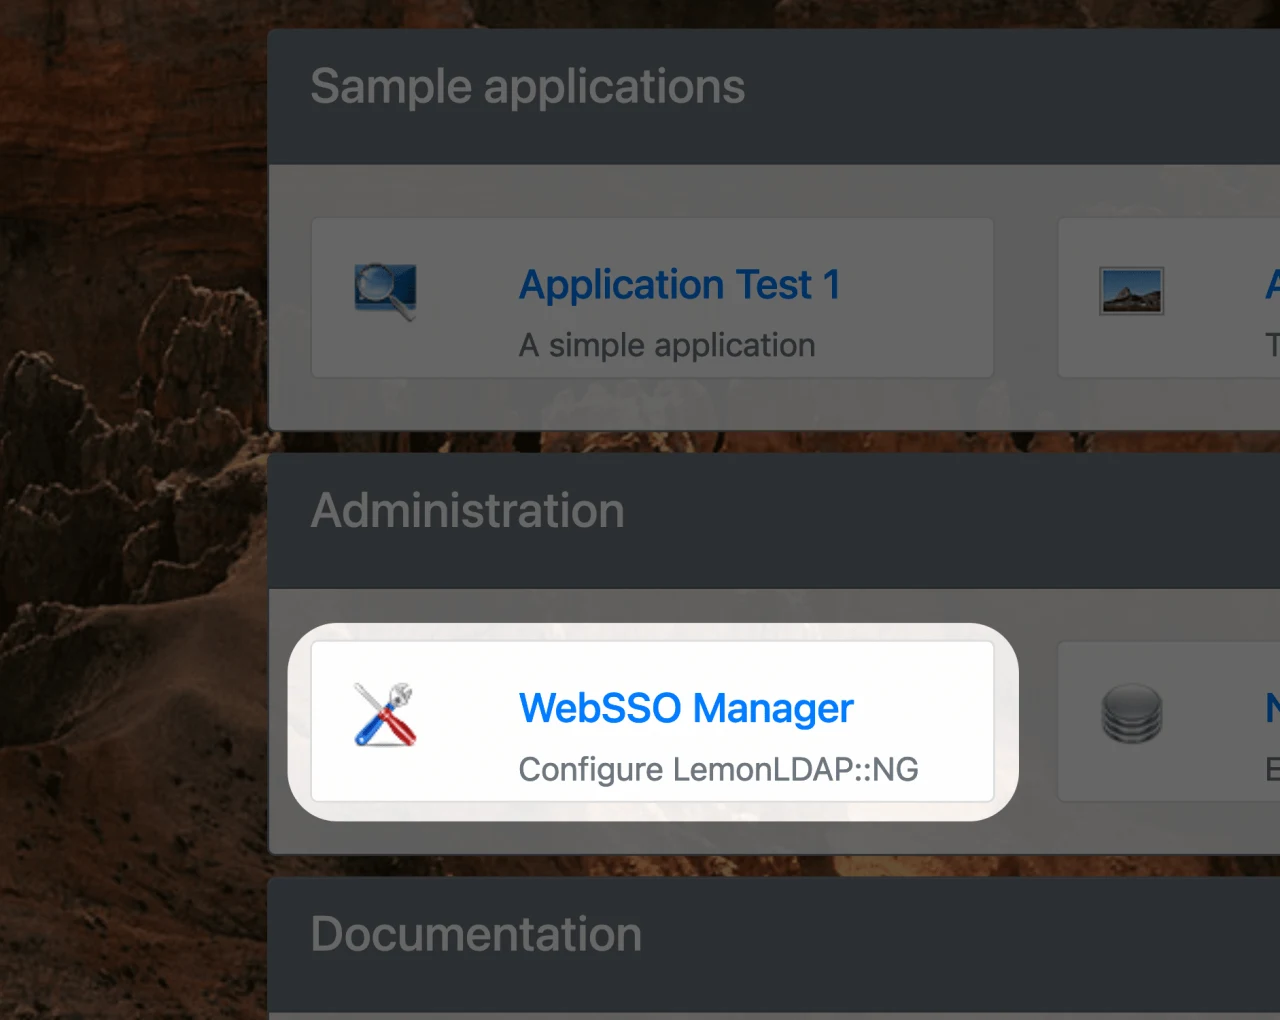
- Connect to your Lemon Admin account.
- Click on "WebSSO Manager".
Signature & Encryption
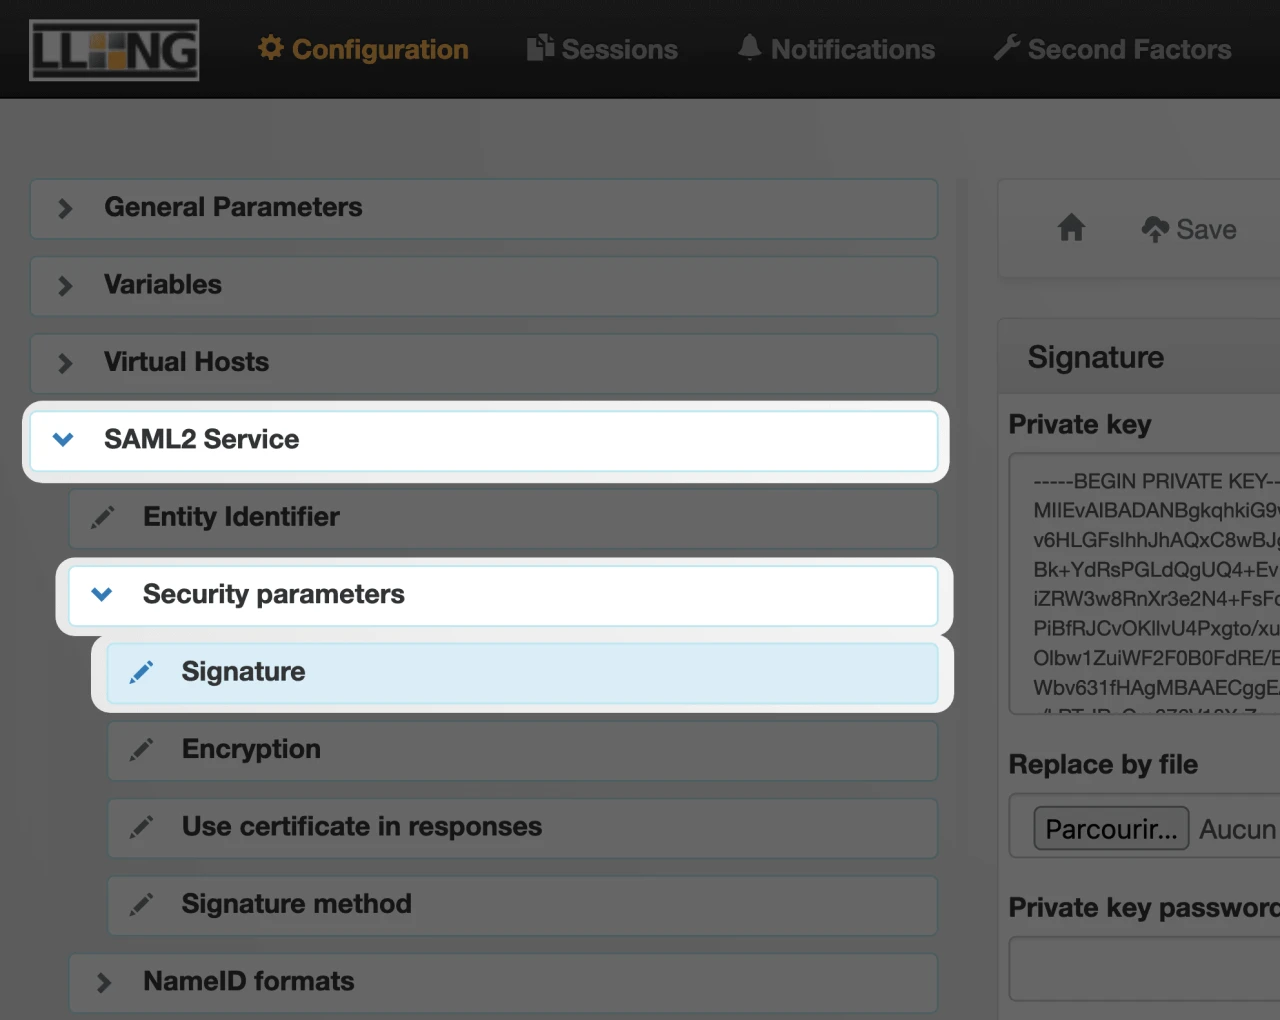
- Expand "SAML2 Service" on the left of your screen.
- Expand "Security Parameters".
- Click on "Signature".
- Make sure that you already have a Signature Key
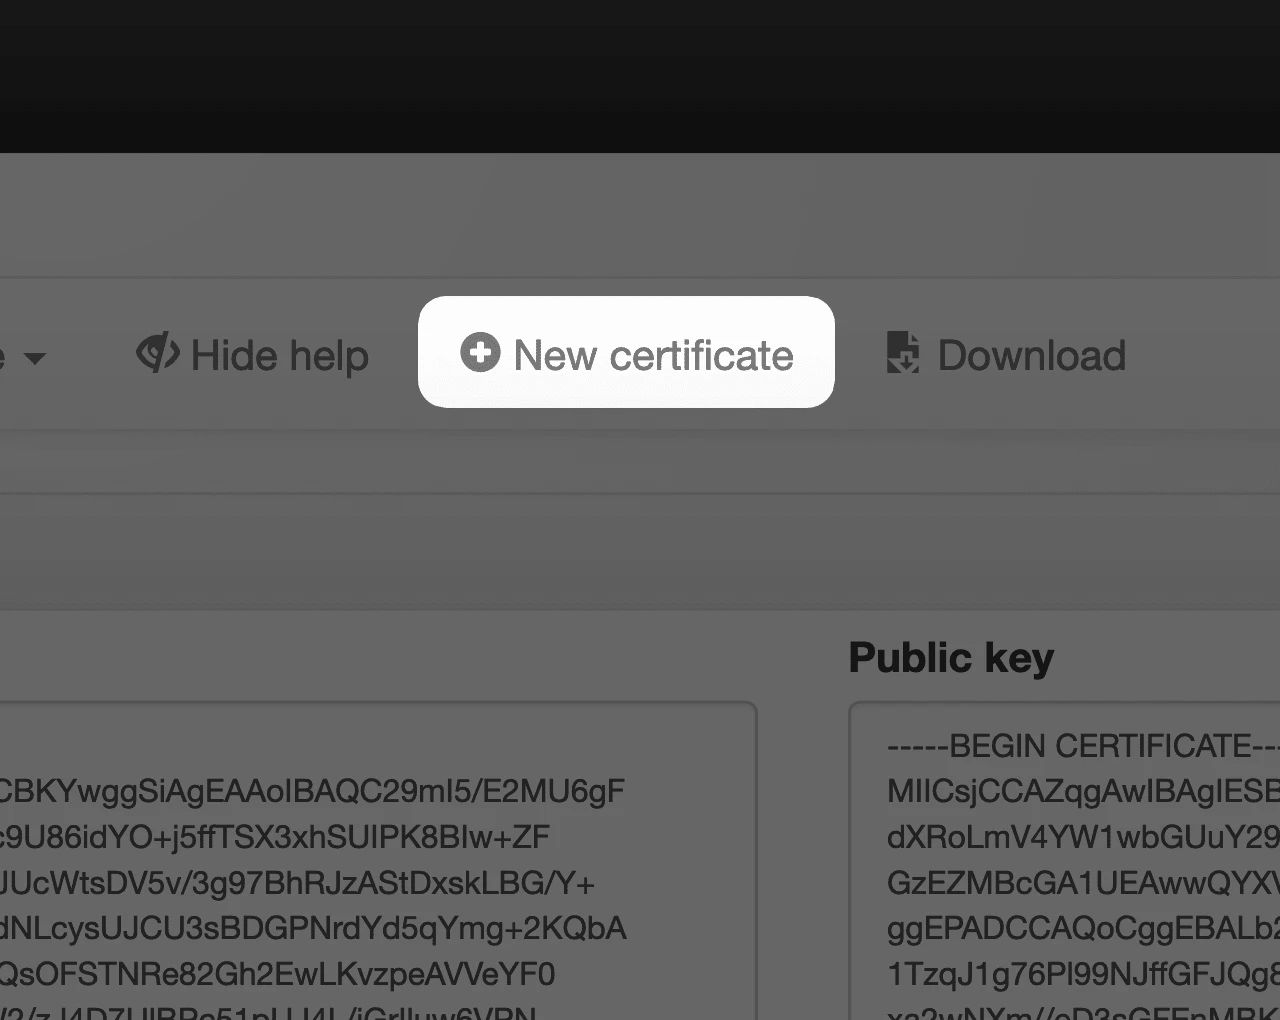
- OPTIONAL: If it is not the case click on "New certificate"
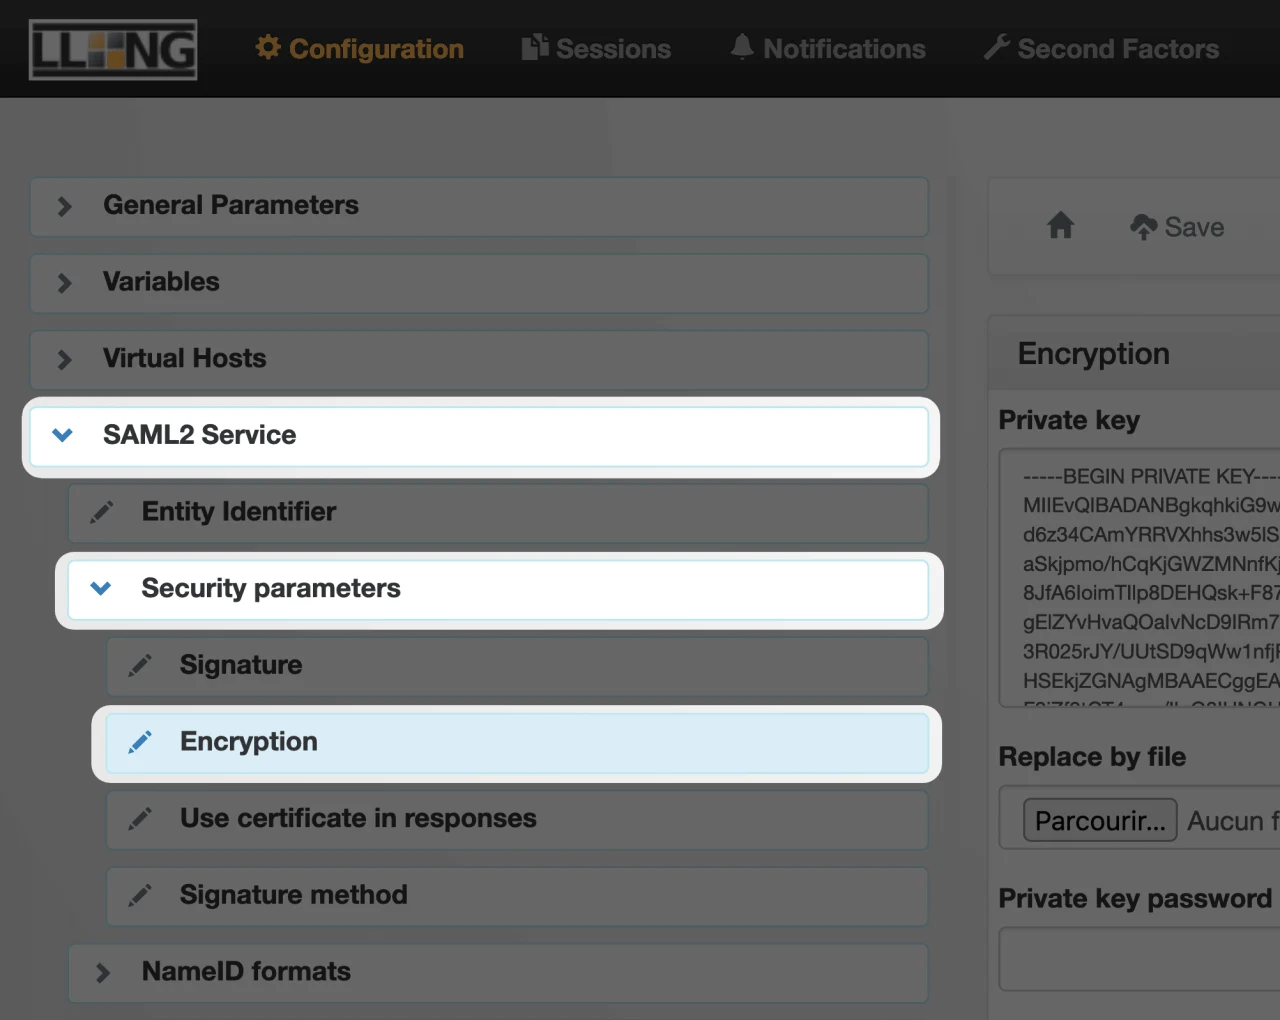
- Now click on the "Encryption" tab
- Make sure that you already have an Encryption Key
- OPTIONAL: If it is not the case click on "New certificate"
SAML Activation & XML Metadata file
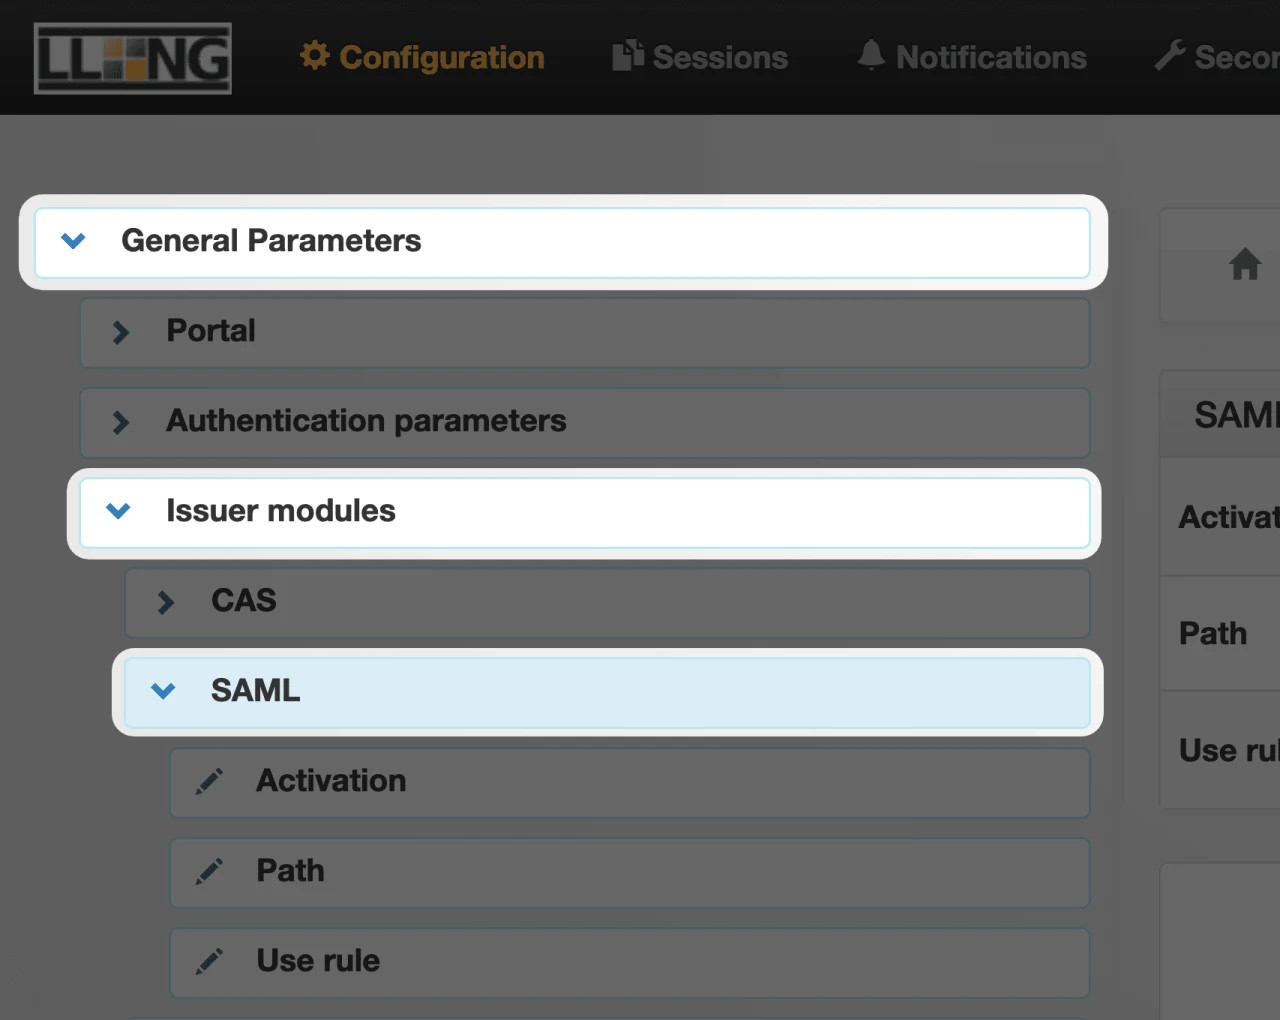
- Expand "General Parameters" on the left of your screen.
- Expand "Issuer modules" on the left of your screen.
- Click on "SAML" on the left of your screen.
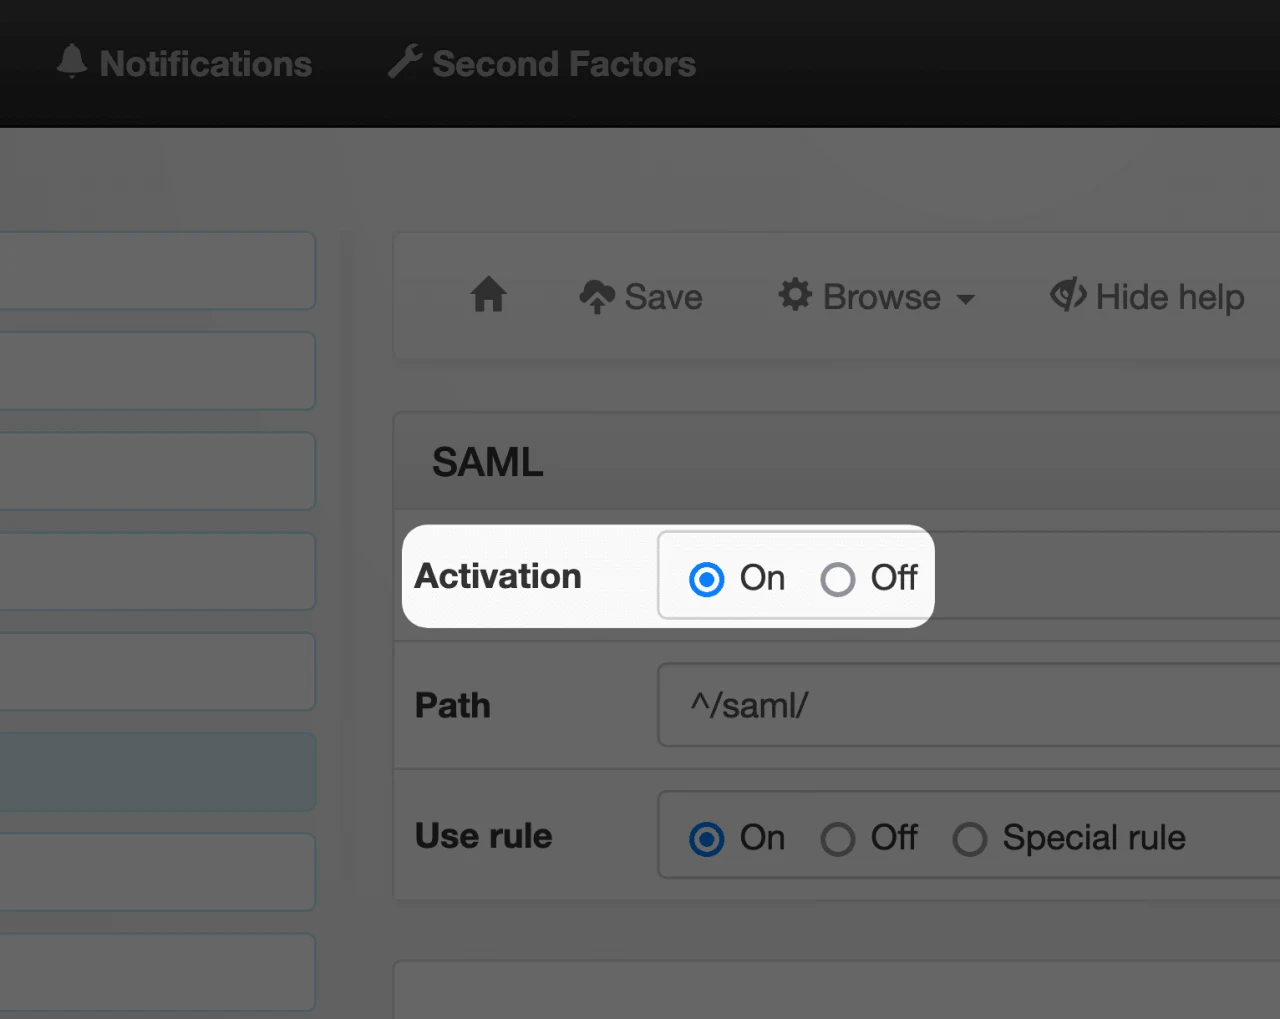
- Make sure that "Activation" is "On"
- Save
- Go back to "General Parameters" > "Issuer modules" > "SAML"
- Scroll down in the bottom-right tab until you find
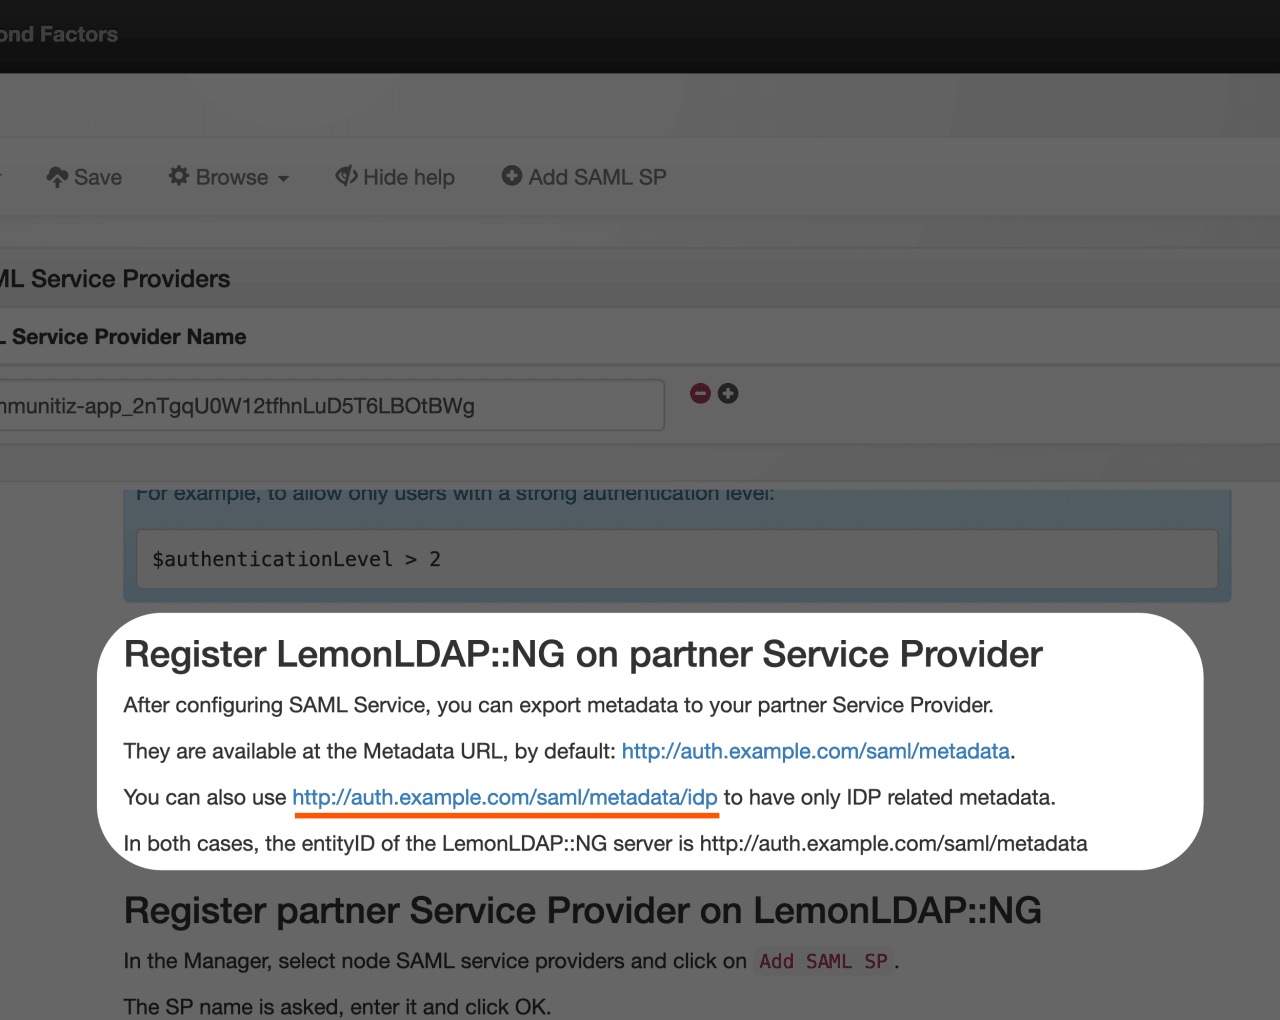
Register LemonLDAP::NG on partner Service Provider - Copy your IdP Metadata URL (i.e.
http://auth.example.com/saml/metadata/idp)
Paste your Metadata URL and click on "Submit".
SAML configuration
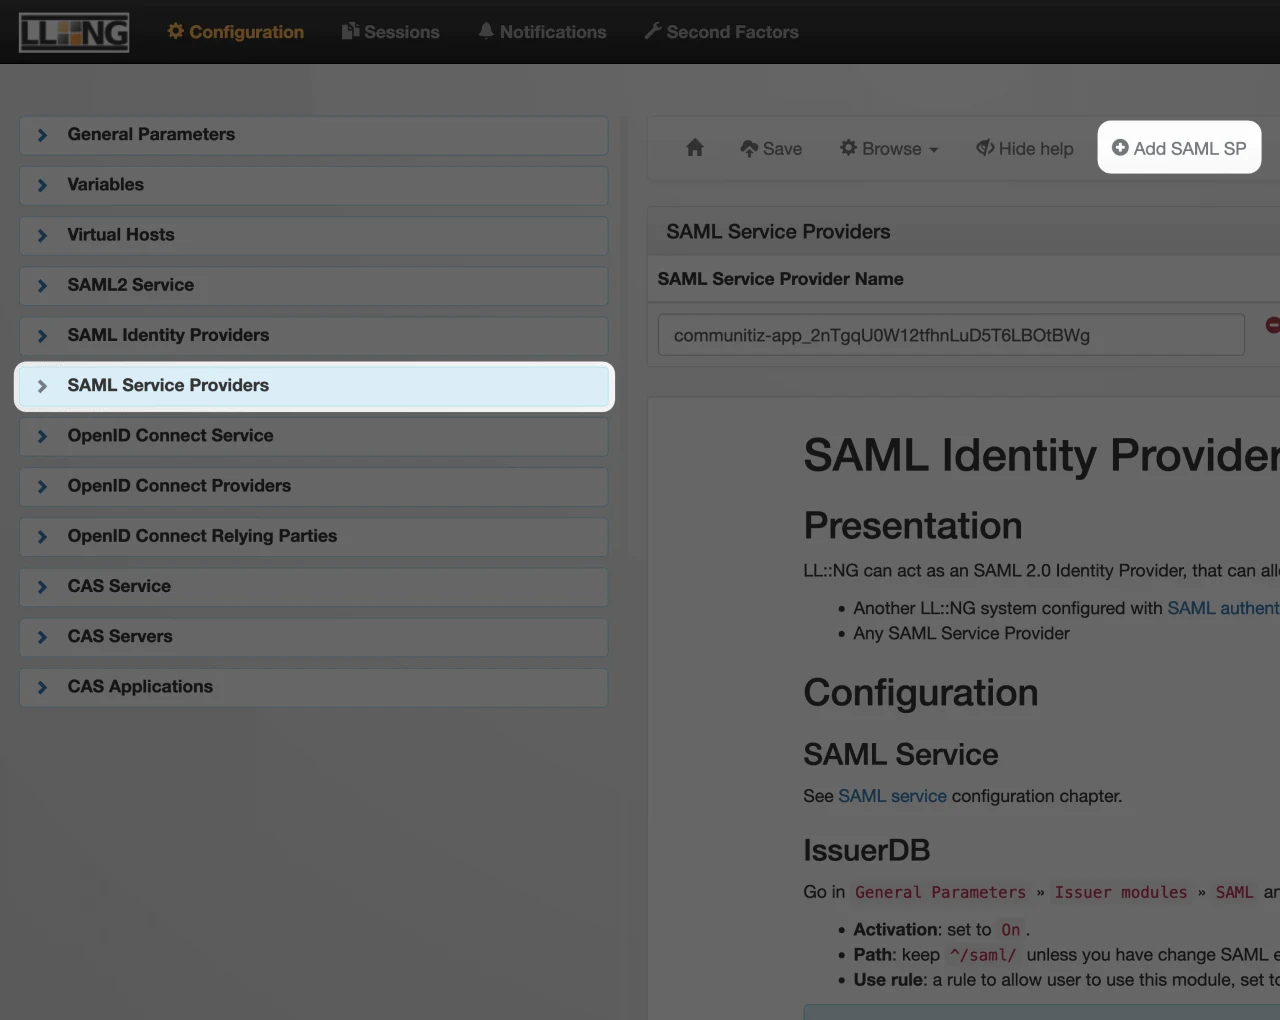
- Click on the "SAML Service Providers" tab on the left of your screen
- Click on "Add SAML SP"

- Enter a name for your SP
- Click on "Submit"
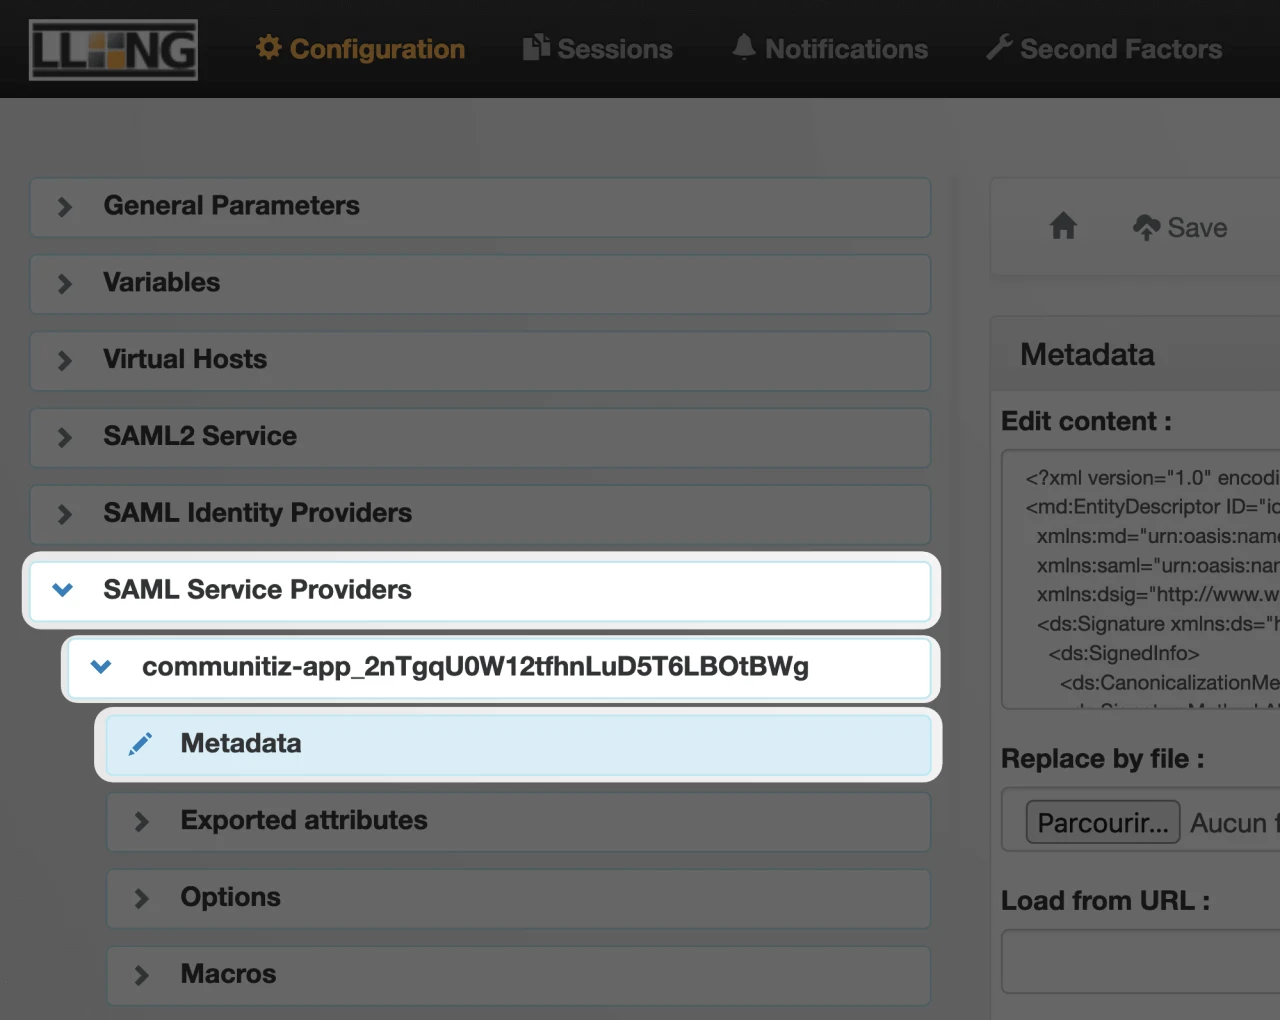
- Expand "SAML Service Providers" on the left of your screen
- Expand your newly create SP, it should have the name you typed earlier
- Click on "Metadata"
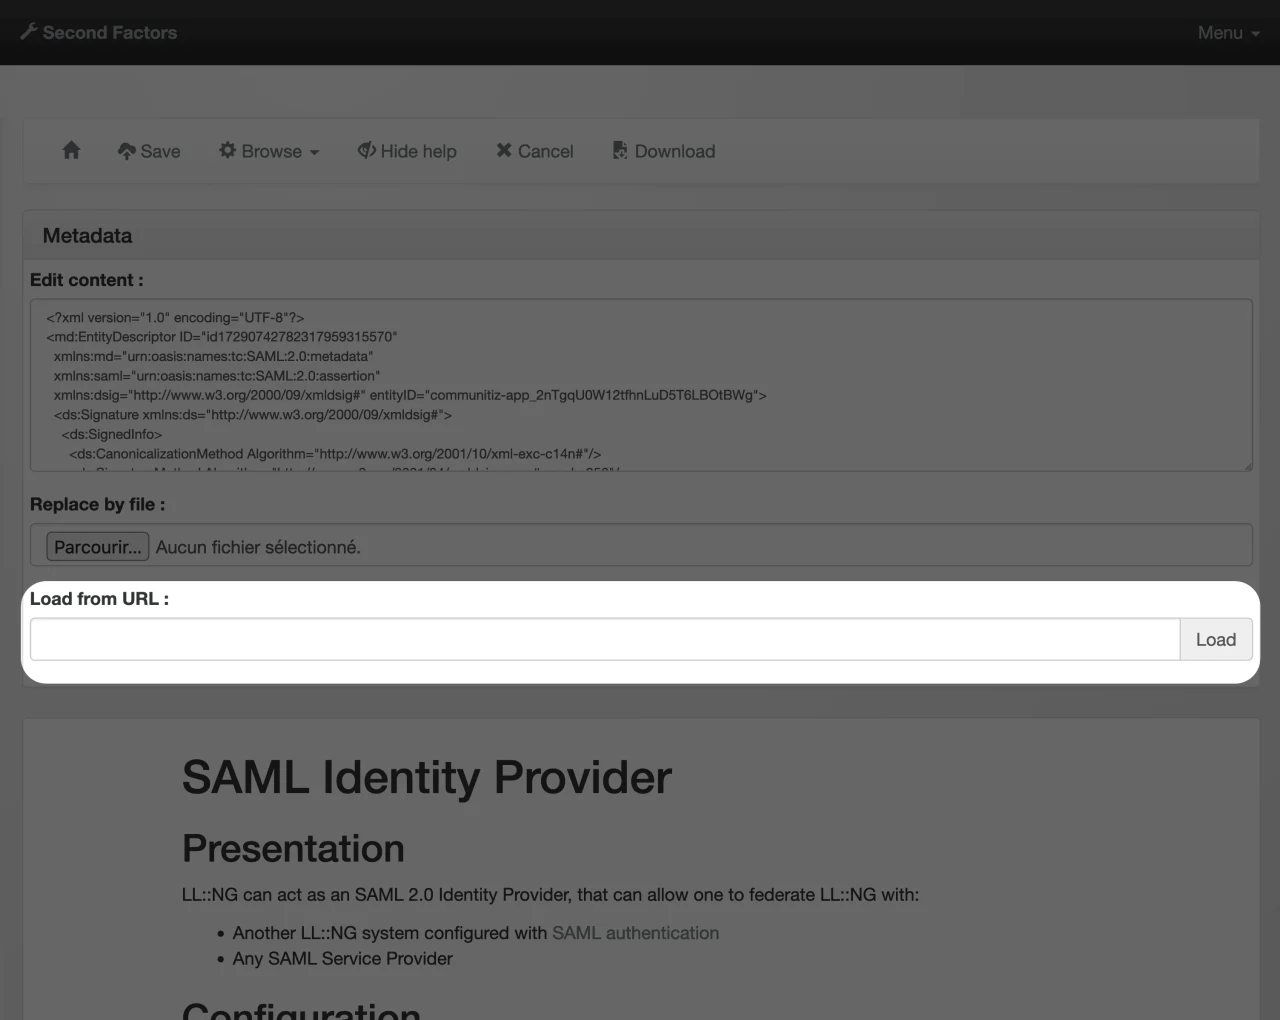
- In the "Load from URL" field, paste the SP Metadata URL value, which is situated in the right sidebar 👉
Attributes Mapping

In the "Attribute Statement" section, please fill out the fields as shown above.
Test SSO login
Test SSO login